Search engines – Google, Bing, DuckDuckGo, Yahoo, Baidu, Yandex and many more. If they do not know that your website exists – then chances are you are missing out loads of free and organic traffic, at the same time plentiful of improvement opportunities.
So? Why lagging behind then? Let’s let them know that we exist by submitting our website to the search engines.
The Basic
How the process works
You don’t need to submit each and every page to the search engine. Rather you only need to submit your website once through the right process. Then the search engine bots will automatically index every single page of your website to the search engines. Even if you create a new post, page or anything on your website, the bots will automatically detect and add them all up.
The bots actually gets all the contents, data that means links to your website contents through the XML site map. An XML site map actually is a page that lists all the contents on your website – including all the pages and posts.
It then helps the search engines bots to discover and grab the content on the website, later to show them in the search results.
Creating the xml sitemap
As you now know the importance of the XML sitemap – we will now proceed to create one for our website. And this is the very first step to submit our website to the search engines.
First, as we have built the website with WordPress CMS, so it has a built in XML Sitemap feature for our website. But the built in xml sitemap feature is not a robust one. It comes with a very basic functionality and can’t be customized in a greater extent.
So, we are going to use Yoast SEO, that is recommended not only by us but also thousands other WordPress developers and geeks.
This plugin is a comprehensive SEO toolkit, that not only includes the site map generator and customizer, but also all the necessary SEO tools and functions.
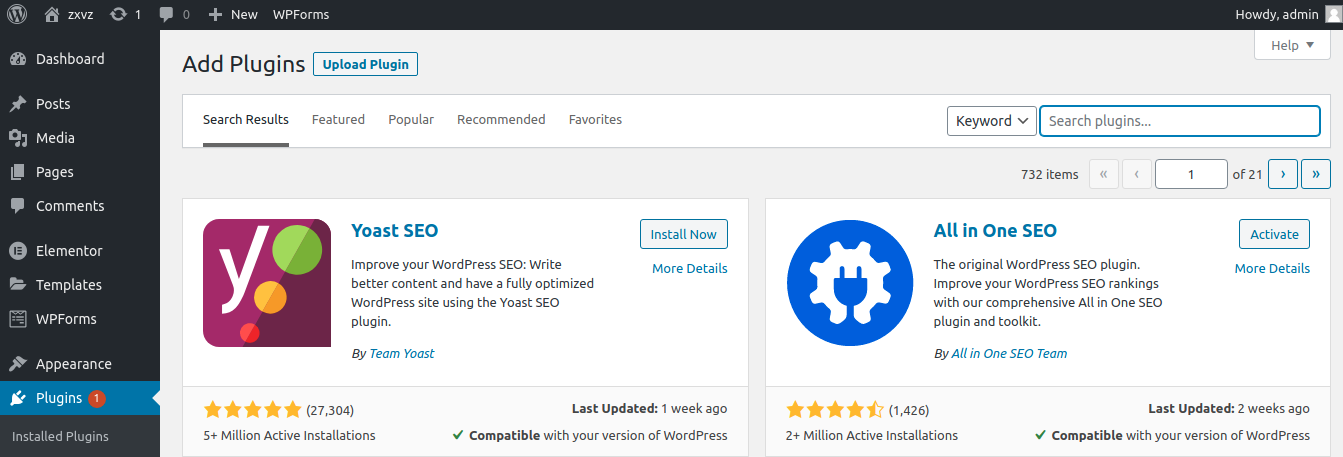
Installation – Login to your WordPress Dashboard, then navigate to Plugins > Add New. Next, simply on the right – search for Yoast SEO.
Then on the left as you can see in the screenshot, the plugin showed up. So click Install and then Active. YAY. Done.
Upon installation and activation of the plugin, go to Dashboard > SEO > General > Features. Then make sure that the XML Sitemaps toggle is turned on. (By default It remains turned on)
Now, check out the link below – this should lead you to the sitemap page of your website.
yourwebsite.com/sitemap_index.xml
The sitemap page kinda looks like this –
As we have found the sitemap page of our website, it’s now time to move on to the next step.
(N.B. – Before moving on to the next step, do copy the sitemap page’s url/address.)
Submit Your Website to Google
Add your site map to google search console
In order to submit your website to Google, you need to sign up with Google Search Console. The sign up process is absolutely free and pretty easy.
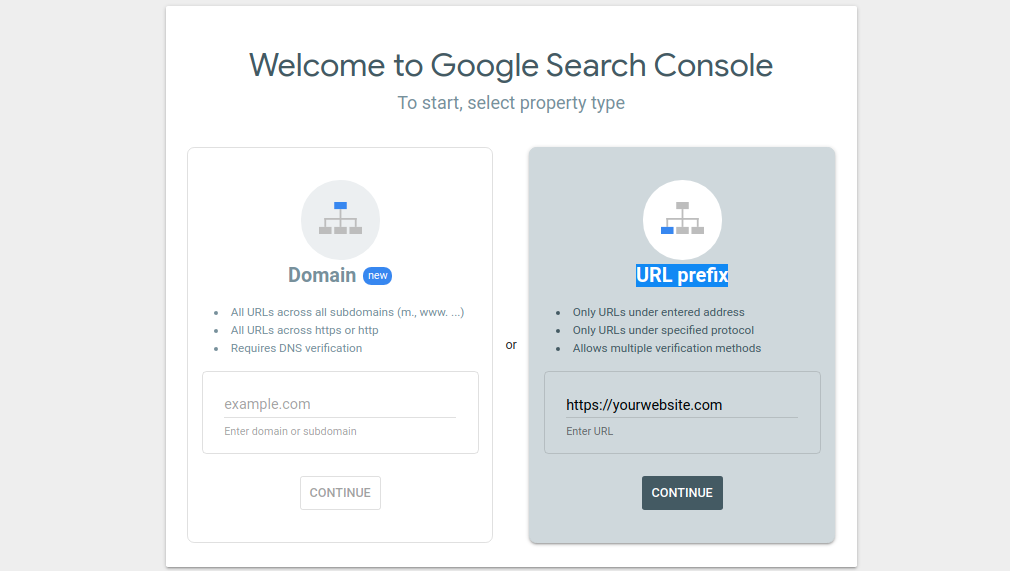
So, first go to Google Search Console, then click on Start Now. And then you’ll see this –
(If you are logged in to a google account, you won’t see the Start Now button, rather you’ll directly be on this page.)
Now, here we can see two options. The first one for inputing the domain name and the second one is for inputing the URL prefix. We will select URL prefix and on the blank type in our website’s address and then press CONTINUE.
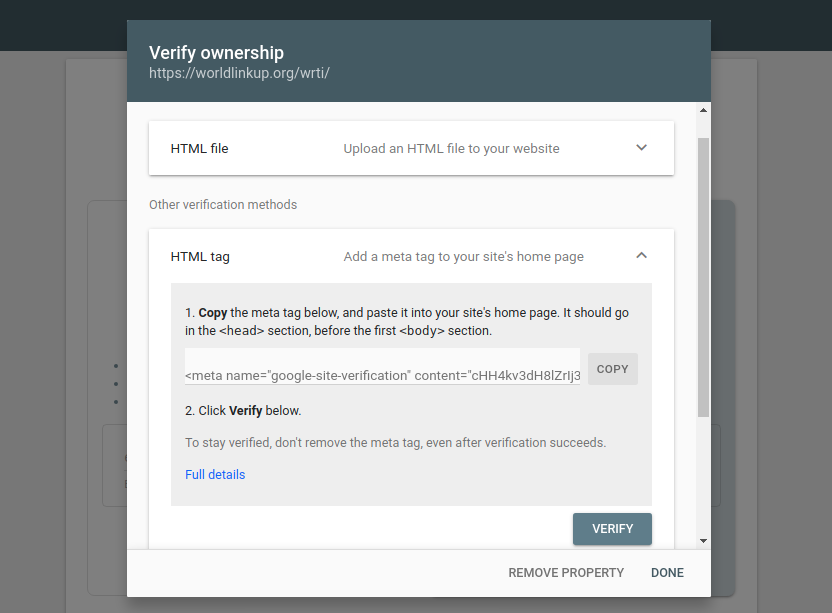
Now, another window pops up for verifying the website ownership. From here, scroll down a tiny bit and you’ll see HTML tag under other verification methods. Select it and it will automatically expand. Click on Copy to copy the html code.
Adding the google verfication code
The code which you’ve copied needs to be added to your website, so that google can verify that the website you’re going to submit belongs to you.
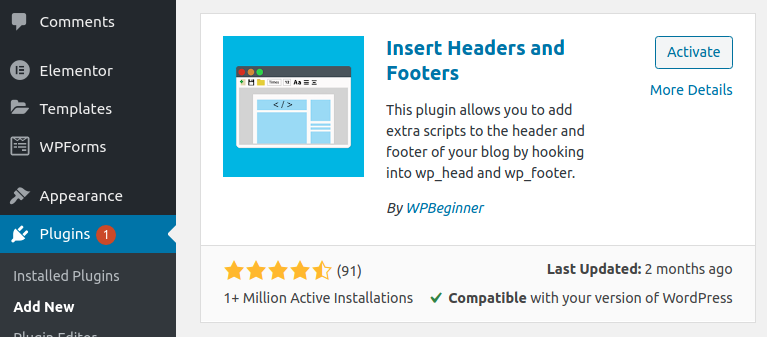
So, first install the Insert Headers and Footers plugin. To install it once again from the dashboard go to Plugins > Add New. And on the right – search for Insert Headers and Footers. Then install and activate the plugin.
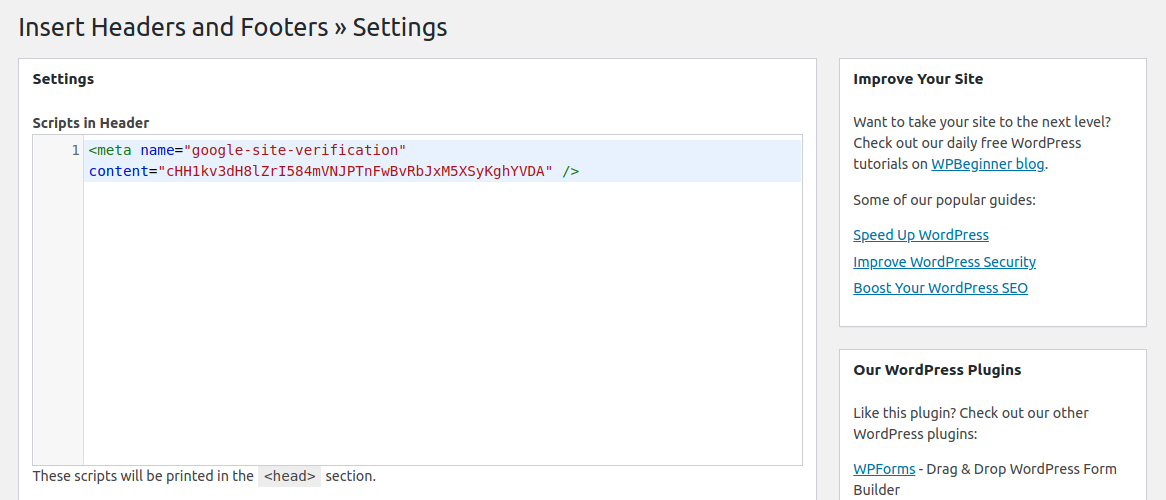
Once it is installed and activated from the dashboard navigate to Settings > Insert Headers and Footers. Then, simply paste the copied verification code from Google Search console to the Scripts in the Header section.
And don’t forget to press the Save button in the bottom of the page.
Finally, once again go back to the Google Search Console page and hit Verify under HTML tag. And you should see a message that says – you’re verified.
Adding the XML Sitemap to google
Once again open up Google Search Console. This time from the left, click on Sitemaps. Then after it comes up, under the Add a New Sitemap type in sitemap_index.xml and you don’t need put your domain name, as it is already there.
Then hit the submit button. You’ll see next a confirmation of successfull submission. Now reload the page after a while, you’ll see a green success text under status. And we are done…
Check out the results
After a successfull submission to Google, you may want to see yourself the results. If google has successfully crawled and indexed all your pages, then you’ll easily be able to see your site in the search results by typing your website address or url in the search box.
Or, there is another way. Just type site:yoursite.com in the search box. Then Google will bring all the results from the domain name you’ve entered.
Submit Your Website to Bing
bing webmaster tools
To get your website submitted in Bing, you need to first go to Bing Webmaster Tools. Here click on Get Started to sign up with Bing Webmaster Tools using either of these – Google, Facebook, Microsoft.
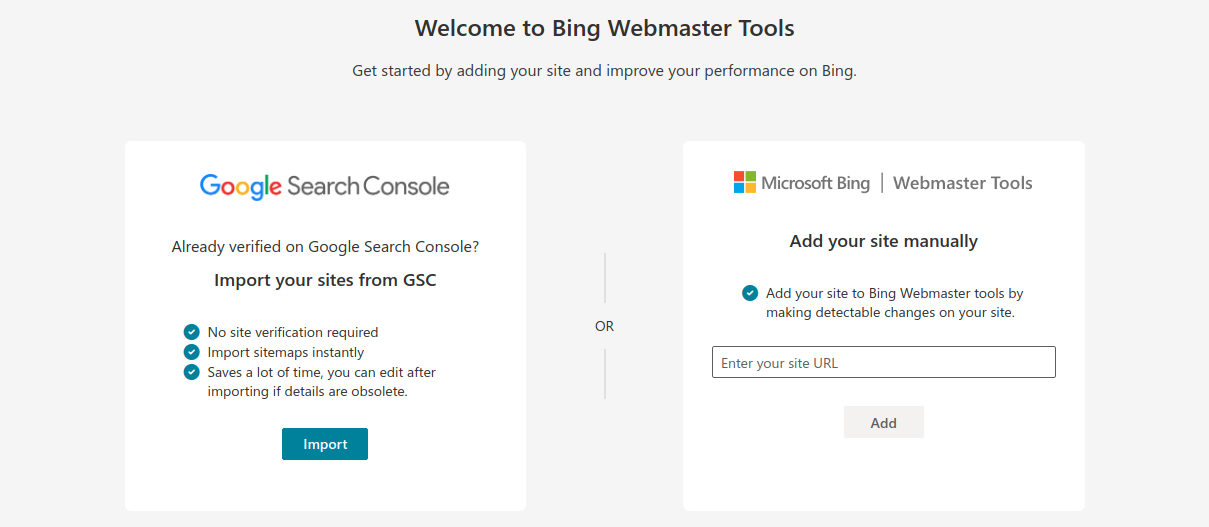
Once you’re signed up you’ll on this page –
In this page Bing promts you to add your website. Now, as we have already added our site through Google Search Console, so we can easily now import all our site’s sitemap data from there to here in the Bing Webmaster Tools.
Using this Importing feature, you can easily and of course pretty quickly submit your website to Bing.
However, you can still use the other option of adding site manually. And this process is completely similar to the Google Search Console’s one. So you need to take a verification code from the Bing, then add it to your site through site’s Insert Header and Footer plugin. Later, you need to add the sitemap.
But now, for our convenience, we will use the Import Feature.
importing GSC data to bing
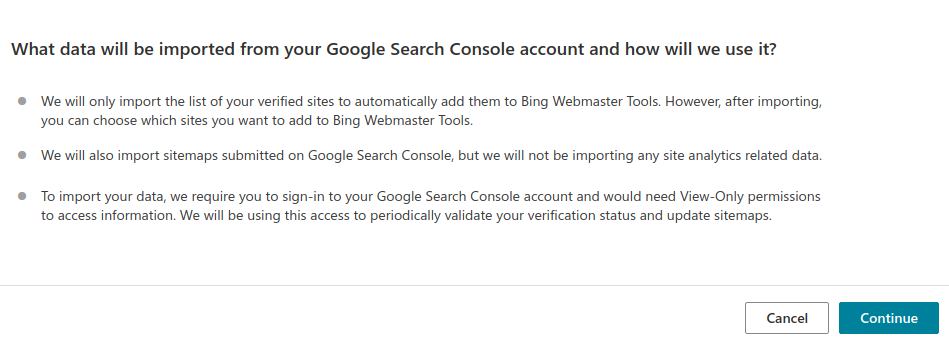
First, click on Import button under Import your sites from GSC. Then a window will appear, press Continue there.
Then sign in to the google account that was used to add sitemap to the Google Search Console. And while signing in, make sure to allow Bing to collect search console data from Google.
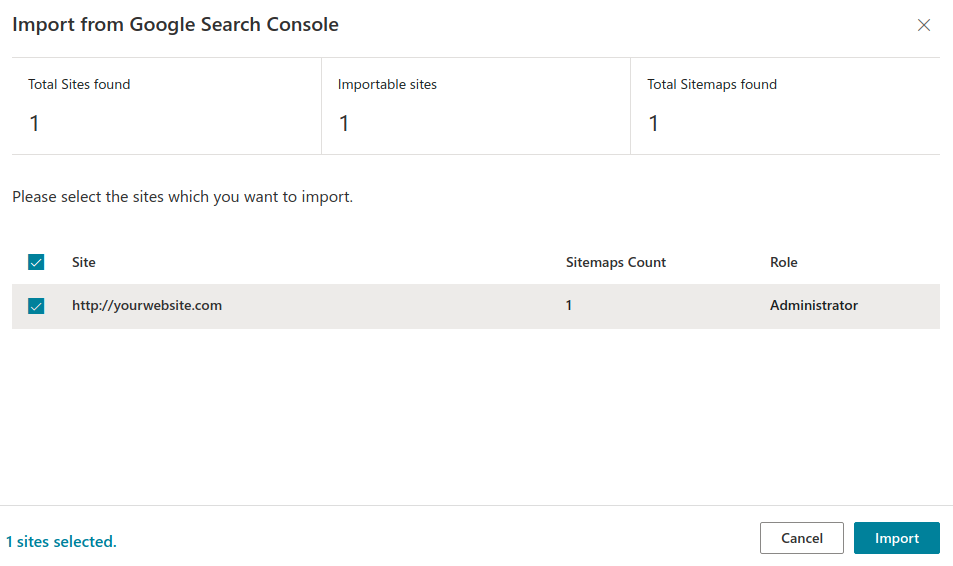
Then this windows will appear –
Here, you will see your site’s name. Then select your site (already selected) and hit Import.
Then, you’ll see a completion message with a congratulations.
Submit to the Other Search Engines
Yahoo search
The easiest submission processes of all is this one. Yahoo search engine doesn’t require you to submit website manually to their website. Rather, they rely on Bing.
If you submit your website to Bing, then Yahoo automatically brings that data from them and you appear on the Yahoo search engine.
Duckduckgo
DuckDuckGo, a privacy focused search engine, that doesn’t require any website submission either, just like Yahoo. They automatically indexes all your pages with the help of more than 350 sources. And it includes Bing and Yahoo as well.
So, if you have followed the previous steps of submitting website to Bing, then you’re good to go for DuckDuckGo.
The End
End for now
Search engine is something that you never should neglect, rather you need to embrace it. The more harder you embrace, the more you get to know about it. And the more knowledge you have, the more control, traffic and maybe more potential customers you have in your hand.
Submission of your website to the search engines was the very first step towards embracing the search engine in the right way. So, for now it’s more than enough. But keep the craving for more knowledge up.
