

When you have a website built in WordPress platform and thinking about doing SEO optimizations, then it’s a serious matter to consider SEO wisely because SEO is so essential for a Website for ranking over the search engines.
However, specifically, here we’ll be going to discuss the guide – how to do OnPage SEO of WordPress website efficiently and effectively?
However, there are plenty of options available to do WordPress OnPage SEO, but here I’m going to show you the most ethical way step by step. So, hurry up, it’s going to be a long run!
However, first let me tell you about a little about OnPage SEO, and it’s importance.
What is OnPage SEO and Why It’s Important?
SEO got divided into two parts – OnPage and OffPage, but OnPage SEO Optimization is the most critical part of SEO. It refers to all measures that can be taken directly from the website to improve its position in the search rankings.
As examples of this include measures to optimize the content or improve the meta description and title tags, image alter tags, URLs.
So, it’s so important to take action to do perfect OnPage SEO optimization on your WordPress website. So, now we can move on.
So, How to do WordPress OnPage SEO?
Here, I’m going to show you the steps to completely set up WordPress OnPage SEO using ‘Yoast SEO.’ It’s the complete SEO solution for WordPress websites when it comes to OnPage optimization.
So, here we go –

Yoast SEO Plugin Installation & Activation

In the process, at first, install Yoast SEO plugin by going to the ‘Add New’ section under ‘Plugin,’ You can search for the plugin from the search bar like the image above.
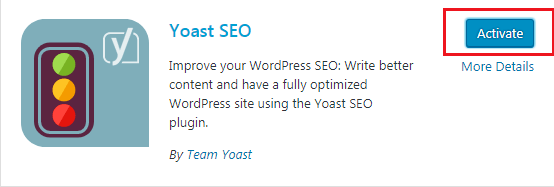
Then, you need to activate it. So, click the ‘Activate’ button.
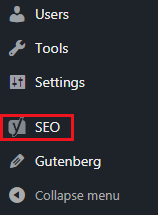 Moreover, once it’s activated, then you can see a new button written in ‘SEO‘ (left side of your WP dashboard). That means our Yoast SEO plugin is installed and activated.
Now, we can go for the technical work to set up Yoast SEO properly for OnPage SEO optimization.
General -Yoast SEO
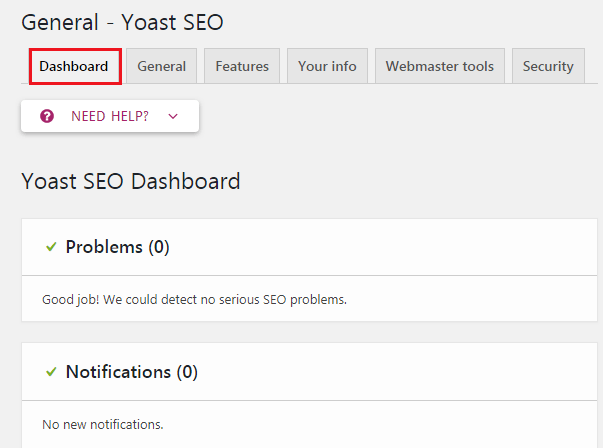
Now, hover over SEO button and click on ‘Dashboard.’ A new window you’ll find like above. Then, switch on the ‘General’ tab, and you will notice a button to open configuration wizard.
You can ignore it because we will be taking you step by step through each option.
Features
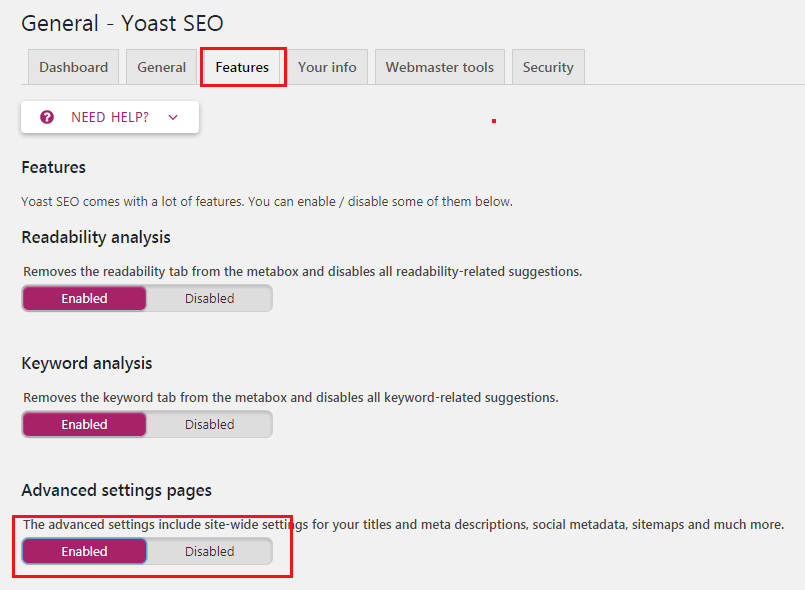
Now, switch the ‘Features’ tab and enable the ‘advanced setting pages.’ Don’t forget to click on the save changes button to store your settings.
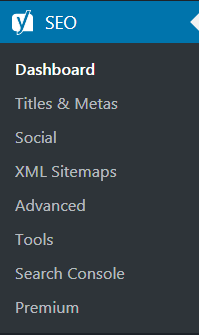
Then, you will notice new items appear under the SEO option in your WordPress menu like the image above.
Where you can see other setting options – Titles and Meta, XML Sitemaps, Social, Advanced, Tools, and Search Console, I’ll be showing you their set up later in this article.
Your Info
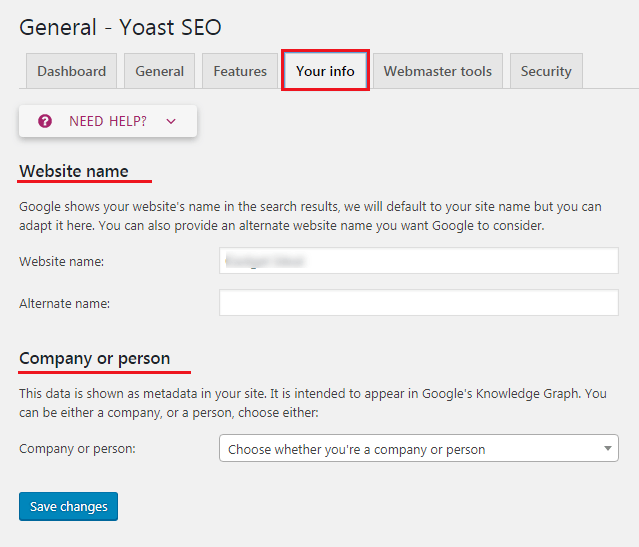
Now, open the ‘Your Info’ tab where you will provide information about your the site like site name and the person or company behind it. First, you need to provide a site name and an alternate name for search engines to consider.
Also, your site’s name could be your site’s title.
However, if you do not enter anything in the fields, then Yoast SEO automatically use your site’s title as your website name.
Then, the next option is to choose whether a company or a person run this website. If it’s a company, you get asked to provide a company name, and you can also upload a company logo.
So if you choose a person, then you can add the name of the person behind the website.
Webmaster Tools
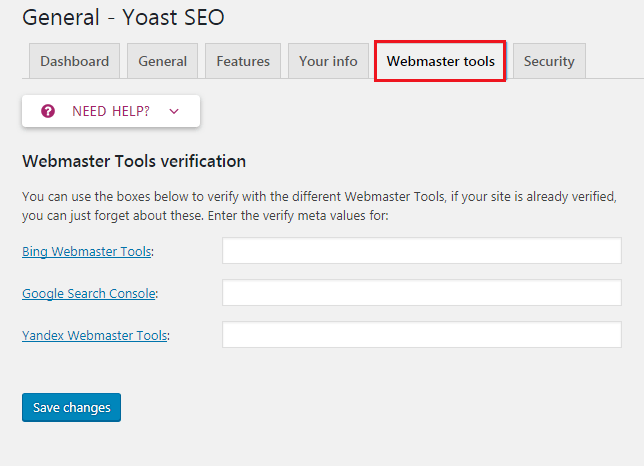
Next, open the ‘Webmaster Tools‘ tab. Moreover, if you’ve any knowledge about SEO, then you’ve probably heard that each of the popular search engines like Google, Yahoo, Bing, Yandex, and Alexa allow site owners to add their sites using webmaster tools.
Using Webmaster tools, you’ll be able to see insights and other relevant data about your site from specific search engines. However, for that, you need to verify your site to see those exclusive data.
You’ve to add a meta tag to your site or upload a file to your site.
Most of the beginners are afraid to add meta tags, that’s why Yoast put this option in to ease the process. So, add the meta code that you received from the search engines in the respective fields.
Security
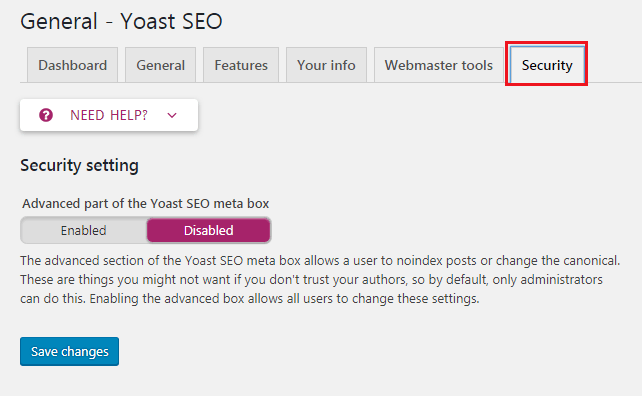
Now, ‘Security,’ the last tab under General Settings of Yoast SEO. It is the only option which disables in the advanced part of the WordPress SEO meta box. Just leave it as disabled.
Disabling advanced metabox will prevent your authors from making advanced changes like noindex and canonical settings (which is good).
Titles & Metas
Now, we’ll be going to the section ‘Titles & Metas’ which has several tabs, but we’ll cover them one by one.
General
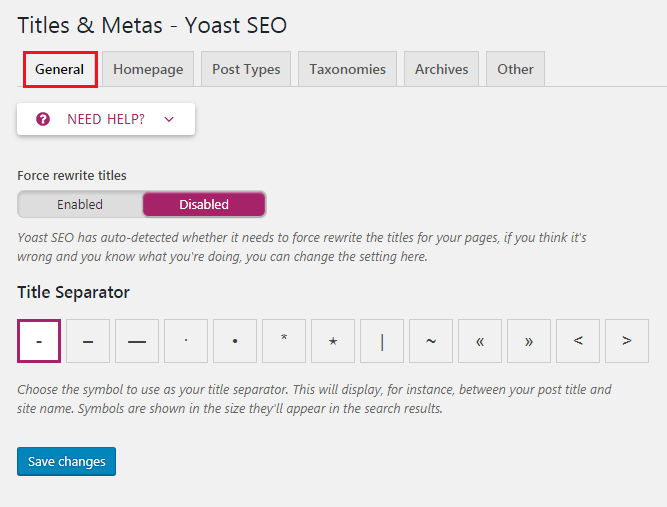
It is where you can choose the symbol you want to use a separator between titles. ‘Dash’ is the default option (recommended); you can use it if you are unsure of which symbol to choose.
As well as, here you can also disable readability and keyword analysis tab which appear under the Yoast SEO metabox when you are writing a post. Just leave them enabled (Recommended).
HomePage
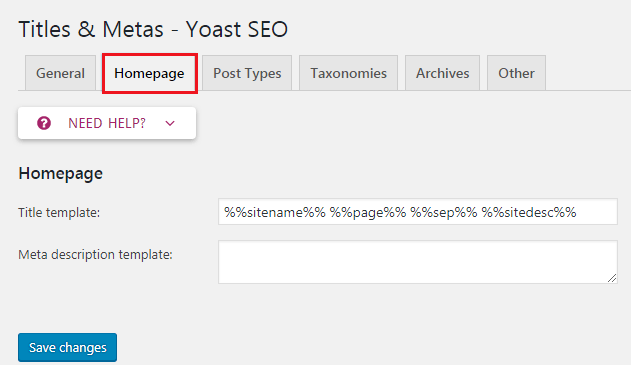
Then, it’s the ‘Homepage’ tab, by default, you see these fields pre-filled with title-template. Title templates are a way to pull the title and other meta information as organized.
My recommendation is to write your title, because you may want a specific title for the Homepage. Now, enter your site description and click the ‘Save’ button.
Post Types
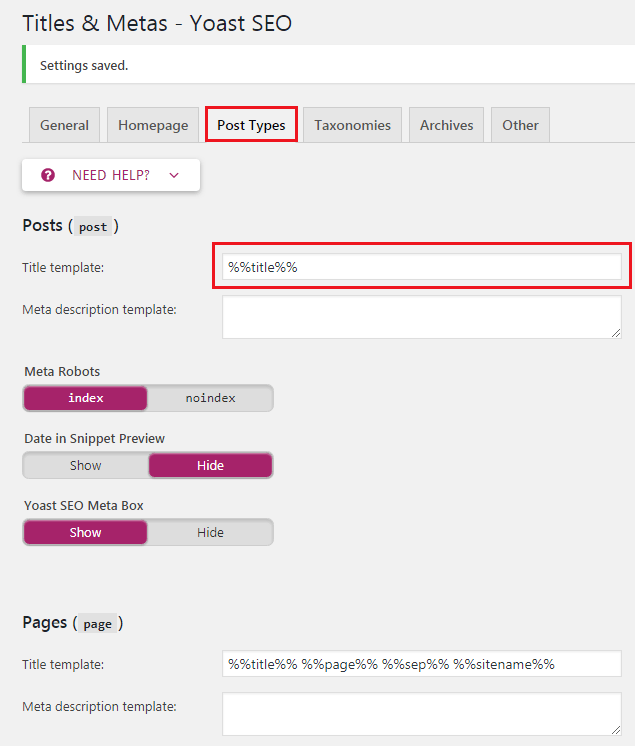
Now, it’s ‘Post Types’ area. You should know, WordPress comes with several post types such as post, page, attachment, revisions, and navigation menus. So, users can also define their custom post types.
Here, you can set titles and meta for posts, pages, media, and other custom post types. Also, this site-wide title and meta description used if you forgot to add title and meta description for an individual post.
My recommendation using only the post title as the title template and leaving the description fields blank for all post types here.
Taxonomies
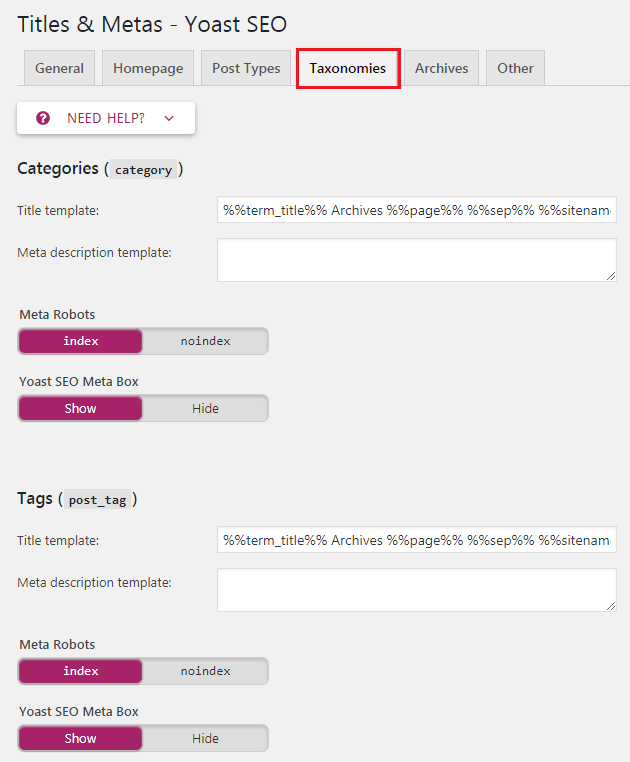
The next tab is ‘Taxonomies,’ from here, and you can configure titles and meta for categories, tags, custom taxonomies, and post format archives.
The Default template should work for most sites and descriptions because Yoast SEO picks up descriptions from your categories and tags.
However, if you do not have any description for terms in your categories, tags, or custom taxonomies, Yoast WordPress SEO does not add meta description in archives for these terms.
Archives
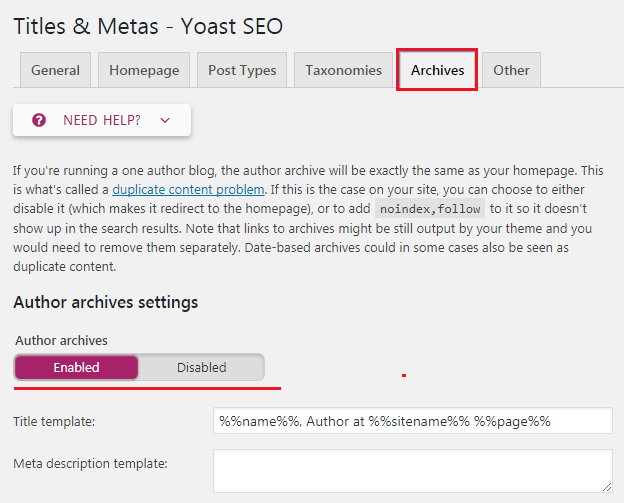
Now, from the ‘Archive’ tab you have to set the title and meta settings for author and date archive pages or any particular page such as search and 404 (not found – important for SEO) pages.
My recommendation is to check to disable author archives for single-author blogs. Because, if you’re running a single author blog, then the main blog and the author archives contain the same content.
So, this setting is there to prevent duplicate content. Now, leave other settings as they are and let’s forward to the ‘Other’ tab of Titles & Metas section.
Other
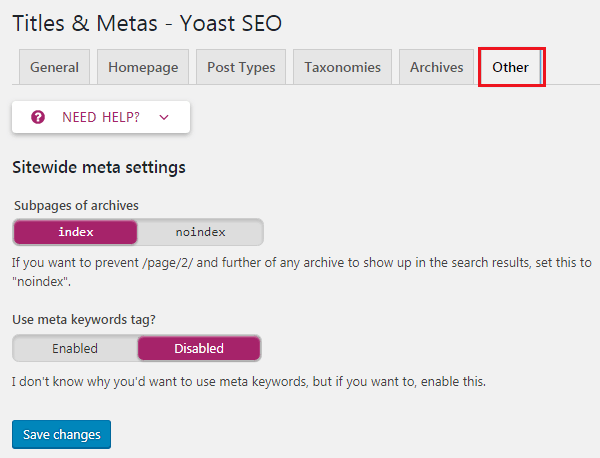
This tab is just for some additional settings like you can disable picking up descriptions from Dmoz or Yahoo directories for your pages. We leave all of them here because for now, and it’s not essential.
Social
Social integration is one of the best features of Yoast SEO, and here it is. From here, you can integrate your site with Facebook, Twitter, and Google+ and other social platforms.
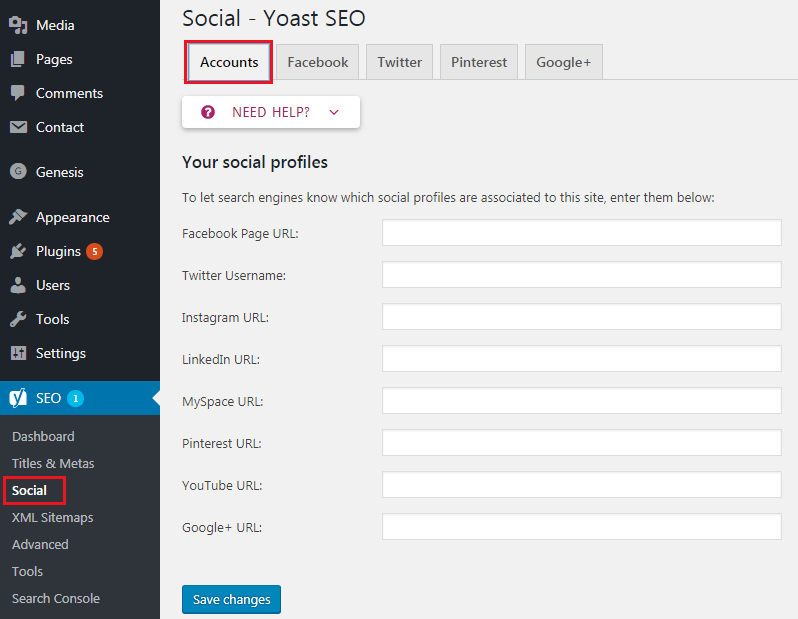
‘Accounts’ is the first tab under Social setting, here you’ll need to add the URLs and Twitter username for the main social profiles of your site.
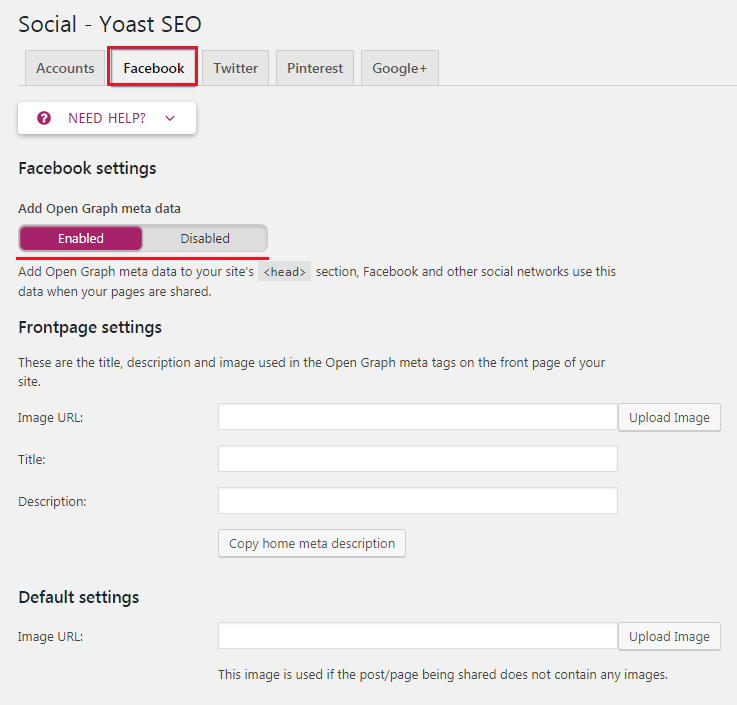
Now, open the ‘Facebook‘ tab and first make sure that open ‘Graph Metadata’ option is enabled so WordPress SEO can Add Facebook open graph metadata in your website’s <head> section.
It’ll help Facebook pick up the right thumbnail and page information while a post from your website shares on Facebook.
Next option is to provide a thumbnail for your homepage with SEO title and description. This image and description get uses when someone shares the homepage of your site on Facebook.
Then, you can provide a default thumbnail image URL, and it uses for all articles that do not have a thumbnail or any other image in it.
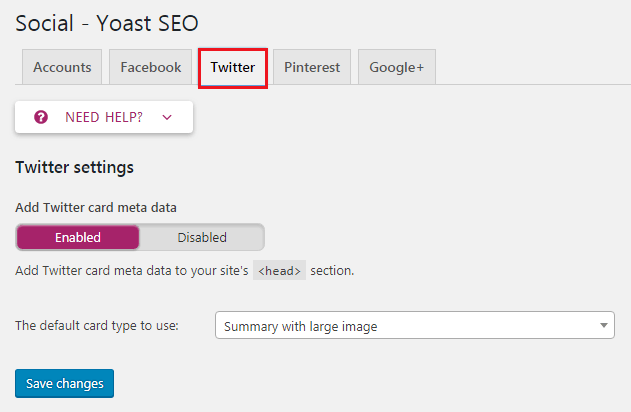
Now, for Twitter, you can add Twitter cards to your site’s head section from here. As well as, you can also choose the card type to use. My recommendation is using a summary with a large image.
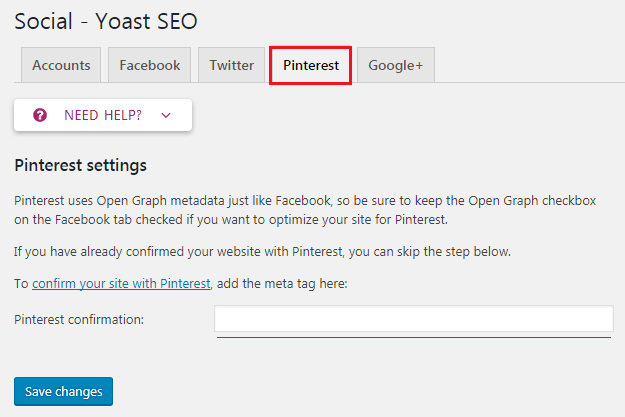
As for, Pinterest, Open Graph metadata just like Facebook and make sure that you have open graph metadata box checked under ‘Facebook’ settings (The Facebook Tab).
Then, you need to enter the site verification code provided by Pinterest. So, visit your Pinterest account settings to get the meta tag provided by Twitter to enter here for getting verified.
Google+
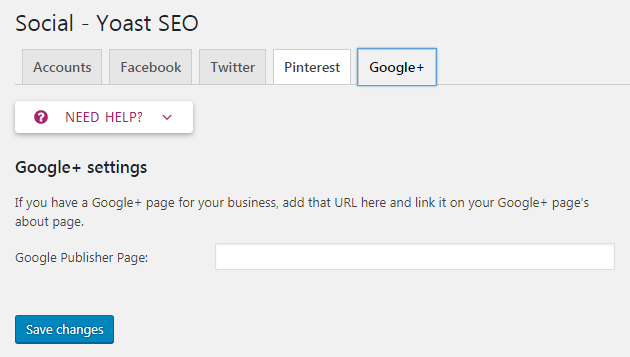
After that, switch the ‘Google+’ tab where you’ve to insert the URL of your Google+ business page. So, go to the page, copy the URL, and paste it into the box.
Now, enter your website’s URL in about section. So, the ‘Social’ OnPage SEO is complete. Now, we’ll head to set up the ‘XML Sitemaps’ section of Yoast SEO.
XML Sitemaps
Sitemaps are so essential for your WordPress Website to get indexed and notified by search engines about your content quickly and easily. As well as, using Sitemaps, you can tell search engines how to prioritize your content.
Concerning this point, Yoast WordPress SEO makes it super easy to create XML sitemaps for WordPress site. This section also has different tabs. So, let’s walk you through them.
General
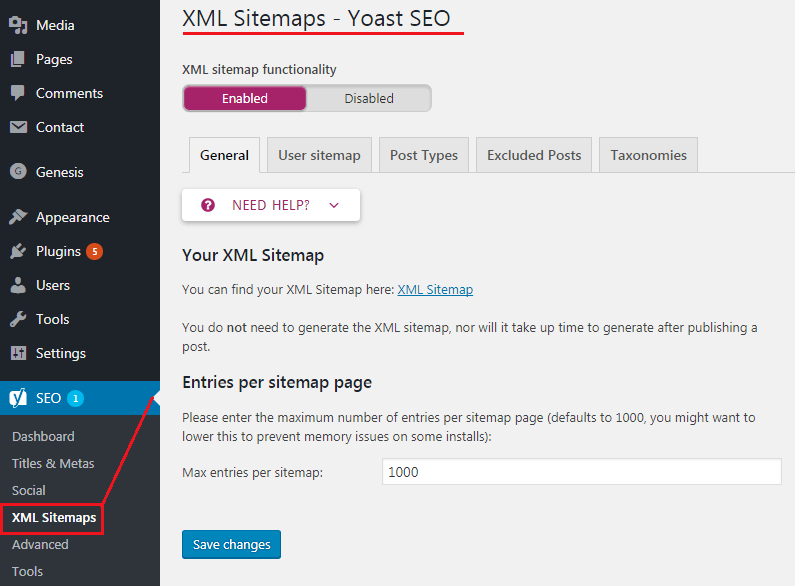
You’ll see the first tab is ‘General’ but before going forward at first make sure the ‘XML Sitemaps’ option is enabled.
User Sitemap
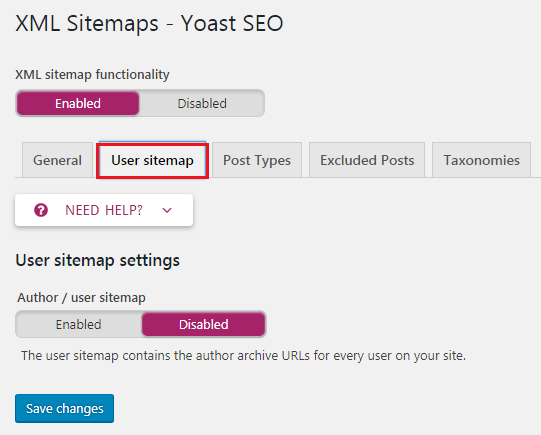
Now, move on to the second tab ‘User Sitemap’and make sure that Author/User sitemap is disabled.
Post Types
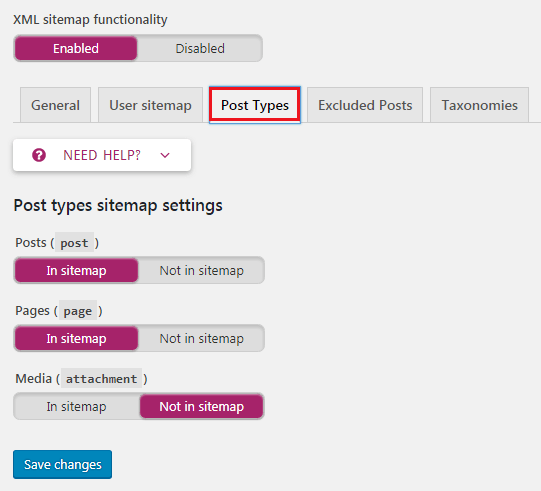
Now, on the ‘Post Types’ tab disable any post type that you don’t want to include in the sitemaps. As the default, Yoast SEO disables Media Attachments from sitemaps and as the recommendation, leave it like it is.
Also, for ‘Taxonomies’ tab repeat the same process. If there is a taxonomy that you don’t want to include into sitemaps, you can exclude it here.
Exclude Posts
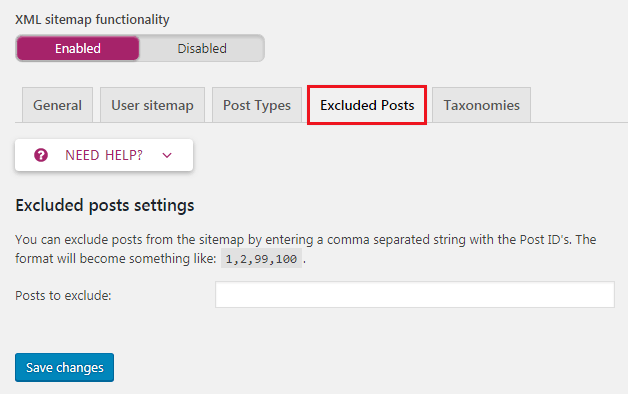
Next is the ‘Excluded Posts’ tab which allows you to remove individual posts, pages, or custom post types from the XML sitemap. To do that, enter the post IDs in the field and save changes.
Now, you’ll notice that the settings of ‘XML Sitemaps’ section is over. So, let’s find out the ‘Advanced’ section of Yoast WordPress SEO.
Advanced
From the ‘Advanced’ page, it allows users to configure breadcrumbs, permalinks, and RSS feed related settings. So, let’s go ahead.
Breadcrumbs
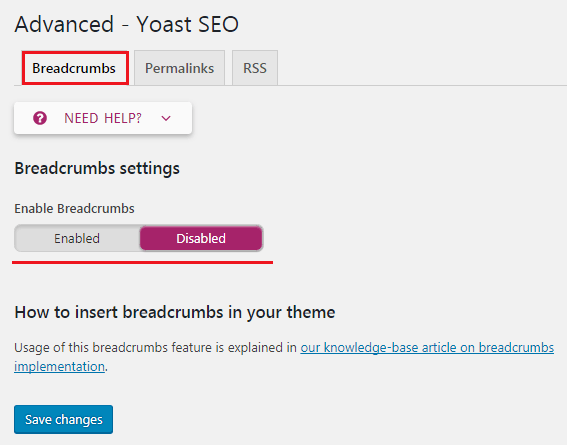 The Breadcrumbs are great for internal linking because it defines a clear path or trail to the page you are on. On the image above it’s disabled, you can enable it.
You can also see these breadcrumbs appear in search results, which gives your site extra advantage in the search query like the image below.

However, the default settings should work for most websites, and you can change something if you want then go ahead. Moreover, once you have done, click on the save changes button.
Permalinks
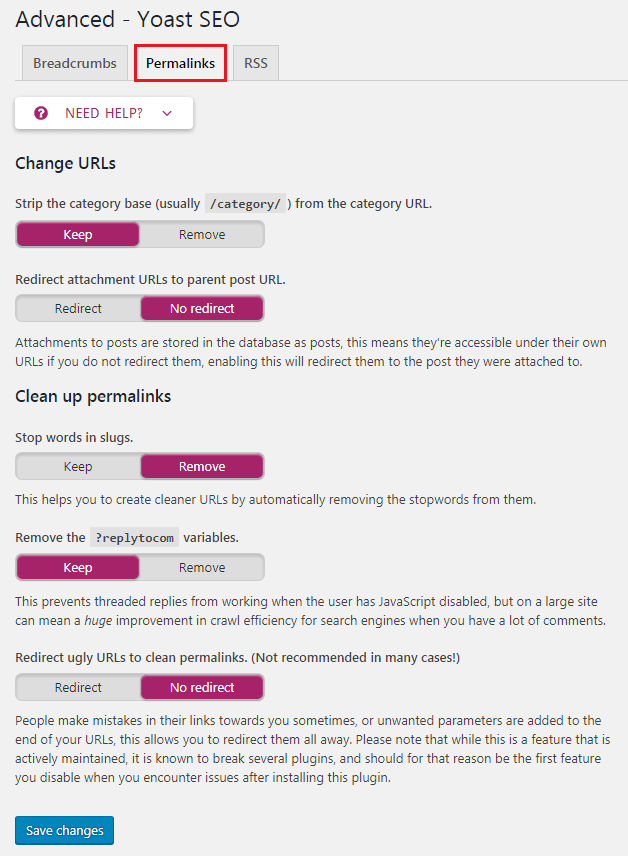
‘Permalink‘ is another vital part of WordPress OnPage SEO. However, remember it’s not on the WordPress ‘Settings’ tab. As you can see, by default, WordPress adds a category base in each category URL. i.e /category/.
Clicking ‘Remove’ you can strip that part from your category URLs. Many people usually want this. However, you should leave it unchecked if you do not want your category URLs and page URLs to conflict if they are the same name.
Then, the next option is to Redirect Attachment URLs to the parent post because WordPress allows users to attach images and other media to posts. However, in most cases, it’s unnecessary when all of those attachments get their URLs.
However, by checking this box, you’ll be able to redirect all your attachment page URL to the original post URL.
Next option is removing ‘Stop Words’ from permalinks, where stop words are common words used in everyday language.
WordPress SEO by Yoast and many other SEO experts believe that by removing these, the URLs get clean and smaller. It is why we left it as it has.
Then, the option is on the permalinks page is to remove? Replytocom variable from comment reply links which disables the links for the users with javascript disabled.
Moreover, most of the web crawlers when they visit your site have JavaScript disabled, that’s why they do not see the URL and can quickly move on.
This way, it increases the crawl efficiency, particularly if you are running a site with lots of comments.
The next option – Redirect ugly URLs to clean permalinks option is not needed in most cases. My recommendation is to ignore it unless you know what you’re doing!
RSS
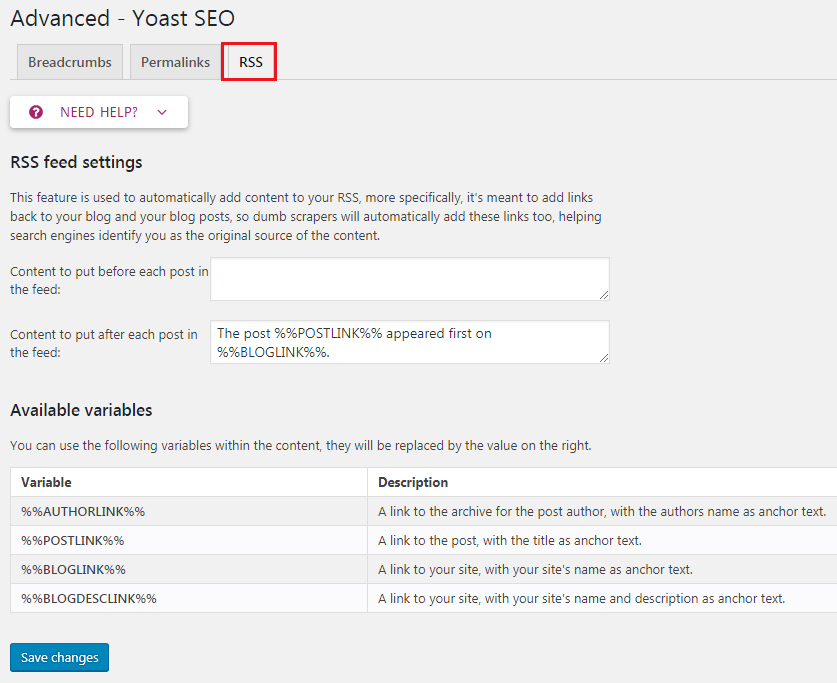
Now, open the next tab, ‘RSS.’ RSS Feeds are often used by content scrapers to copy content from your website. On this point, Yoast WordPress SEO allows you to add a backlink to your site for each post in your RSS feed.
You can also let people subscribe to your website to RSS Feed (which is a plus point)
So, this way, you’ll get backlinks from their site that’s good for OnPage SEO. As well as, Google knows that you are the source.
Here you can see the options to add your author link, Post link, blog link, and blog description. It can also be used to add an advertisement to your RSS feed.
Tools
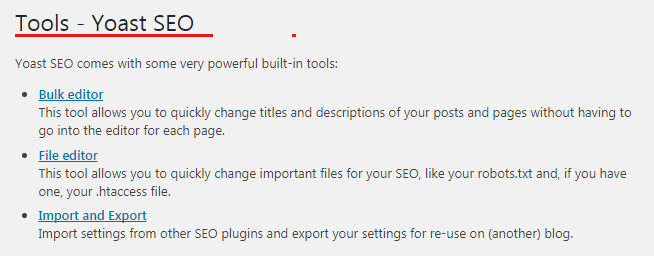
We’ve finished the ‘Advanced’ settings, and the first option is the ‘Bulk editor’ which allows you to edit post titles and descriptions in bulk.
My recommendation is not to use this option because duplicate descriptions and titles can cause damage to your Website SEO.
Also, the ‘File editor’ option, every webmasters and WordPress developer urge beginners and even intermediate level users to stay away from these settings.
A little mistake there can do severe damage to your site, making it useless, even could be inaccessible for search engines.
Look, we’ve spent already a reasonable amount of time getting these settings just right. So, now you probably want to export the settings as Backup (just in case if you accidentally mess things up in the future).
As well as, you can also export settings to use it as an initial guideline for all of your future WordPress sites. You can import settings there on the site you use this plugin.
Search Console
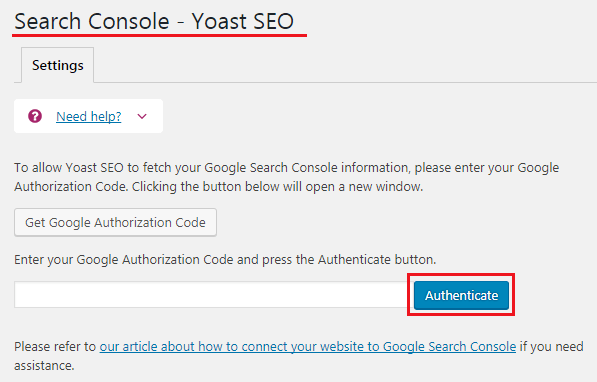
Now, we’ll talk about ‘Search Console’ section of the WordPress Yoast SEO plugin. It allows users to connect their WordPress site to Google Search Console tools (webmaster tools).
You can add your Website to Google Webmaster tool easily by verifying using this option of Yoast.
For doing this, click on get Google Authorization Code then you will be redirected to Search Console website where you get a code. , copy the code, and enter the required section and click ‘Authenticate’ to complete the verification.
Once, the verification is complete, and you need to select a profile. Then, select your website from the drop-down menu.
Moreover, Yoast SEO will now fetch your Search Console data into the WordPress that you can see the Desktop, Mobile, Feature Phone tabs. Here you can see crawl errors, so you can set up redirects and mark them as finished.
As well as, whether it’s about SEO, you should also add Google Analytics to your WordPress site to get more details data about how your visitors interact with your site.
Premium
As you can see, we’ve come to an end after coming through this huge set up for WordPress OnPage SEO. So, while you these all essential features are free, then can you imagine about the features of the Premium version.
There are much more! If you think it’s worth to buy the premium version of Yoast SEO, you can do it from the ‘Buy Yoast SEO’ option. However, until the importance, I think it’s enough to go with the free version.
Wrap Up
It was a long way really while we’re setting up all the essential WordPress SEO options to cover OnPage SEO. Hope, you’ll also be able to complete the whole setup for OnPaage SEO using this plugin – ‘Yoast SEO.’
If you’re using any other SEO plugin, you may share that with us. As well as, you can also share your thought about this tutorial, don’t be shy. Go to the comment box, type your words, and publish it. We’re all here together.
You will love the following articles:
- How to Add TopBar in Genesis Framework (RainaStudio Map 101)
- How to Add an Audio Sound to Blog’s About Page (RainaStudio Map 101)
- How to Easily Add Slider On Home Page in WordPress
- How to Use Advanced Custom Fields on WordPress
- How to Create an Automatic WordPress Backup for Free
- How to Add MailChimp Subscribe Form to WordPress
- How to Disable Comments on WordPress
- How to Regenerate Custom Thumbnail Image Size
- How to Compress and Optimize Image on WordPress
- How to Add Caching Engine to WordPress Website
- How to Enhance Your WordPress Visual Editor
- How to Add Sitemaps to Google Webmaster
- How to Limit WordPress Login Attempts
- How to Secure Your WordPress Website
- How to Create Sitemaps for WordPress Website
- How to Add Google Analytics to WordPress Website
- How to Build an eCommerce Website Using WooCommerce
- How to Add GUTENBERG Visual Editor to WordPress
- How to Install WordPress Plugin
- How to Add a Contact Form to WordPress
- How to STOP Spam Submission on Your Blog
- W3 Total Cache vs WP Super Cache – Which Should You Choose
- How to Research Competitors Using Semrush Keyword Research Tool
- How to Research Keyword Using Long Tail Pro (Step By Step Guide)
- Ahrefs vs SEMRush vs Long Tail Pro: Best Keyword Research Tool in 2020
- How to Add Nofollow Tag to a Certain Domain

