Well in this post I am going to share how you can create an exit intent popup form in WordPress for your blog website. There are many ways to create exit intent popup form but today here we will learn only one way.
In a very recent client project I have created one and I am going to share exactly the same way. Okay site tight!
Oh my gosh! I almost forget to tell. If you have not checked my recent post yet. Check it out, in the previous post I have shared how you can create squeeze page in WordPress easily. I hope you will enjoy it.
On Optimonk, Nikolett Lorincz written the details about “exit intent” and “exit intent popup” and how it is become so popular in recent years. And she shared some awesome examples of exit intent popup form design and optimization.
Let’s start the work.
Creating an Exit Intent Form in WordPress
To execute, we will need two WordPress plugins. They are following:
WPForms
WPForms is lead capture WordPress plugin. You can easily create a lead capture or contact form by its drag and drop option.
Exit Popup
The Exit Popup is a tiny tool for WordPress. It helps to create anything popup conditionally in a jQuery modal.
Download and install both of this plugin one by one. If you do not know how to install a WordPress plugin look at this tutorial.
Step 1: Create a Form Using WPForms
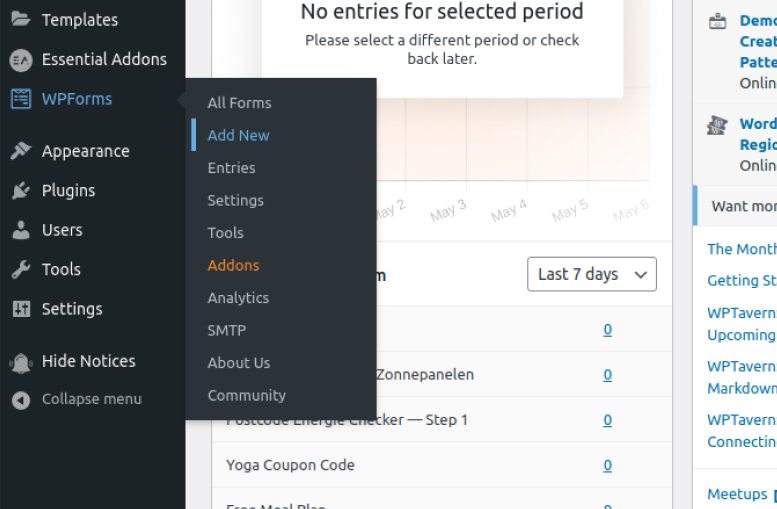
Login to your WordPress website Dashboard. Look for WPForms menu, underneath of this menu you see Add New click on this menu.
WPFprms Menu in WordPress Dashboard
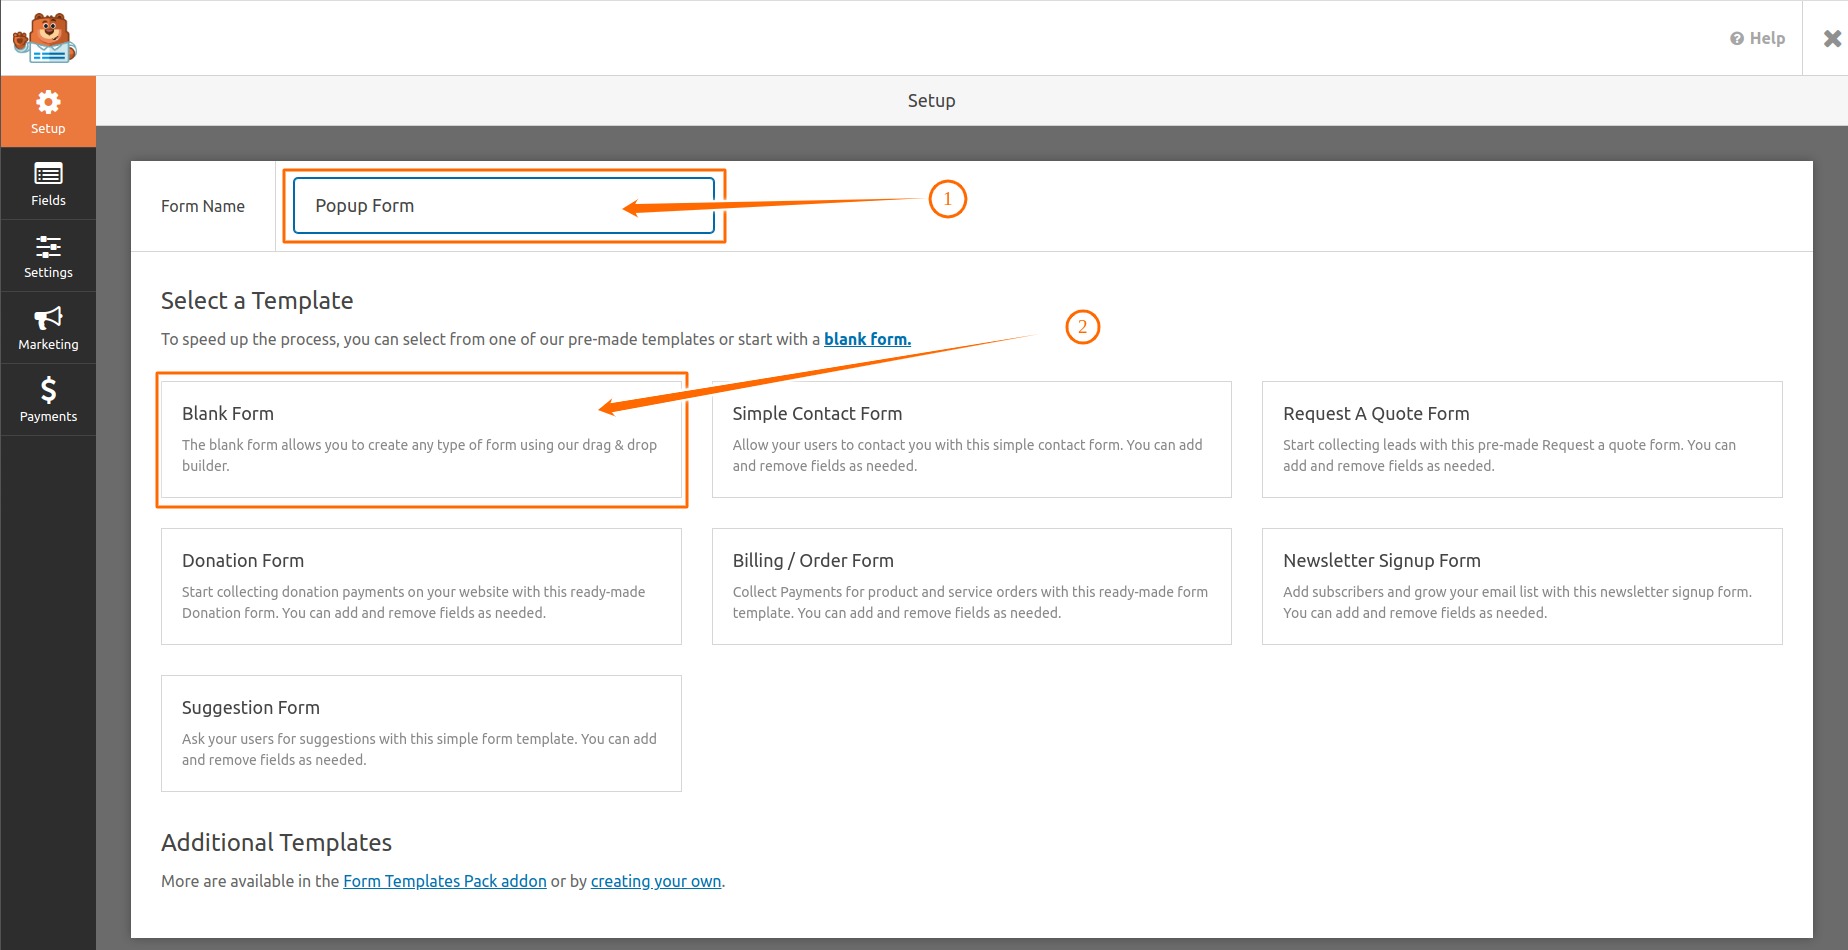
You will be redirect to a new page type the form name and click on the Blank Form to create a blank form.
Type Form Name and Create Blank Form
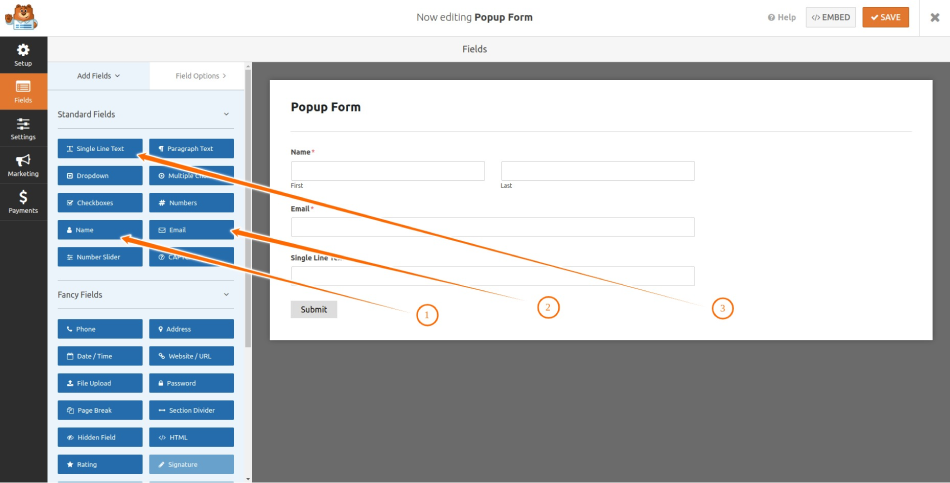
Now we add 3 fields to this form. For example we want to know visitor name, email address and their company name. Let’s add Name, Email and Single Line Text fields.
Add Fields to the Form
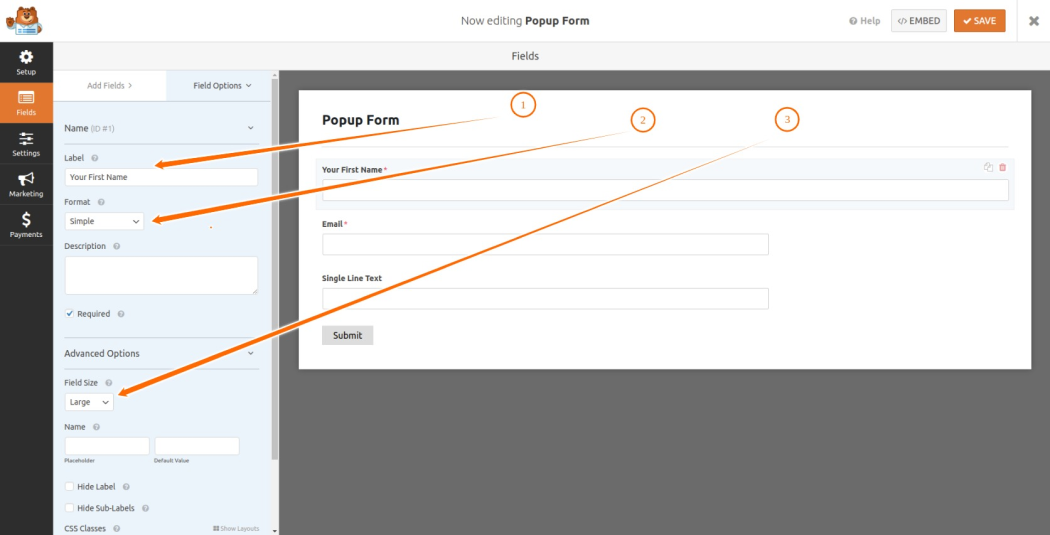
Now we make some changes for each field. For name field we set the “Your First Name” label and change the format to simple. In Advanced Options we change the Field Size to Large.
Change Name Fields Options
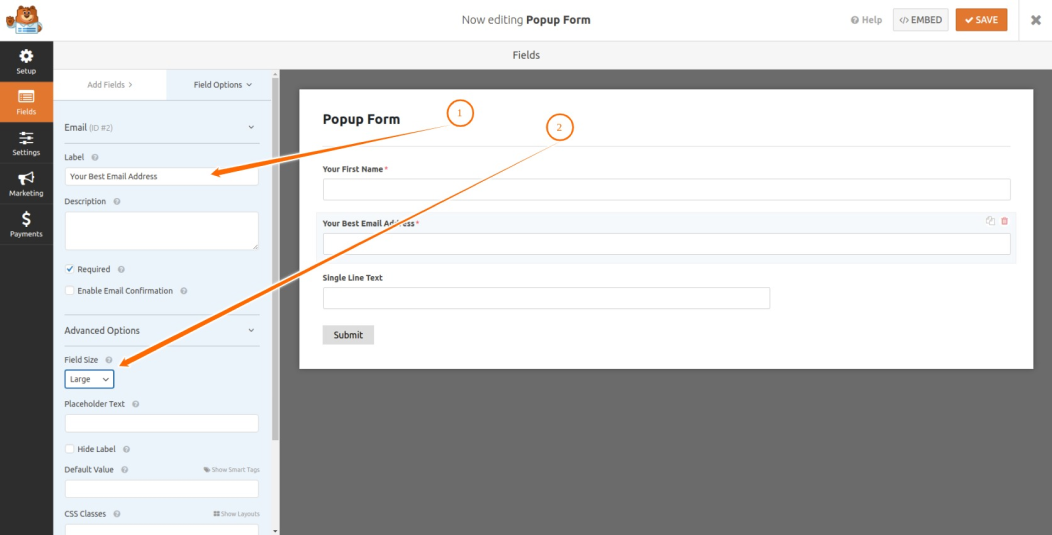
For Email field we set “Your Best Email Address” as field label and change the Field Size to Large.
Change Email Fields Options
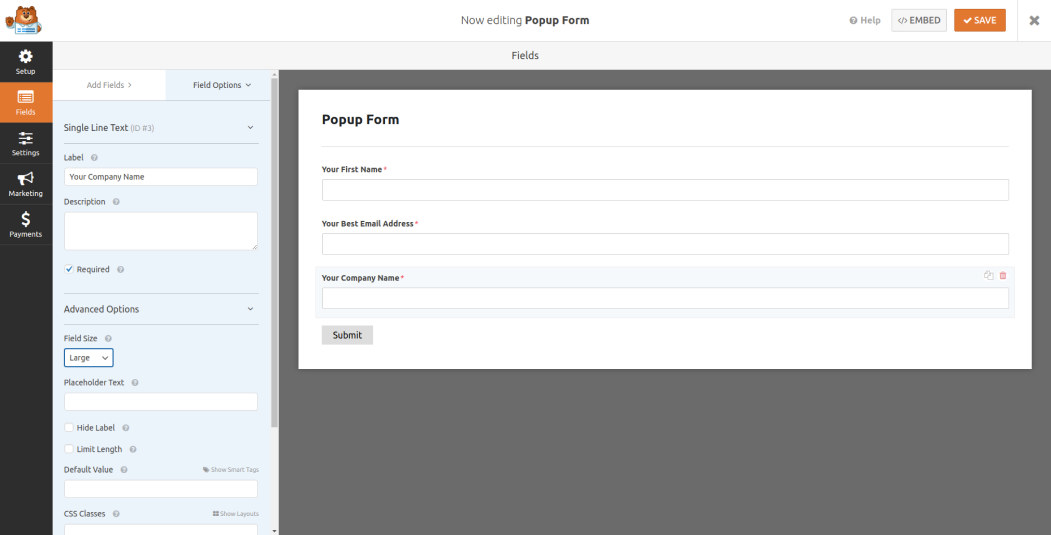
For the last field we set “Your Company Name” as the field name, make it required to submit and change the Filed Size to large as well.
Change Company Fields Options
Okay, we are done Save the form and get back to Forms Overview area by clicking on the close button.
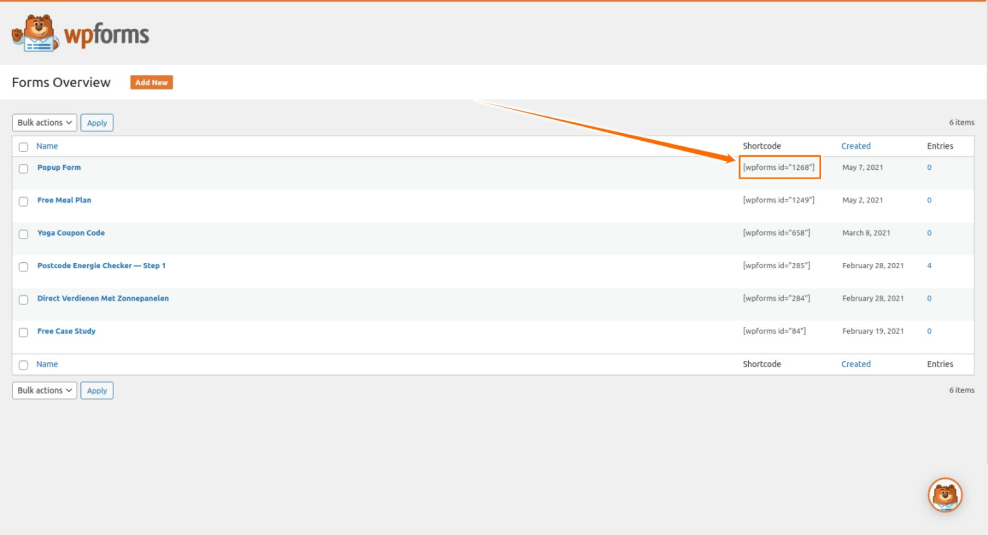
There you see shortcode for each form we have created. So we will need the shortcode for the form a bit later. Copy it!
Copy the Form Shortcode
Step 2: Create the Popup with the Popup Maker Plugin
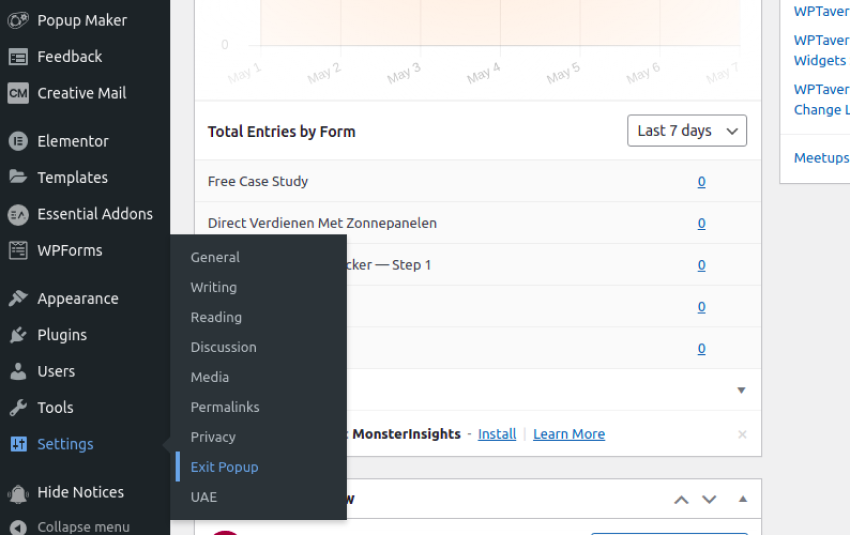
After installing the Exit Popup plugin, you will see the Exit Popup menu in Dashboard under the Settings menu. From there we start.
Click on the Exit Popup.
Exit Popup Menu
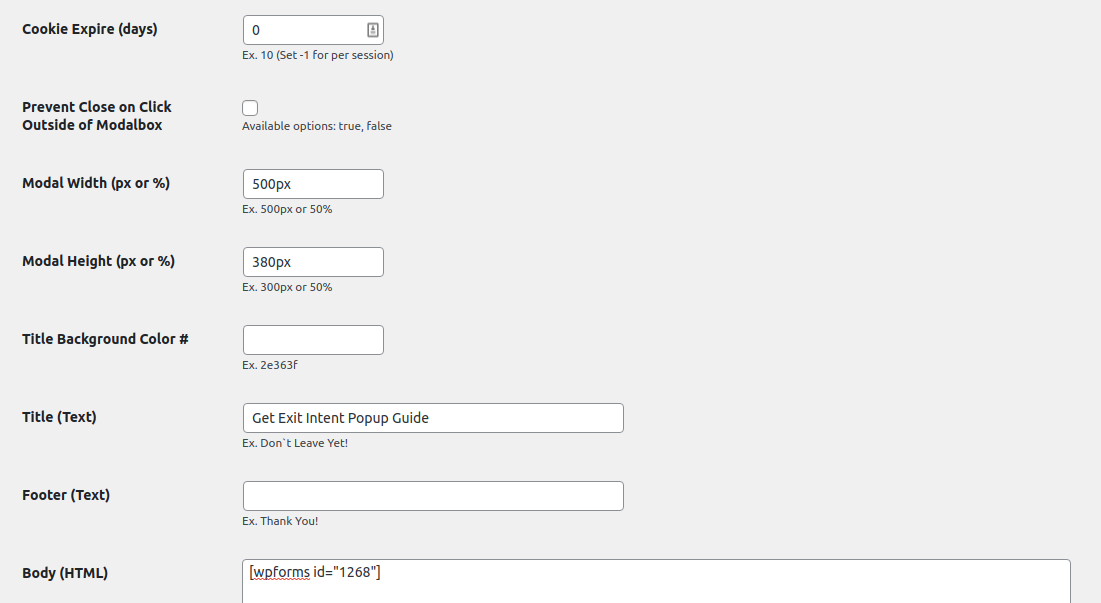
Now we are on a page where you see some fields of Cookie Expire, Prevent Close on Click Outside of Modalbox, Modal Height-Width, Title, Footer and Body Area.
There in the settings we set 0 for Cookie Expire (days), Modal Width 500px and Modal Height 380px, Get Exit Intent Popup Guide for Title (Text) and put the form shortcode into Body (HTML).
Hit the Save Changes button.
Setup Settings for Exit Popup
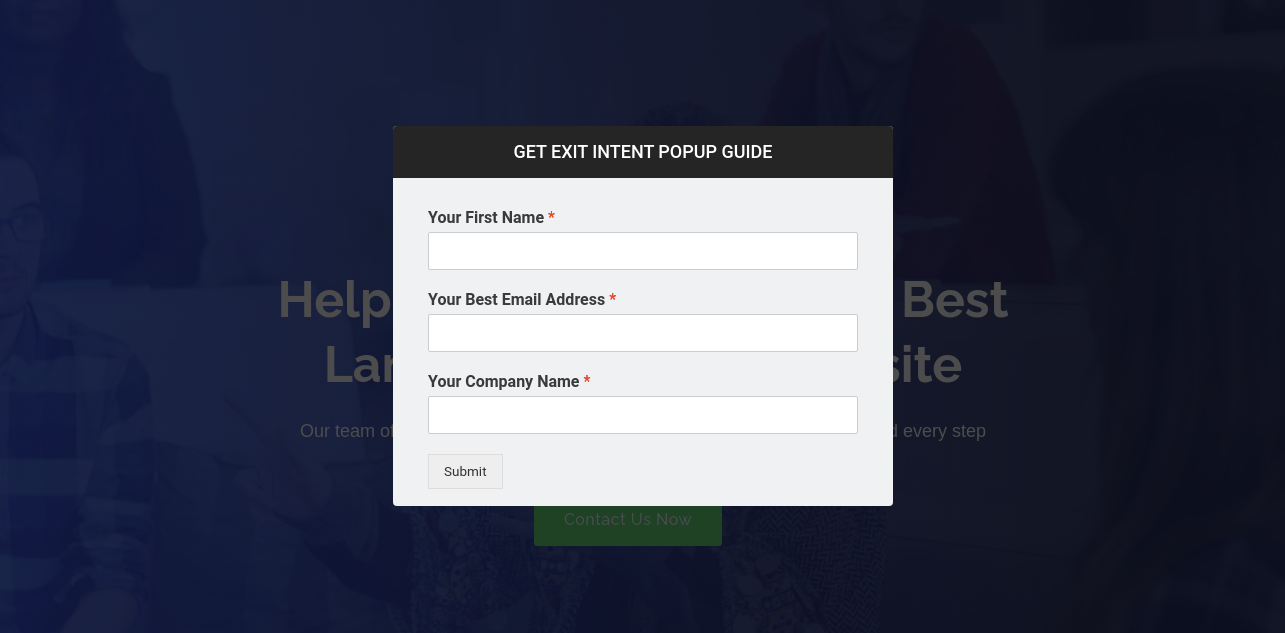
That’s it. The following is the screenshot of our Exit Intent Popup form.
Exit Intent Popup Form
We are at the end of the post. If you find this tutorial helpful share with your friends. Comment below if you do not understand any part of this tutorial.
I want to know if there different ways you follow to create an exit intent popup form let me know.
