Do you need a WordPress job application form? or Want to create one for in your WordPress website?
Either way, I have covered you in this blog.
So, before creating our job application form we need to figure out what are the information we need to collect from applicant. Well for the purpose of this blog we will create a very simple online application form in our WordPress website.
So, the form will have 13 fields to collect different information from the applicant. Let’s what are those fields.
- Full Name
- Birth Date
- Current Address
- Email Address
- Phone Number
- LinkedIn Profile URL
- Position Applied
- How did you hear about us
- Were you referred by any existing employee
- Who referred you
- What is the best time to contact you
- Upload Your Resume
- Cover Letter
Hope those are enough for our simple application form in WordPress. So, now let’s…
Create a Beautiful WordPress Job Application Form Step by Step
We require you to read each and every step so that you do not go wrong with this WordPress tutorial. In the first step, we will install a plugin for creating this form. And in the second step we create the form by this drag & drop form builder.
Let’s dive in…
Step 1. Install WordPress Application Form Plugin
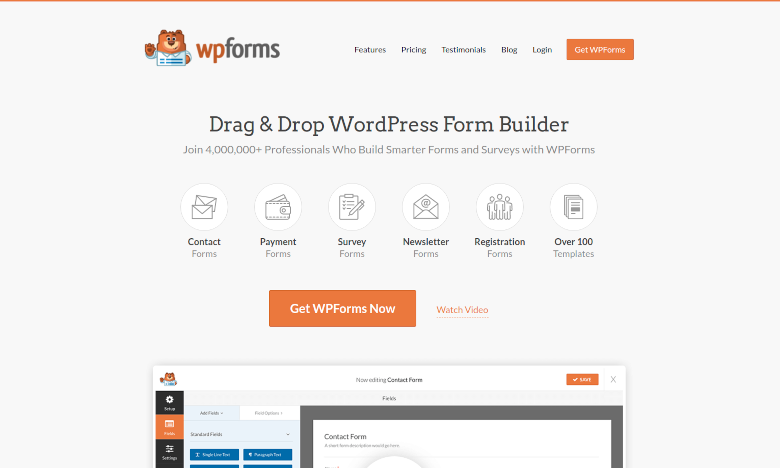
The plugin name is WPForms. Here is their official website WPForms.com. Go ahead and get the plugin. Okay, I will give you a tour to their website.
On the home page you will find a lot of information about the plugin and what it does. They have good reputation, you will find what are people saying about this plugin. You can go to the features page from the navigation. The plugin is offering 33 features.
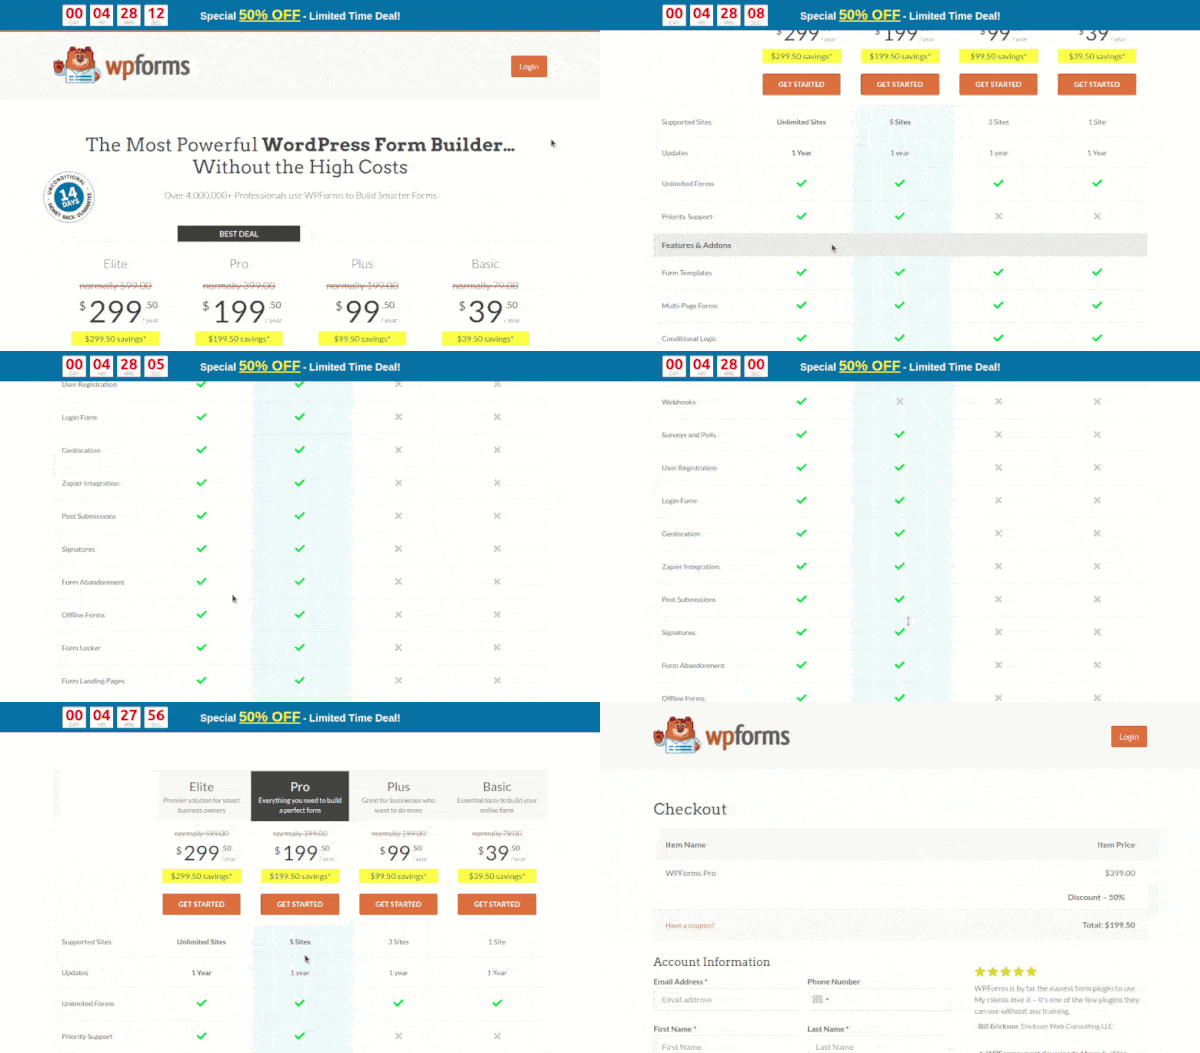
All the features are reliable I beat. So, now let’s grab the plugin, click on the Get WPForms Now button you will be on the pricing page.
The plugin has four pricing option to choose from. I personally use WPForms Pro package for all of our websites. This package has almost all features a smart website should have.
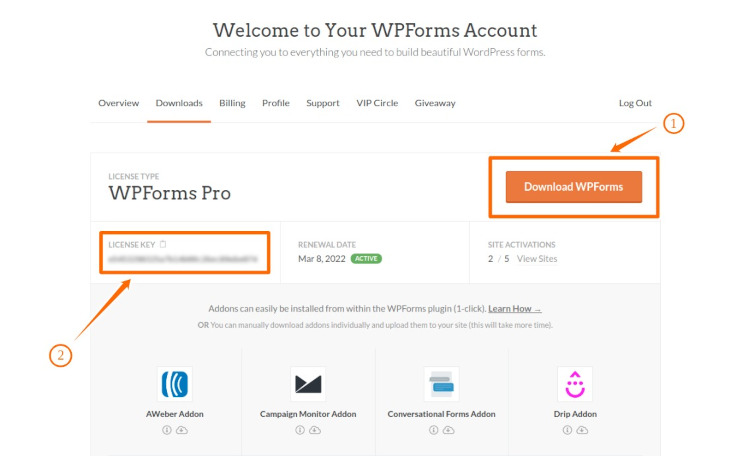
After placing an order or purchasing a package you will have an account on that website. Login to your account and you will see the Downloads tab. Click on this tab and you will find a button to download the plugin.
Check out the following screenshot. As soon as you click on the red marked ( 1 ) button the WordPress plugin for job application will get downloaded.
Copy the licenses key and save it in a text file ( red marked 2 ).
Now, install the download plugin in your WordPress website. If you do not know how to install a WordPress plugin then please check out our tutorial on installing WordPress plugin easily.
Once you installed the plugin we need to activated the plugin using the licences key. Go to Dashboard » WPForms » Settings. Here you will find the field to insert the key. Paste it and click the Verify Key button.
If your license is valid you will see a message here that Your license key level is Pro or something.
Step 2: Create the Job Application Form by Drag & Drop Form Builder WordPress Plugin
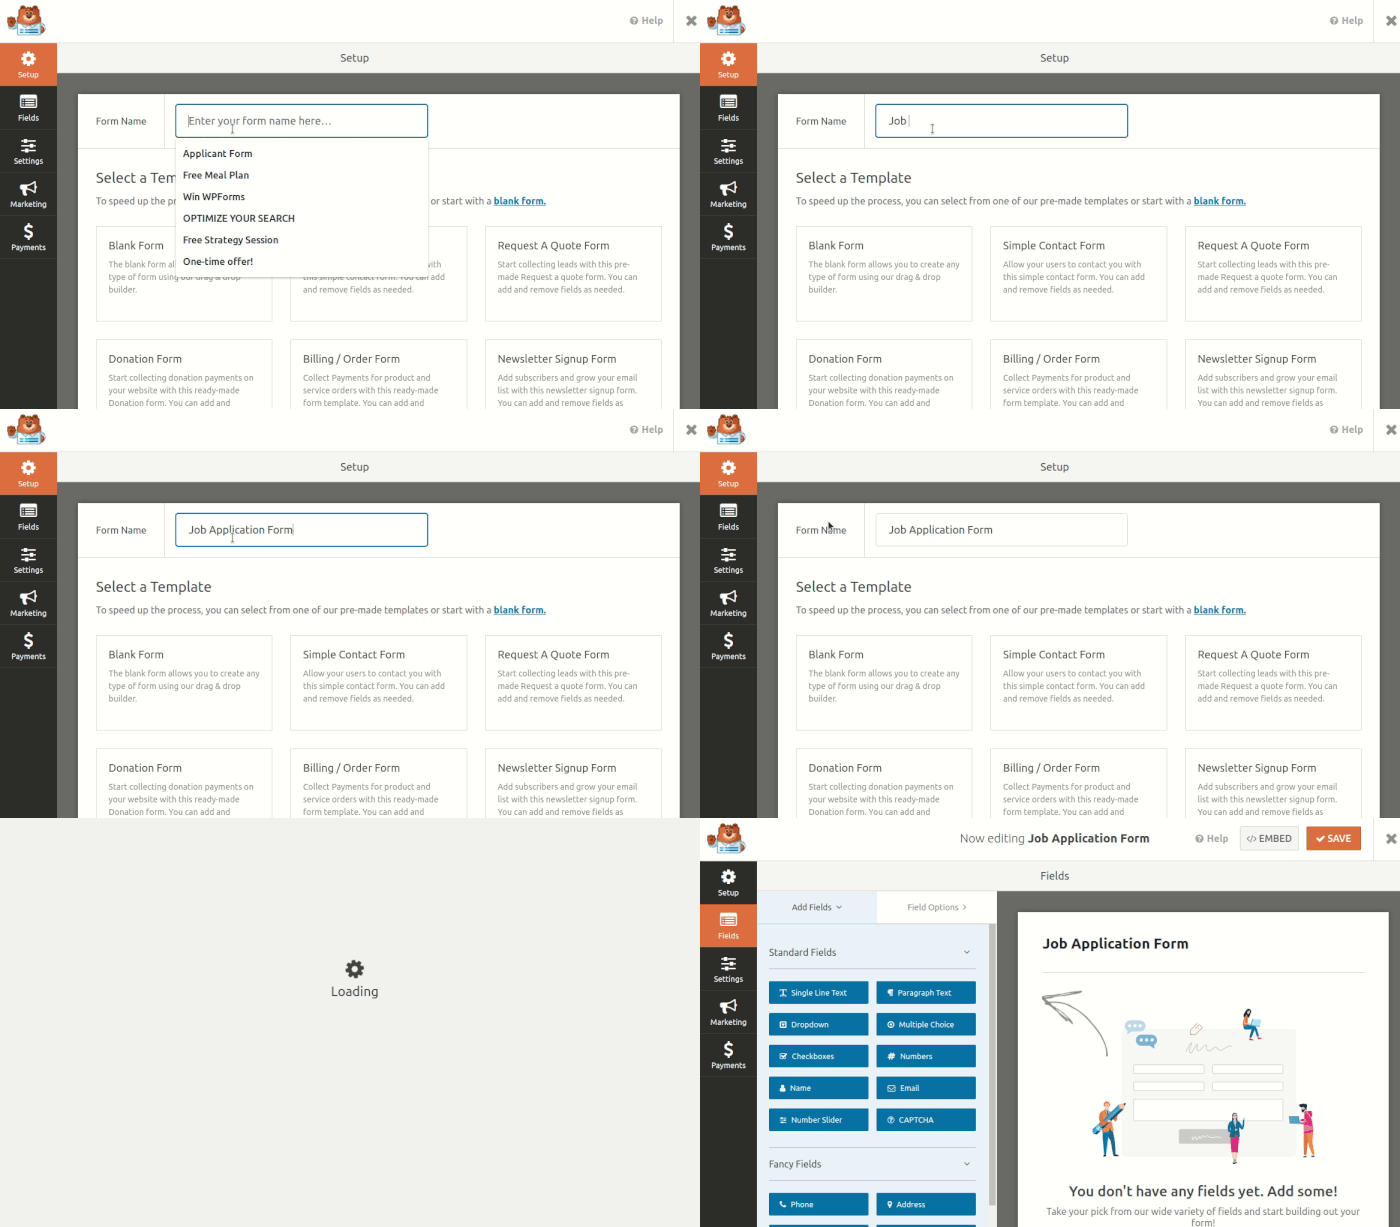
Go to WPForms » Add New, here we give the form a name and select Blank Form from Select a Template.
We are now in the drag & drop panel area. So, here, we drag and drop the fields from the left Add Fields panel to right panel.
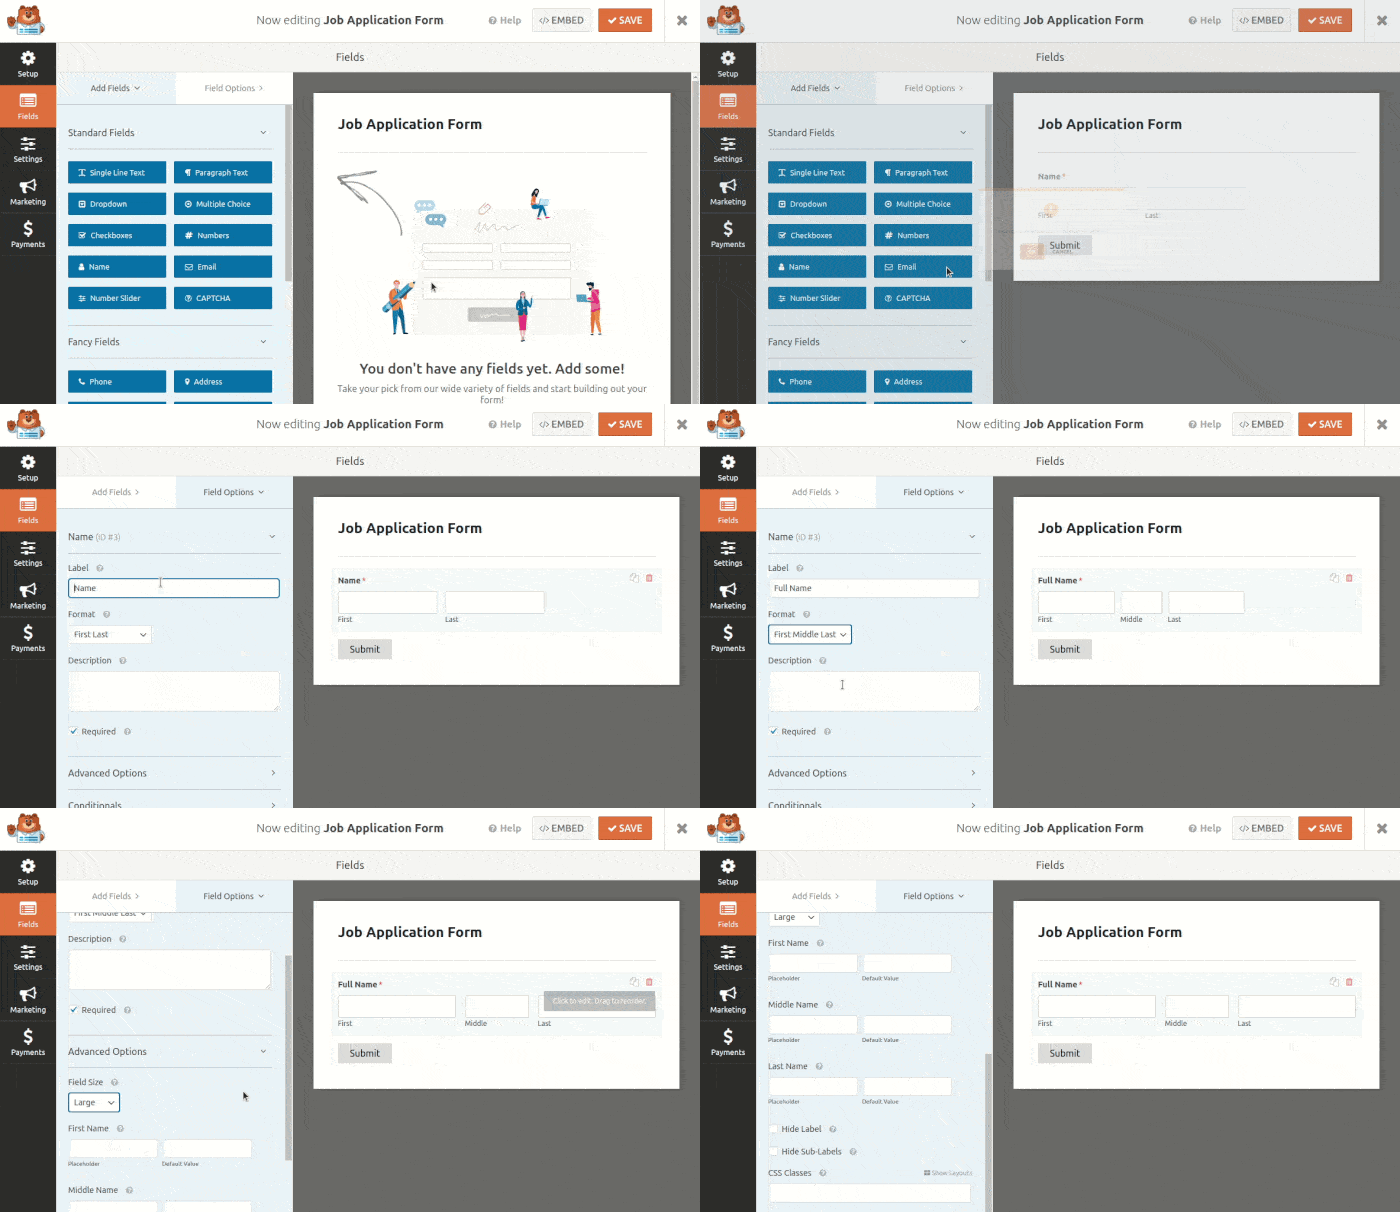
Let’s add the Name fields, rename the default form label and customize other options. Let’s take a look at the image below.
So, what we notice in the above image. We notice that we are adding a the name field by clicking, we click on red trash icon to delete the field. Then we drag & drop the name field over the right panel, clicking on it to edit. From Field Options panel we are changing the label name, format and the field size.
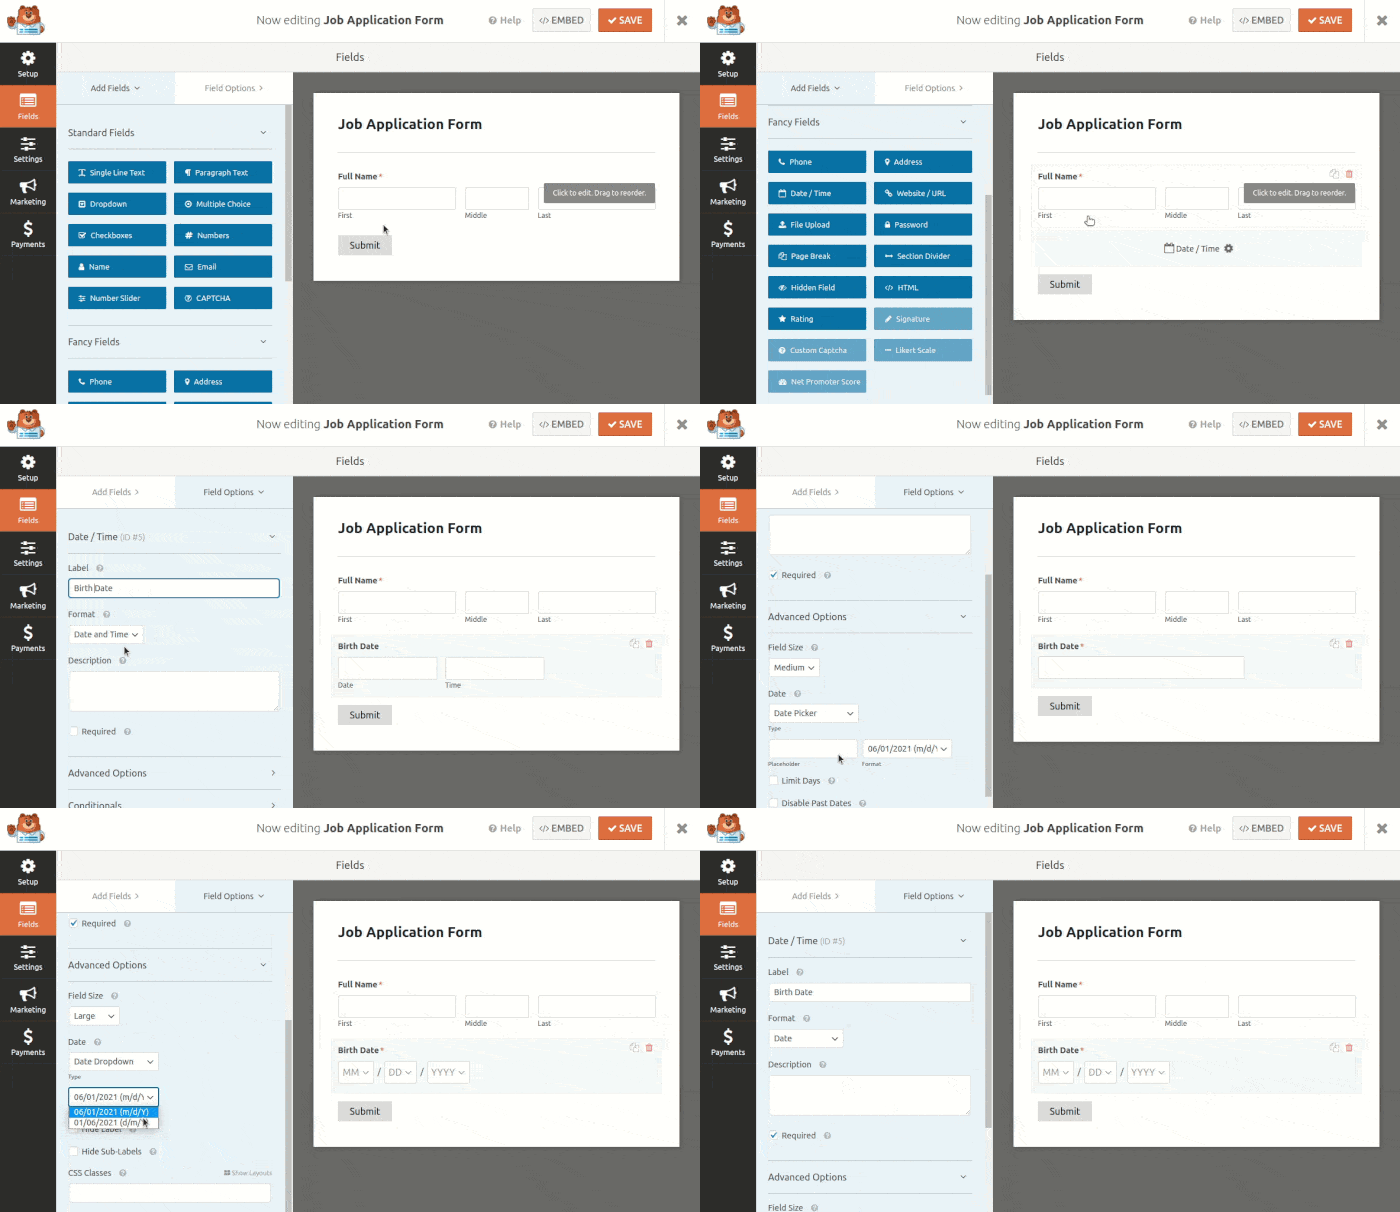
This is how we add each from Add Fields and then edit or customize the field by clicking on it. Now, add the Birth Date field. We drag & drop Date/Time field to the job application form area.
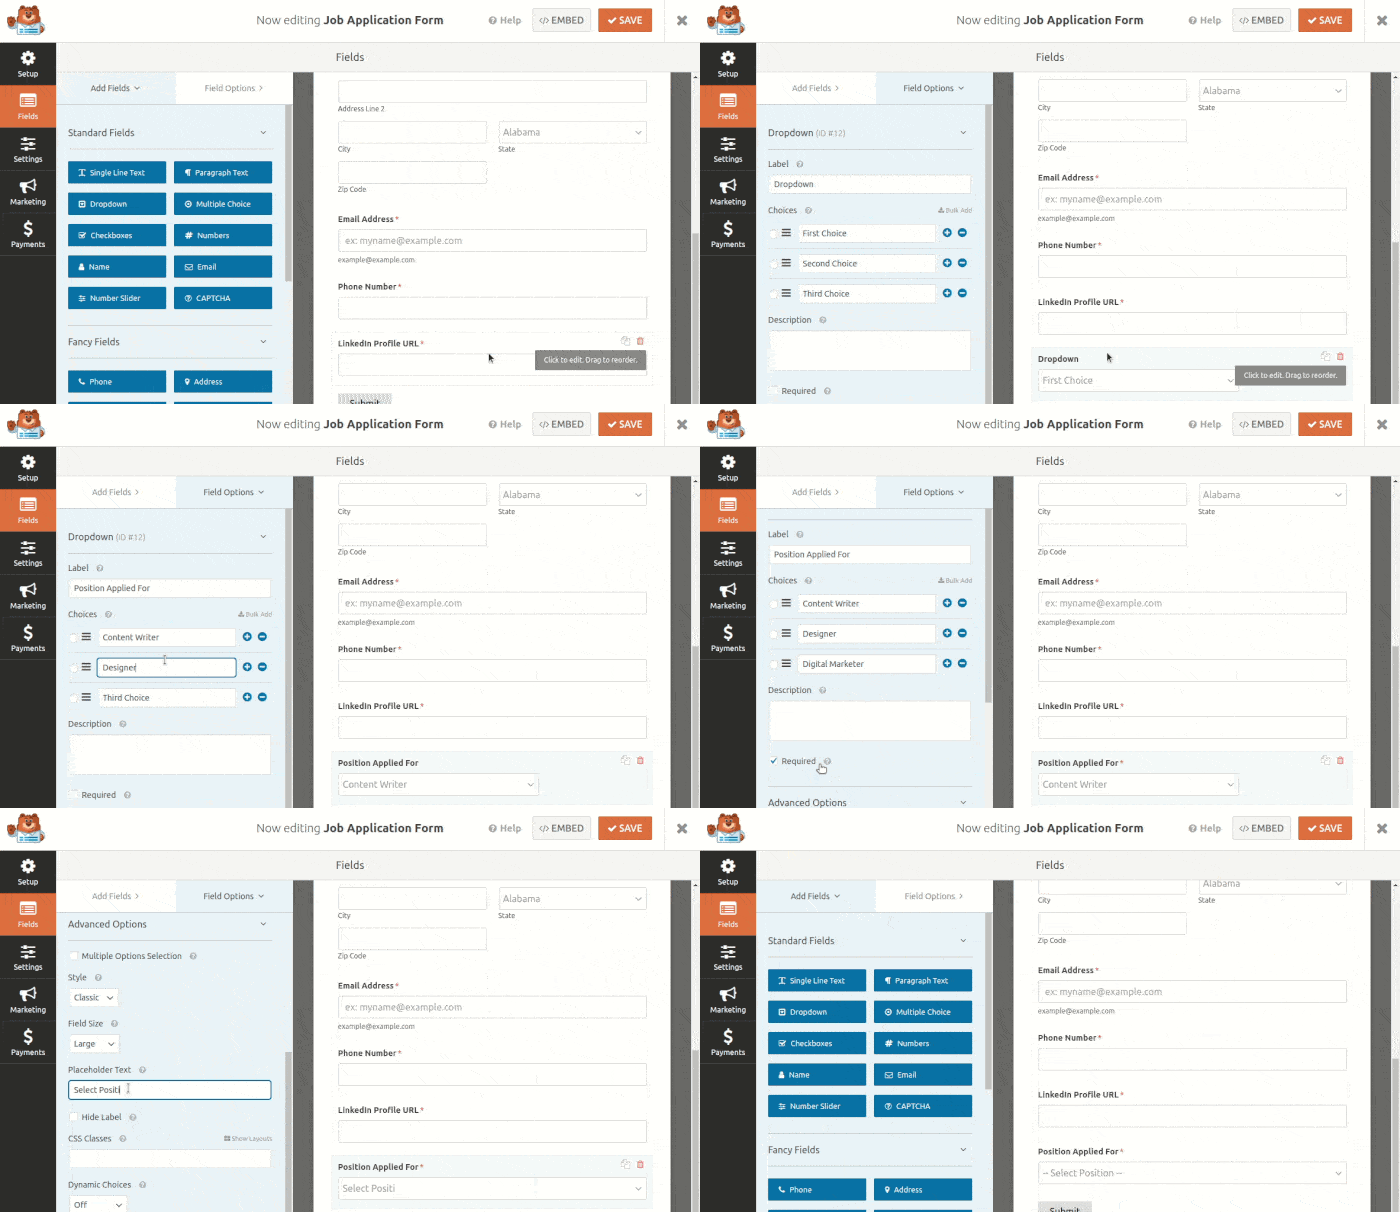
Same way drag & drop address field and rename the label, customize other options the way you want. Give a try and add email, phone number, and LinkedIn profile URL fields by yourself.
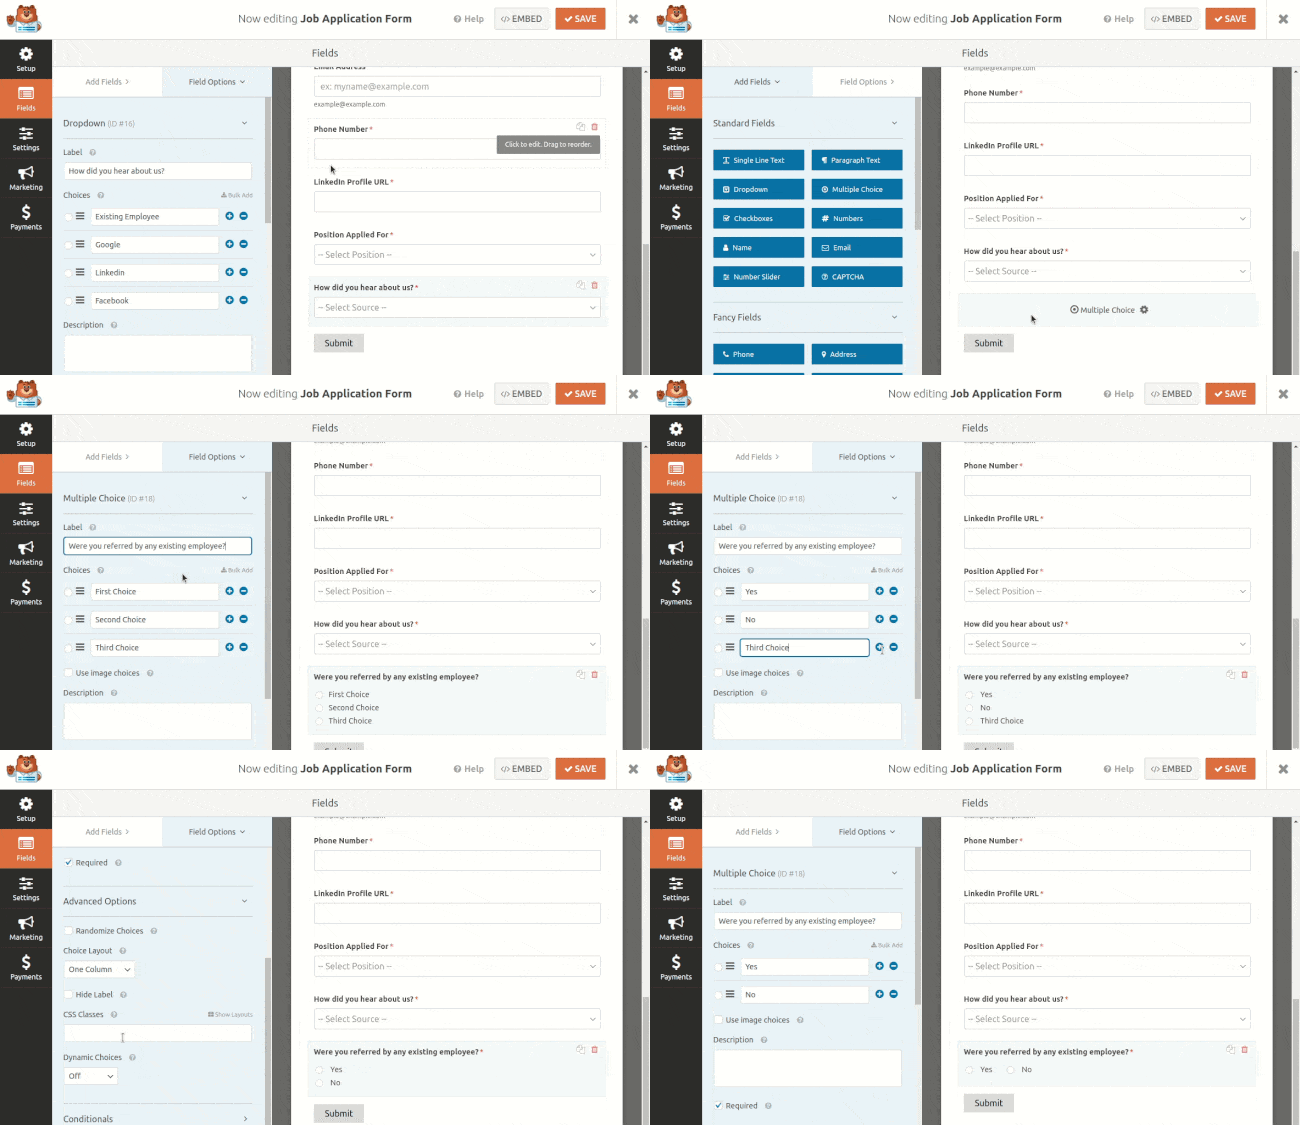
Now we see a drop-down field for Position Applied for. Go ahead add the drop down field, rename it. See the following screenshot.
Add the How do you hear about us field in the same way shown in above image.
Now we are going to add the next field that is Were you referred by any existing employee. This field is multiple choice field. Drag and drop the field. Rename is the label, options and customize other settings. Check out the image below.
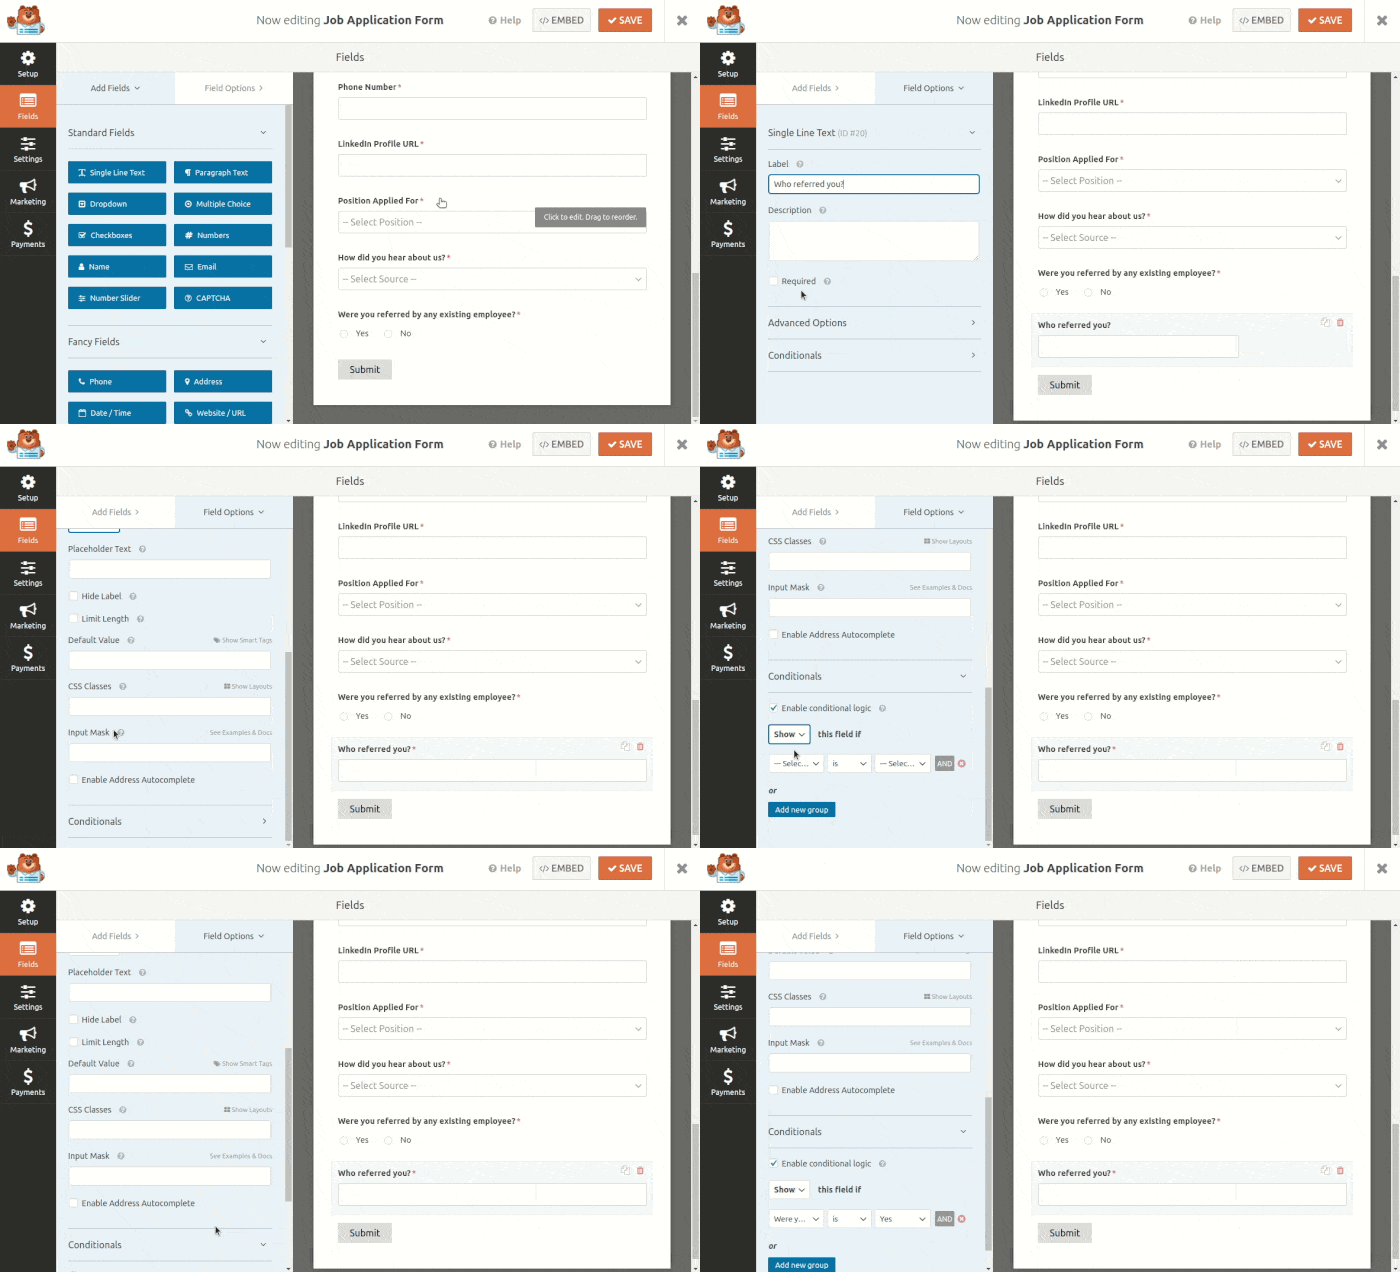
Our next field is Who referred you. This field will be a conditional field that means based on the answer of the previous field we will show or hide this field.
If the user select YES for the Were you referred by any existing employee field then it will come up.
To do it we will want to the Single Line Text field from the Add Fields panel. Then as usual rename the label and other settings. See the following GIF screenshot how we enable the conditional logic for this field.
You try to add the next field What is the best time to contact you by yourself. This is a similar field to Position Applied for or how did you hear about us.
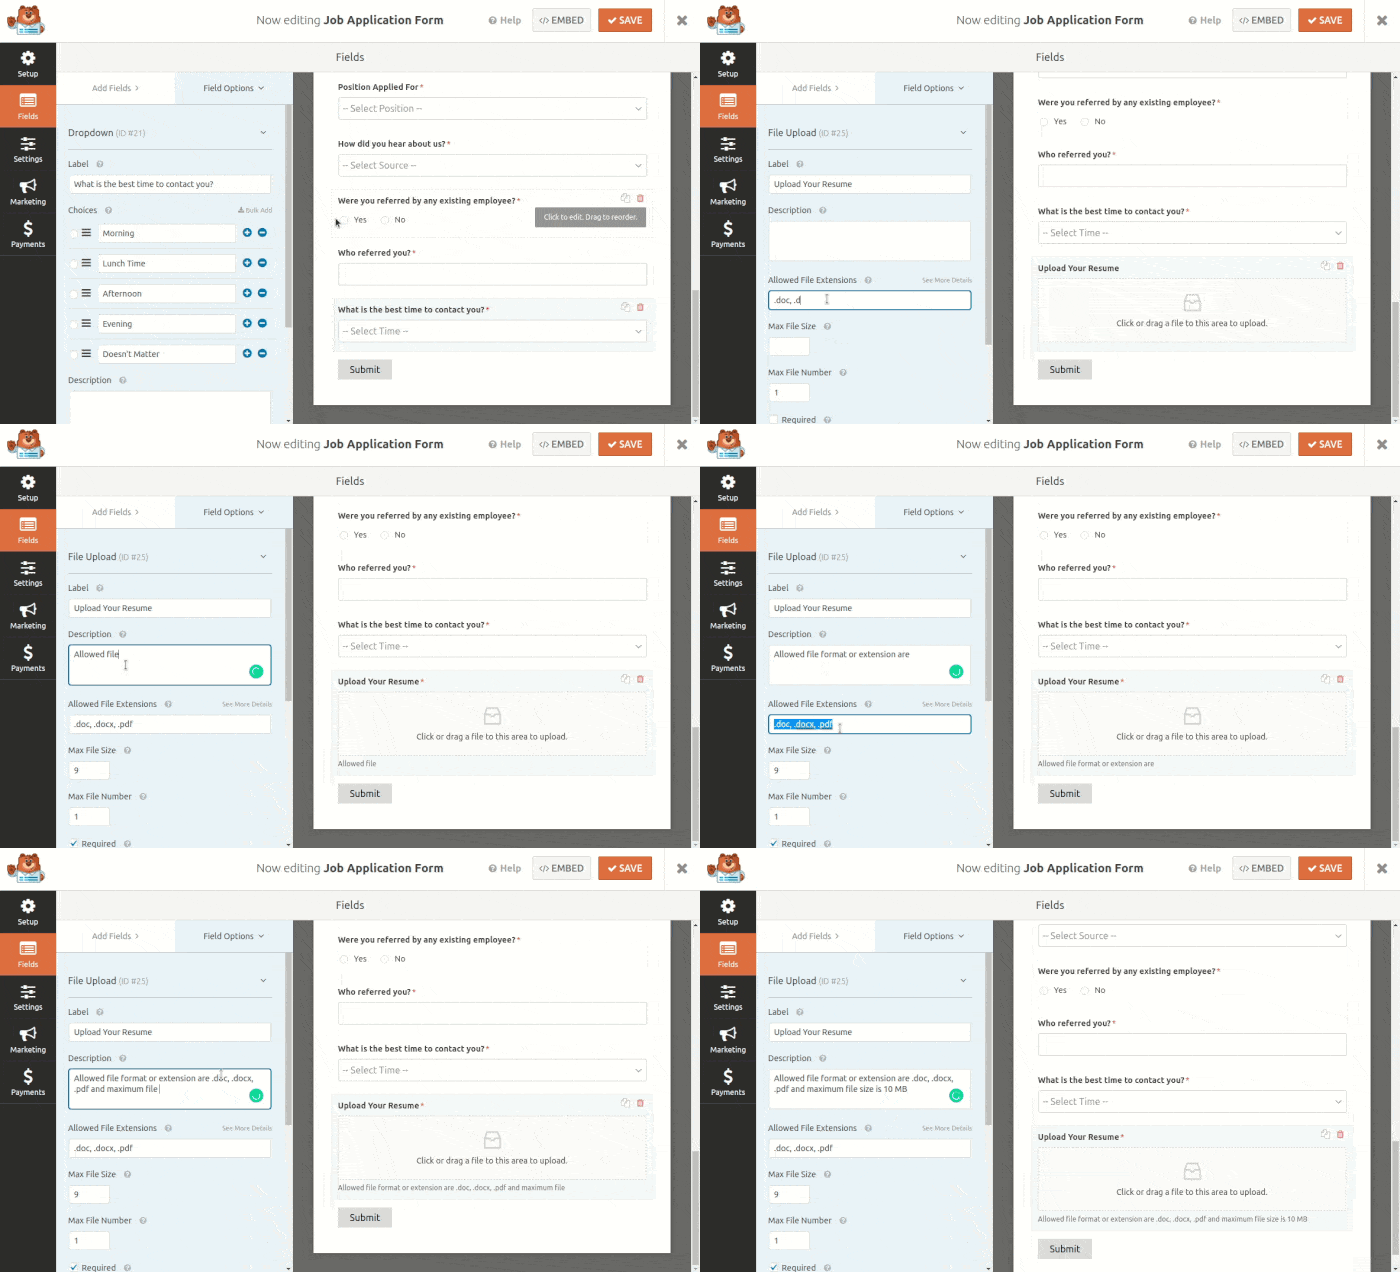
We are now heading to add the Upload Your Resume field. There is field called File Upload. We add this field to our job application form and rename the label. There are other settings we can set like allowed file format or extension, maximum file upload size. Don’t waste time, let’s add this field.
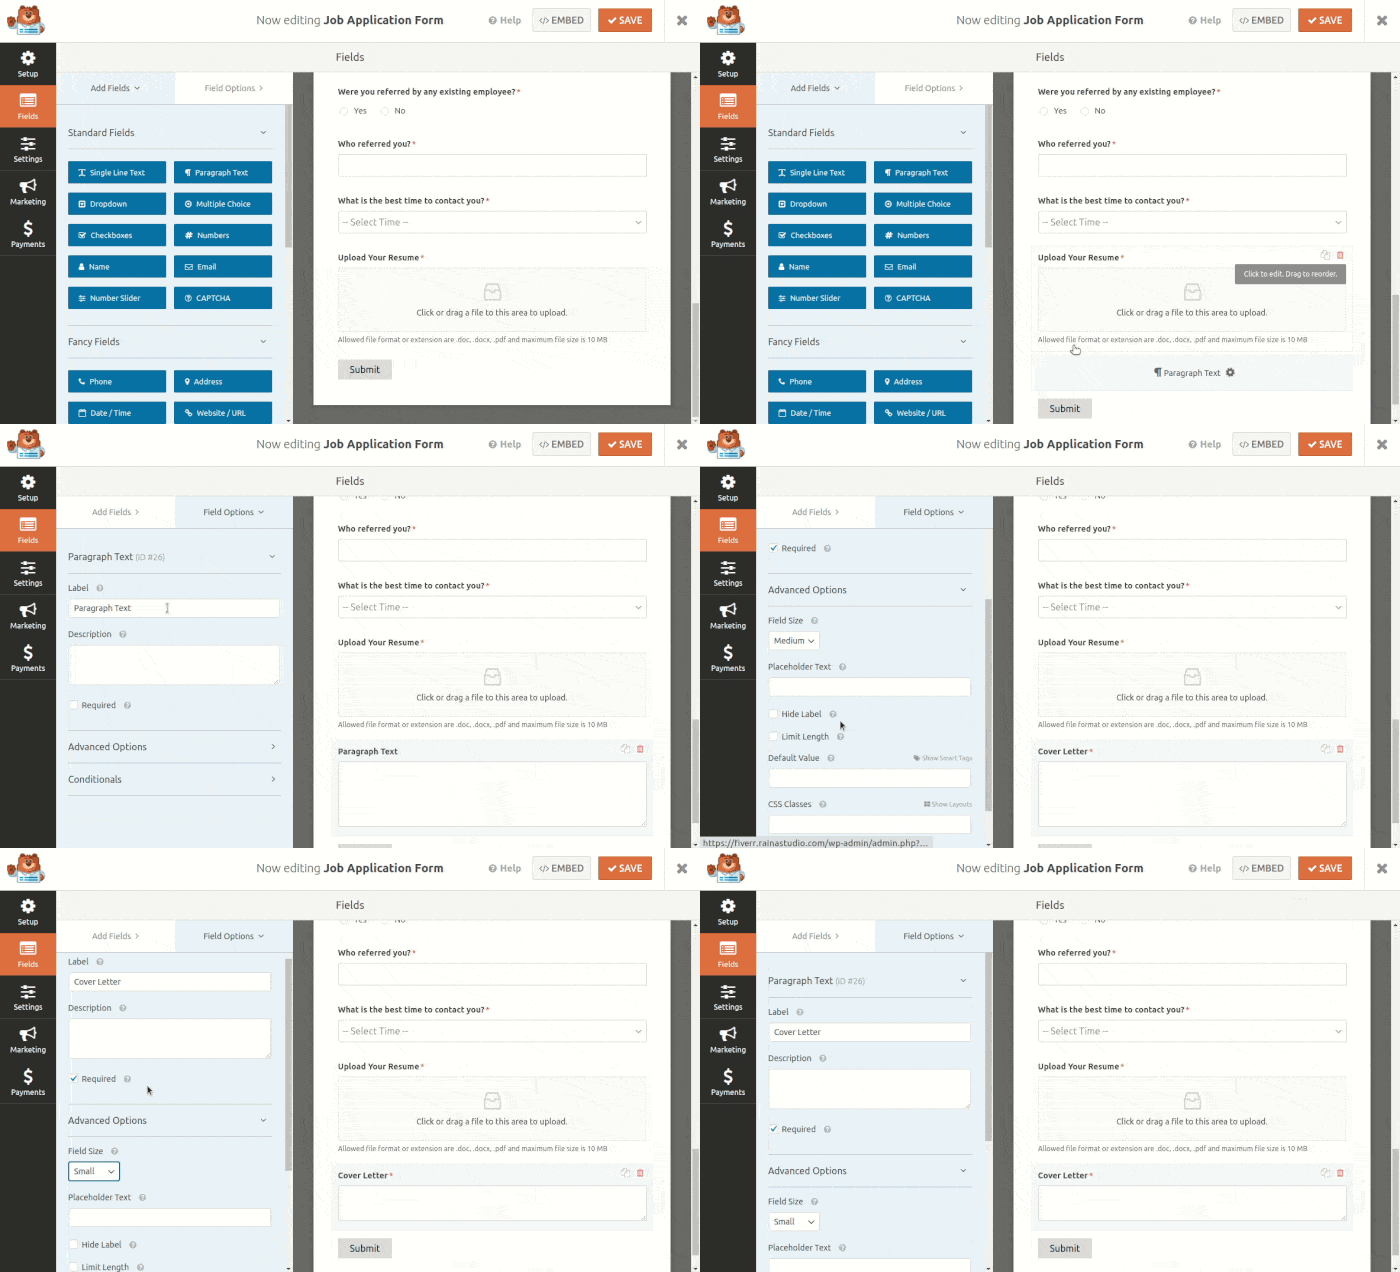
Our last field is Cover Letter filed. Well, this is nothing but a Paragraph Text field in WPForms or the form builder plugin. Let’s add the last filed.
Drag & drop the Paragraph Text field and rename the label as Cover Letter.
Get Email Notification for the Job Application Form and Editing the Confirmation Message
So far, we have added all the fields we want to have on this form. Now, we want to get email notification upon the form submission. That means when an applicant fill up all the fields and hit the submit button we will receive from our website that the form is submitted by someone.
To do this, we will want to go Settings » Notification. Here you will see the default notification settings. You can edit each filed here. Insert your email in the Send To Email Address with {admin_email} is easy. Just add a comma and write your email address.
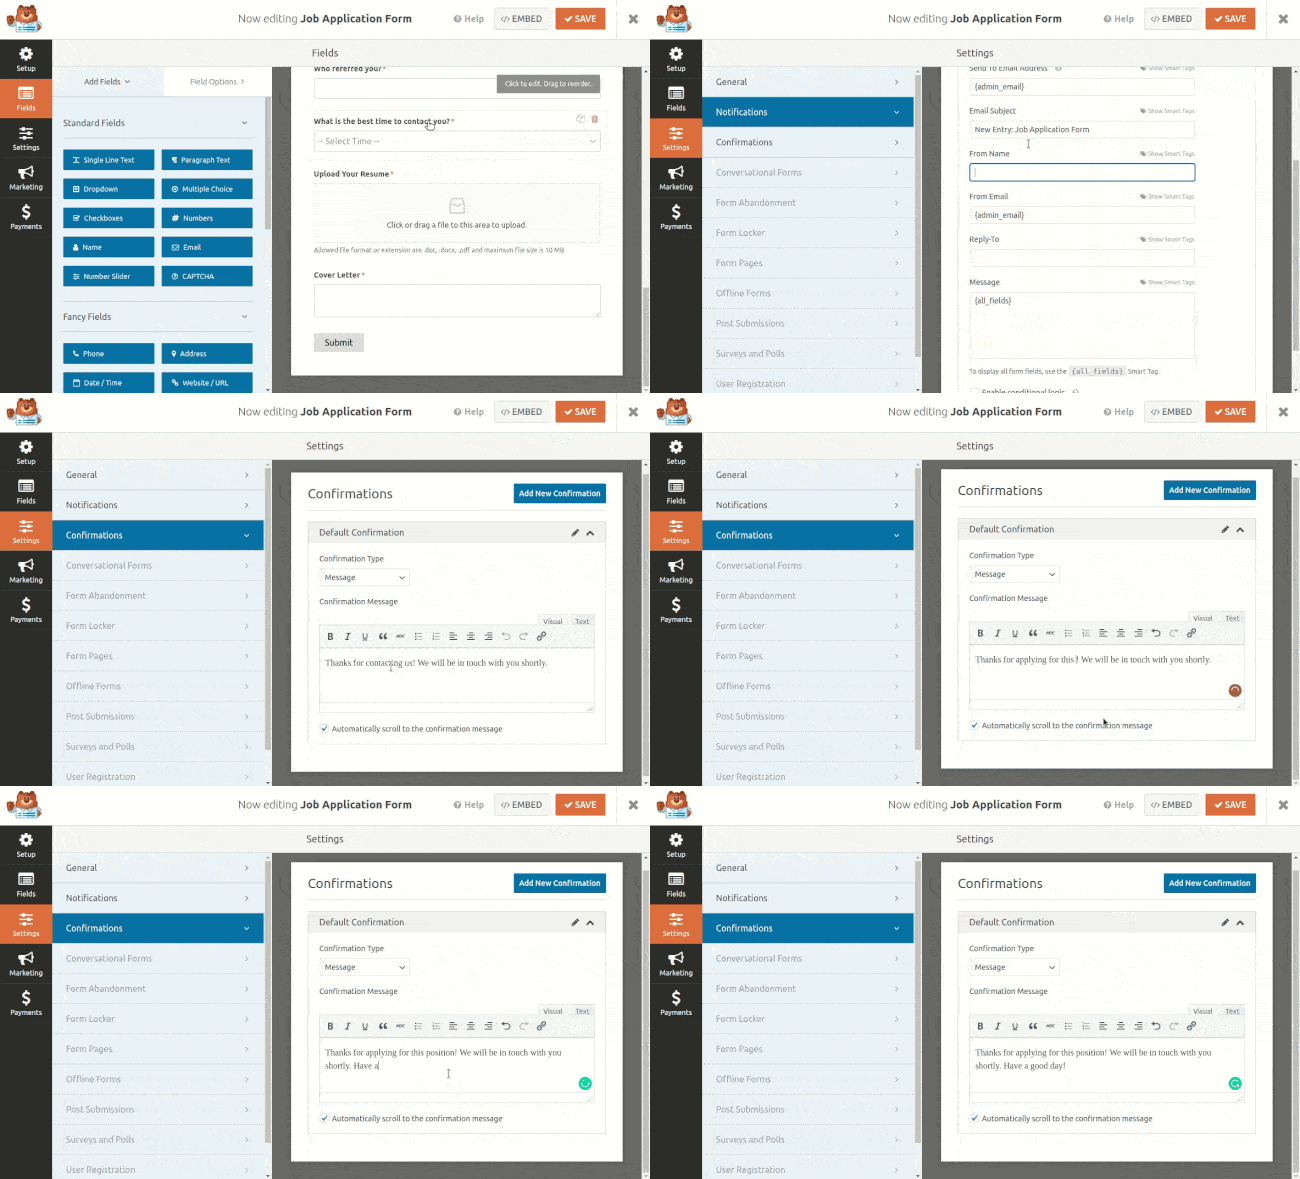
Underneath the Notification setting menu there is Confirmation setting. Click on this menu to edit your confirmation message if you want. Check out the following photo.
If you like to do more with your form, you may like our previous post:
- How to Connect Your WordPress Form to HubSpot CRM
- How to Integrate Your WordPress Form with Zoho CRM
- How to Add Contact Form Entry to Google Sheets Automatically
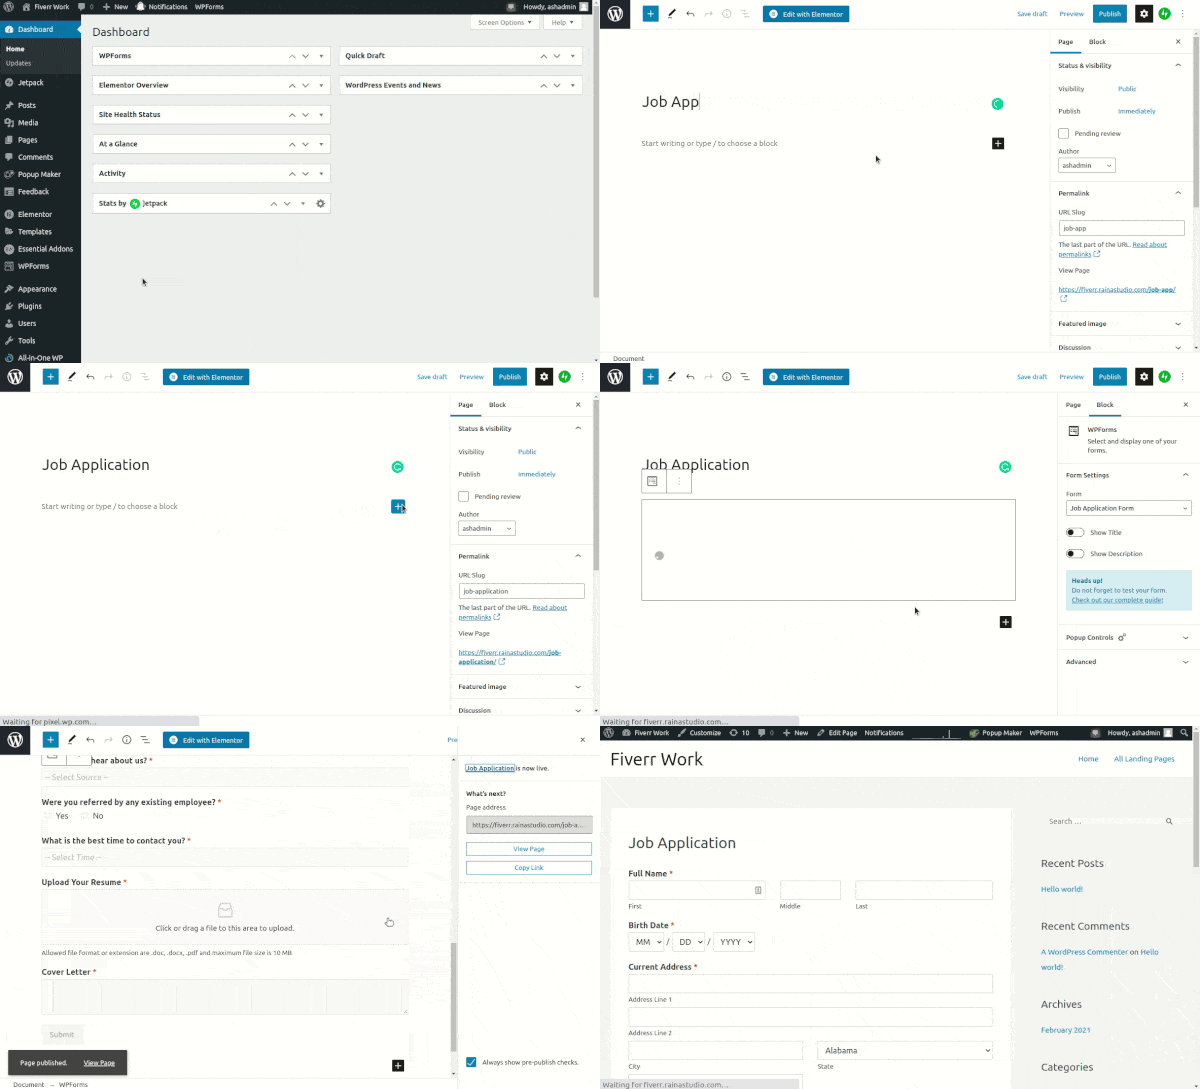
Now let’s add the job application form in a WordPress page and test the form. To create a new page go to Dashboard » Pages » Add New. Give a name to the page and add the WPForms blog to the editor and select the form you just created and hit the publish button.
Fill up the form and test it, check your email for notification. Hope thing are working good for you.
Check Application In Your WordPress Dashboard
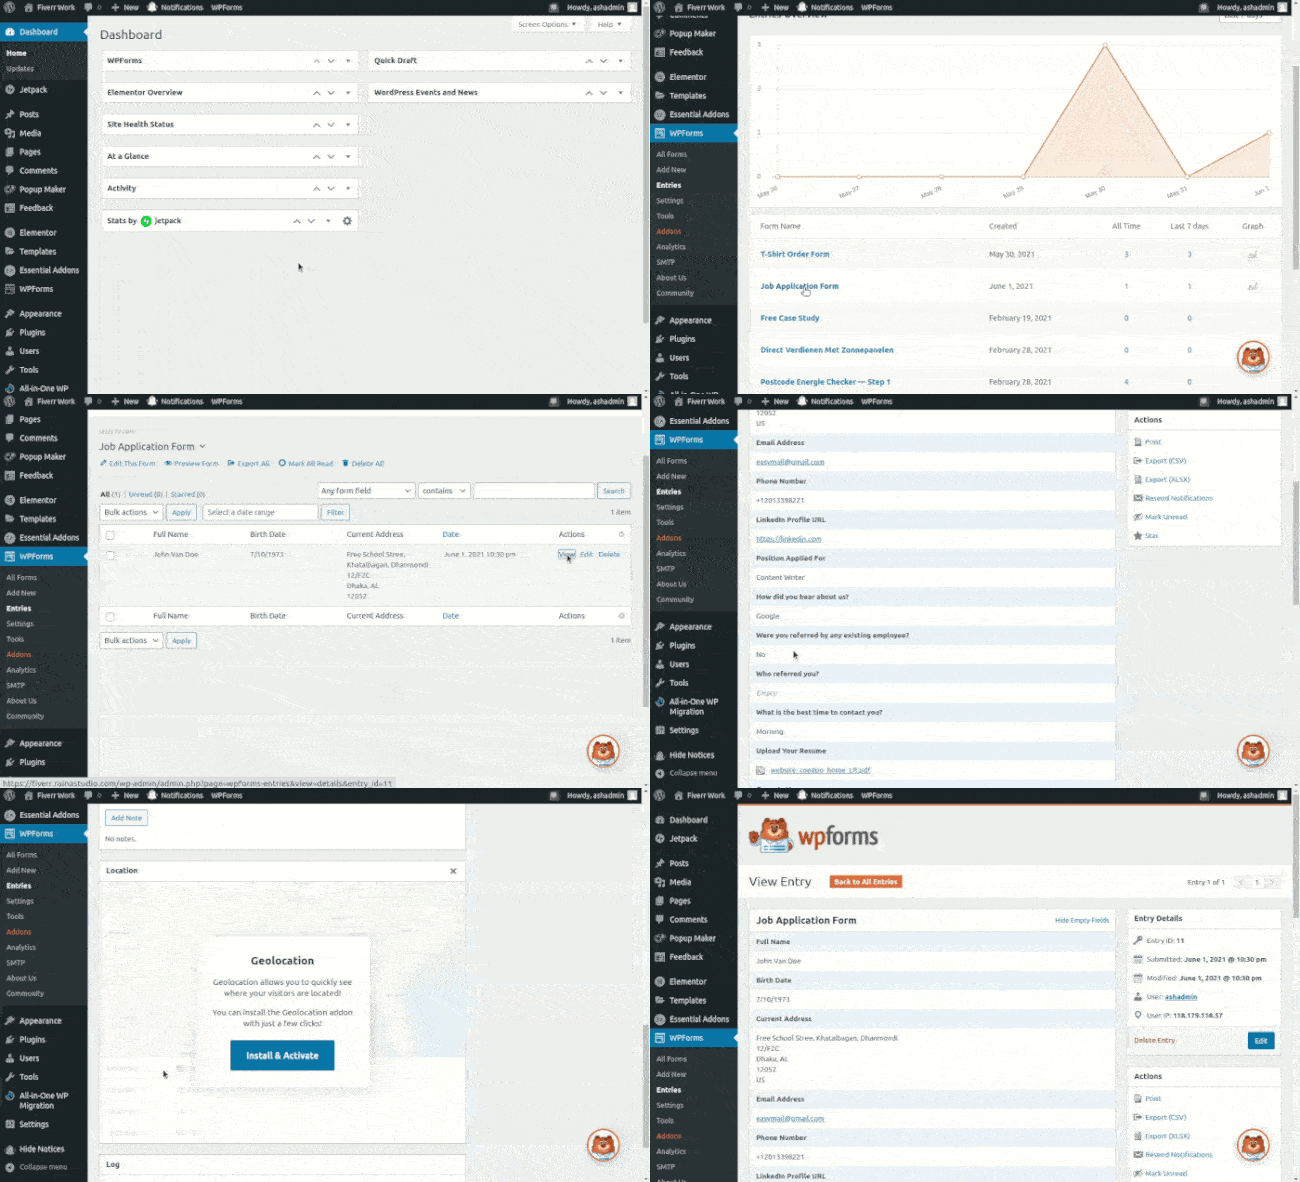
So, it’s time to check the submitted application, right. To check the application you will want to go Dashboard » WPForms » Entries. Here you will find all the form’s entries. If you have more than one you will see them, to check any specific form entries click on that form name.
In our case we will check out the Job Application Form. And notice the image below to check the application listed here.
Thank you for checking out the full article. We are at the end of this blog before leaving I want to ask you to share this post with your friends or colleague if you found this helpful.
Comment below if you have any question or suggestion about our blog. We appreciate your contribution.
