Are you looking for the best and easiest way to create a (custom) WordPress user registration form? If yes, then your hunt meets an end here.
Now, there are primarily two ways to create a custom user registration form in WordPress. One is manual, and the other one is by using a plugin. The manual method is quite tiresome and requires a lot of time. But using a plugin – is the most popular and efficient way.
So, here in this article, you’ll see the best user registration form plugin and learn why it is the best. Also, you will learn the method of crafting a beautiful customized user registration form for your website.
So, let’s begin, shall we?
How to Create a WordPress User Registration Form Step by Step
The very first step in creating a custom user registration form is to select the right plugin – “A registration form builder and customizer plugin.”
But as the plugin market is overflowing with hundreds of such, it’s pretty hectic to find the right one. So to help you in the process, we have picked up – WPForms. Now, let’s see why it is the best and stays ahead against all its competitors in the market.
- WPForms offer the necessary functionalities to create different types of registration forms.
- It has a vast range of customization features for the registration forms.
- This plugin can also customize the login form.
- It allows payment system integration with the registration form.
- It provides instant notification for each entry.
- Finally, apart from these, you can create, customize and manage contact forms, marketing campaign forms, surveys, newsletter forms, and many other types of forms with WPForms.
- A great bundle of addons comes with WPForms. That offers features like geolocating, spam protection, lead generator, form locker, and much more.
So, from here, we can conclude that WPForms provides comprehensive registration form building and customization support.
However, as you’re running a website, for sure, you’ll need a contact form, newsletter form, payment form, and some other types of marketing forms or survey kits. Luckily, if you get WPForms, you’ll get all of these, including advanced customizing options in one plugin.
Thus, why using different plugins for different features while you’re getting them all at once? And remember, using a lot of plugins is not a good thing for your site’s health.
Step 1: Installation of the WPForms Plugin
To get started first, you need to get the WPForms plugin, then install and activate it. Next, you need to verify its license. See how to get, install, activate, and verify the plugin here.
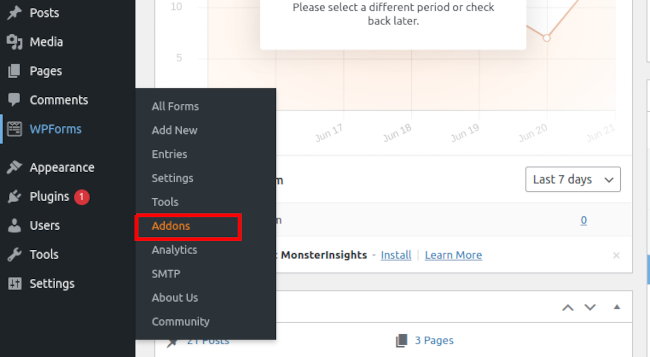
Once you have installed, activated, and verified the plugin – head over to WPForms » Addons on your WordPress Dashboard.
Then scroll down, find the User Registration Addon on that page. And click Install Addon.
Step 2: Creating the User Registration Form
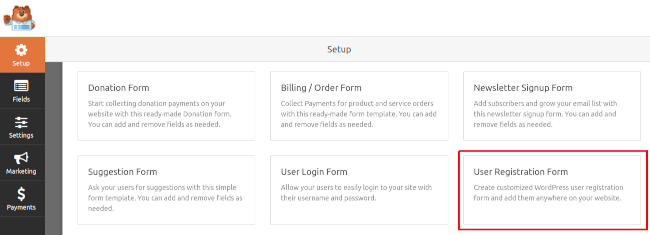
To create the form, once the addon is activated, navigate to WPForms » Add New.
Once again, scroll down a bit, and you’ll see the User Registration Form. Hover over it and click on Create a User Registration Form.
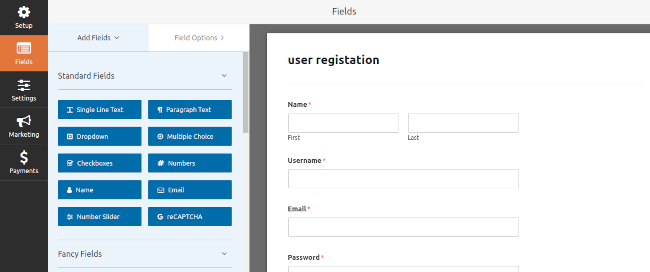
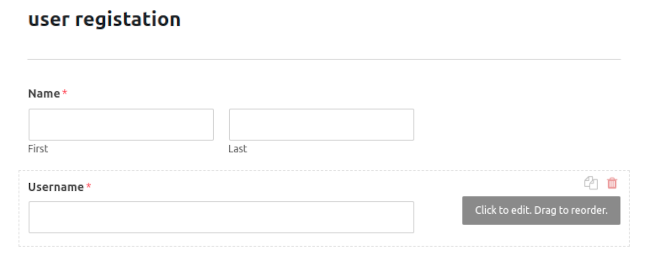
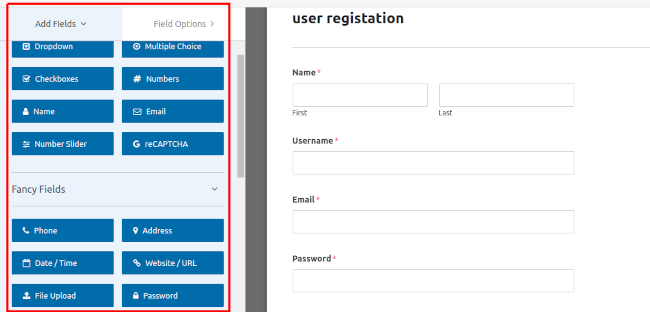
Now, you will see the form builder. On the right, you’ll see the form and, on the left – the form fields that can be added to it.
On the right, hover over to each of those fields to edit, delete or drag them up and down to change their position.
To add a new field, scroll down and choose your desired field from the left. Then either click on it or drag it to the left to add the field to the form.
Step 3: Customizing the Form
To customize the registration form setting, head over to the left side of the page and click on Settings. It will then open up this window.
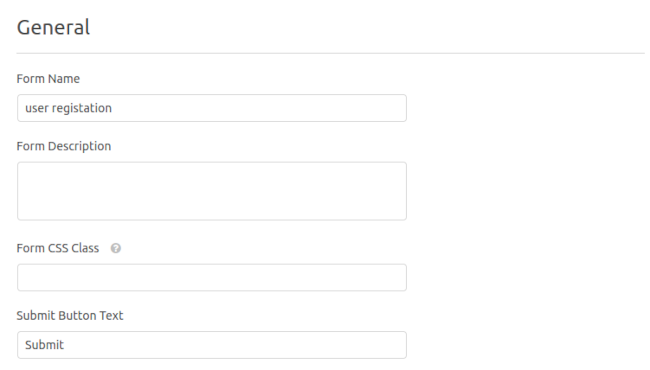
Here you will see four different basic options to customize your form – General, Notifications, Confirmations, User Registrations.
First, click on General. Then edit the form name, submit processing text and add custom CSS classes (if you have). Also, you have some checkboxes to enable/disable AJAX page loading, anti-spam protection, and several others.
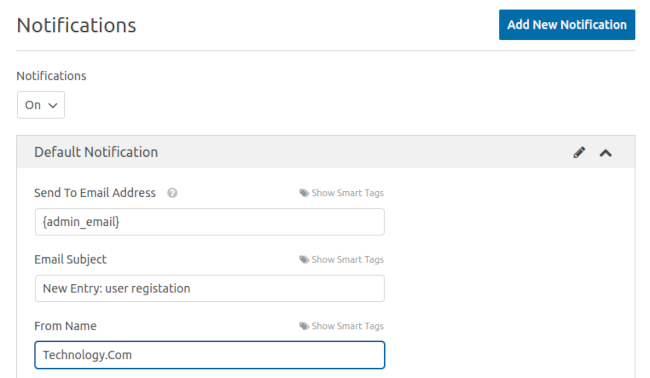
Now, click on Notifications. It is a place to configure the notifications you’ll receive by default if a user registers through this form. You can turn on or off the notification feature. You can also add new notification by clicking on Add New Notification. You can edit the notification email details from the fields below. Plus, you have an option to add conditional logic to the notification.
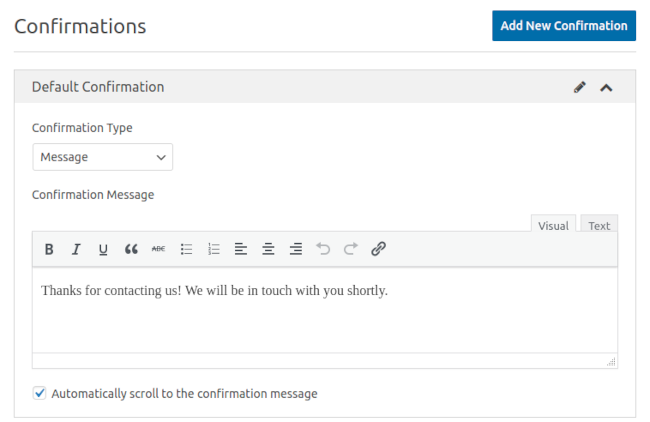
Head over to the Confirmation this time. This option allows you to set a message for the user after he/she completes the registration. You can change the confirmation type to a specific page URL or your homepage.
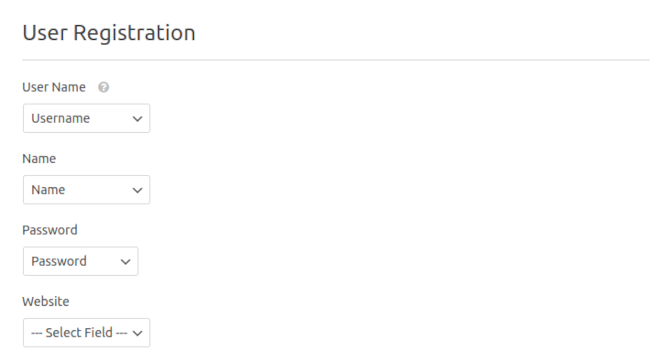
On the User Registration Option, you can set the default value for a field. (if the field info isn’t set or provided). Next, scroll down and, you’ll see a dropdown menu to set the user role for the newly registered users.
After assigning the role for the users, you can choose whether a user will receive an email containing the credentials or not by ticking on the checkbox with “Send email to the user containing account information.” Also, you can choose whether, as an admin, you’ll receive an email or not upon new registration by ticking on the next checkbox.
The next checkbox contains – “Enable user activation.” If you check this box, the user will then require to verify their email address to register with your website. Now, if you want to manually approve a user, then from the dropdown, under the checkbox, select Manual Approval.
The last dropdown field – User Activation Confirmation Page allows you to choose a page that you want your user to see after clicking on the activation link.
Set any of those above options the way you want or the way you prefer. If you want those fields/options to be the default way, then leave those fields as-is.
Finally, to save all the changes you made, click Save at the top of the page. And, you’re done.
Now, close the builder and enjoy. Your registration form is ready to serve your users.
You can copy the form shortcode and paste into any page. That’s it!
Several Words More
We hope this article helped you learn how to create a registration form for your WordPress website. If you, by the way, have any queries, suggestions, or questions, then feel free to let us know in the comment section.
And yeah, check out this article on – How to Login to WordPress Admin Dashboard.







One thought on “How to Create a WordPress User Registration Form Easily”
Hi Sir, thank you so much for sharing the best and easiest way to create a custom WordPress user registration form. The step-by-step guidance helps a lot to learn the process.