Do you want to migrate WordPress website from one to another?
Eventually, while making use of WordPress, you’ll possibly run into a scenario in which you need to migrate or clone a WordPress site. You could require a secure environment to check new features in, or probably you’re planning to relocate your website to a new host.
The concern after that comes to be … exactly how do you ensure the migration process goes off easily?
Well, that’s is what we are going to help you today with this post. We will make sure to do the migration in the easiest way possible. And will share step by step with screenshot so that you don’t miss a single point.
Before starting the first step of this post, we want to let you know in our previous blog post we shared something very interesting about contact form. You might find out them useful.
- How to Connect WordPress Contact Form to Zoho CRM
- How to Add Contact Form Entry to Google Sheets Automatically
- How to Create a Contact Form with File Upload Option in WordPress
Let’s focus on the tutorial now.
Migrate WordPress Website in 5 Minutes — An Easy Step by Step Guide
In a client project we created a squeeze or landing page with optin form in our hosting. When it was completed we had to migrate or move it to the client’s Bluehost hosting.
Think the website we created is a full funnel website with 3 pages and the domain name is EXAMPLEA.COM that is hosted in our hosting. EXAMPLEB.COM is a fresh WordPress installed website in client’s hosting.
So, we can say we are migrating EXAMPLEA.COM to EXAMPLEB.COM. Hope it makes sense. We are going to do this job is two steps. In the first step, we will install a WordPress plugin to get a full backup of EXAMPLEA. In the second step we will download and restore the backup file into the EXAMPLEB.
Step 1: Install All-in-One WP Migration Plugin
This plugin takes the full backup including all you got in the website. You name it database, media files, WordPress files. You do not have to have technical knowledge to create WordPress website backup using this plugin.
The plugin has over 3 million installs and more than five thousands five stars review. You are understanding the value of this plugin now. Take a look at this plugin here.
Some of the features of this plugin are premium now. For example, with the free version you can not restore the file that is above 600MB or something. There are some limitations. But they also have to make some money right. So you can go a head.
Now let’s take the action. Go to your website’s Dashboard > Plugins > Add New. In the right hand side you got a Search plugins… search box. Type the plugin name there and you will see the plugin in a moment in the list.
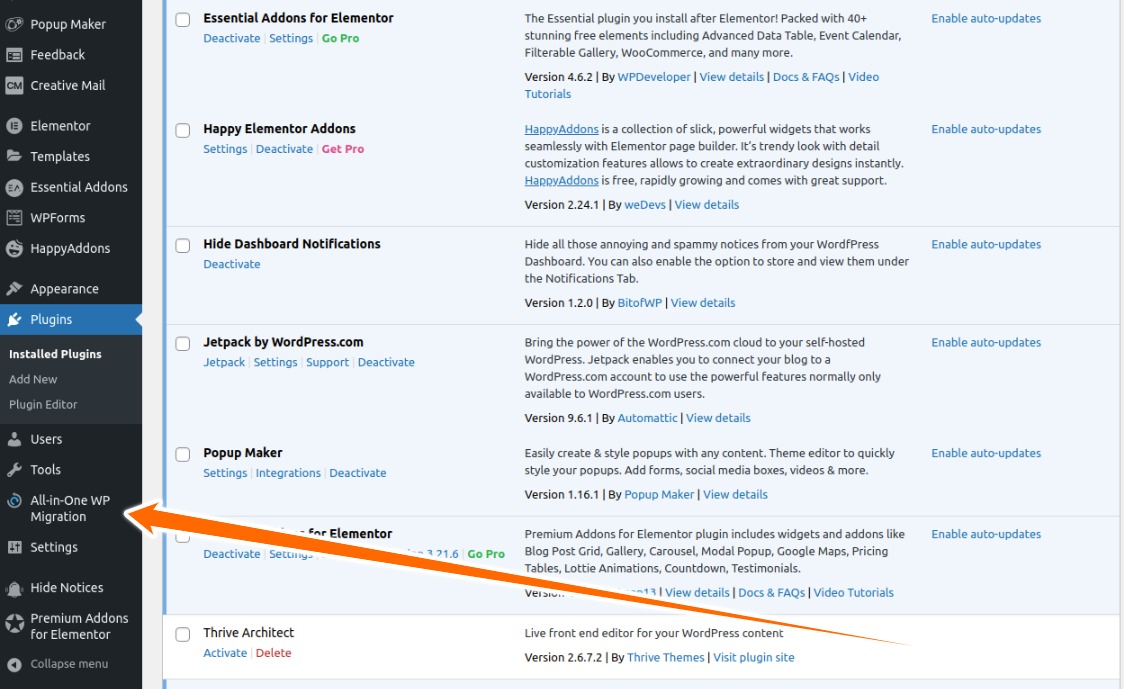
Install and activate the plugin. You will see the plugin menu in the right hand admin menu area. Check out the following screenshot.
All-in-One WP Migration Plugin Admin Menu
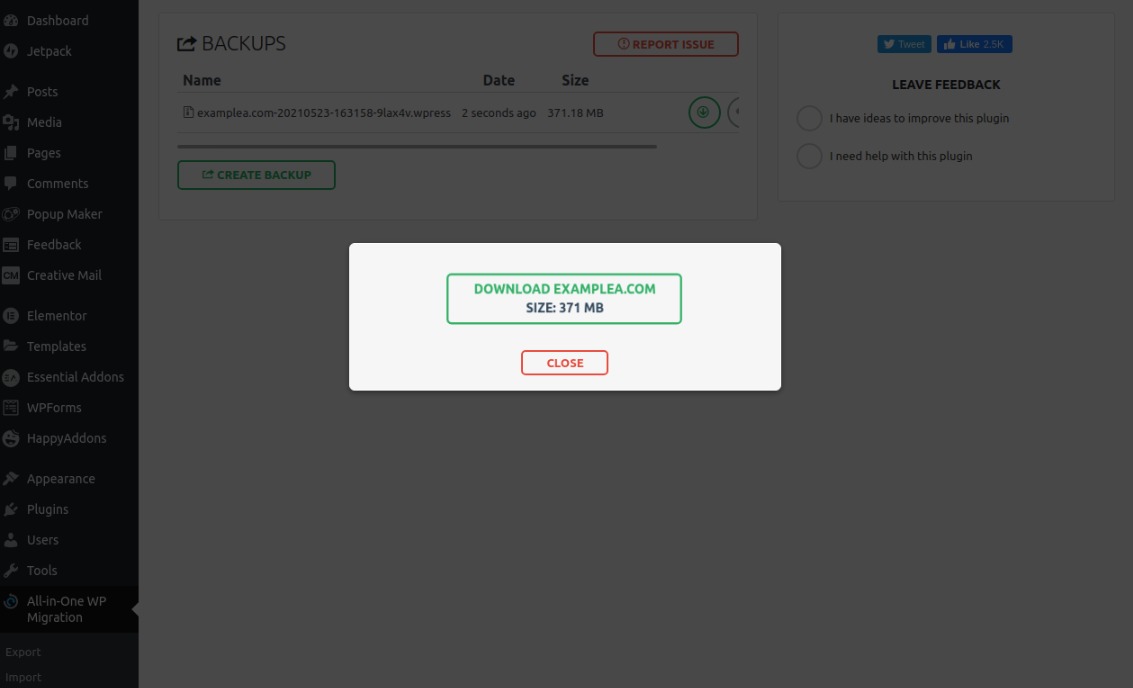
There is a submenu called Backups under the main menu. Go and hit the submenu. On this page we will see existing backup here. As we do not have one we click on the green create backup button.
As soon as you hit the button it will start taking the backup. After taking the backup it will show the download button to download the backup. Download it to your PC.
Download Backup Message
Step 2: Restore the Backup File to the Target Website
As our target website is EXAMPLEB. We login to the WordPress Dashboard or administrative area of this website. To restore the downloaded file we will want to install the same plugin on this website as well.
When you done installing the plugin go to Import submenu of All-in-One WP Migration plugin. Here we import our downloaded file. Note that based on your server configuration maximum file upload size will be declared there.
In our case, maximum upload file size: 64 MB but the backup file size is 371 MB. There is a blog post written by the plugin author on how to increase maximum upload file size. They mentioned 4 solutions.
The easy solution is to use one of the extensions for this plugin. The extension has two options to choose from, free and premium. Using the the free one we can increase upload file size up to 512 MB.
Let’s install and active the plugin extension. Great we got the 512 MB maximum file size.
File Importing Area
We drag & dropped the backup file and it took 1 minutes 45 seconds to upload. Now go to the Backup page. You will see the uploaded file here. Now we click on the restore button.
Restore Backup File Button
Oops! As soon as we click on the restore button it is saying, “Restore”functionality is available in a paid extension”. That is cost around 70 bucks. You can get the extension to keep using the latest version of this plugin, then install and restore the file.
If you do not have that budget then you can use the older version which is 6.7 of their plugin. In that version the restore functionality for free. The version is not available on WordPress repository to download but you can Google or [thrive_2step id=’9278′]download it from here[/thrive_2step].
Note that you will need to deactivate and delete the previous version including the extension we installed to increase maximum upload file size. Then install the one you got in your email.
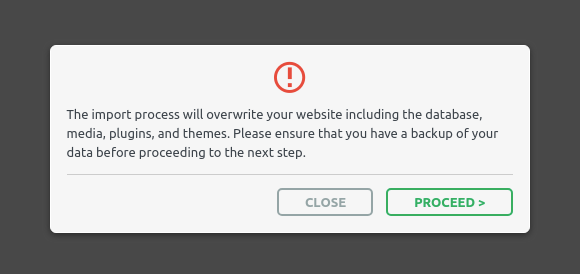
Now you will be able to restore the uploaded file using this one as well as you will also can import up to 10 GB backup file. That is huge right! Click on restore button to complete the migration. As soon as you click, a lightbox will prompt with proceed button. To finish the process hit the button.
Restore the Uploaded File
We are at the end of this tutorial post. If you find this article helpful show your love sharing it with your friends and family. Comment below if you have any thought regarding this post.
Do not worry if you are not a techie person. We got your back, here is a WordPress website migration service designed for you. That will cost $25 USD only. Order it and get done your job within an hour.


