


Are you looking for a way to add a simple order form to your WordPress site?
ARForms is an easy-to-use online form creator plugin for WordPress that integrates with PayPal payments and others.
Creating an order form is easy, and you can customize it as much as you need.
A form on your website can also be configured to take customer order information and accept payments later.
We’ll show you in this article how to make a simple order form that accepts online payments.
What is the process for creating an order form on my website?
The first step is to find the best WordPress Form Builder plugin for creating dynamic forms with responsive and customizable styles for your customers. Among all Form-builder plugins, ARForms has the best feature set. By adding ARForms to your WordPress site, you will be able to create forms in any niche you can imagine using ready-made templates, predefined form elements, and many more.
An Easy Order Form with Online Payments
Does your organization accept donations? If you need to collect orders, maybe you should create an order form for clothes, a catering inquiry form, or any other type of order form.
A template for an online order form can be used to take payments for either digital or physical products.
In this article, we’re going to show you how to create a WordPress order form that accepts PayPal and other payments. In other words, if you want to take online payments through your web-based order form, this is where you should go.

Step 1: Set Up a Simple Order Form in WordPress
Would you like to know how to create an order form online? Installation and activation of the ARForms plugin are the first steps. Check out this step-by-step guide on how to install a plugin in WordPress for more information. Next, go to ARForms » Add New Form to create a new form.
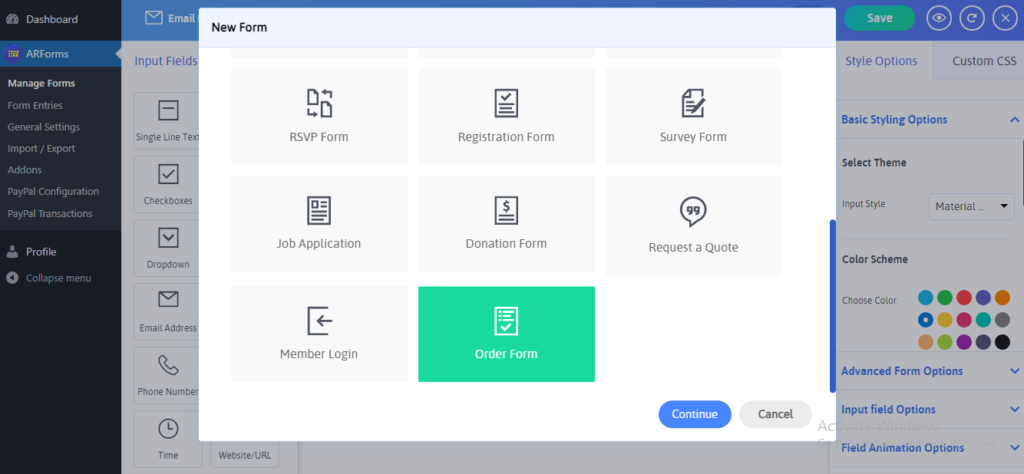
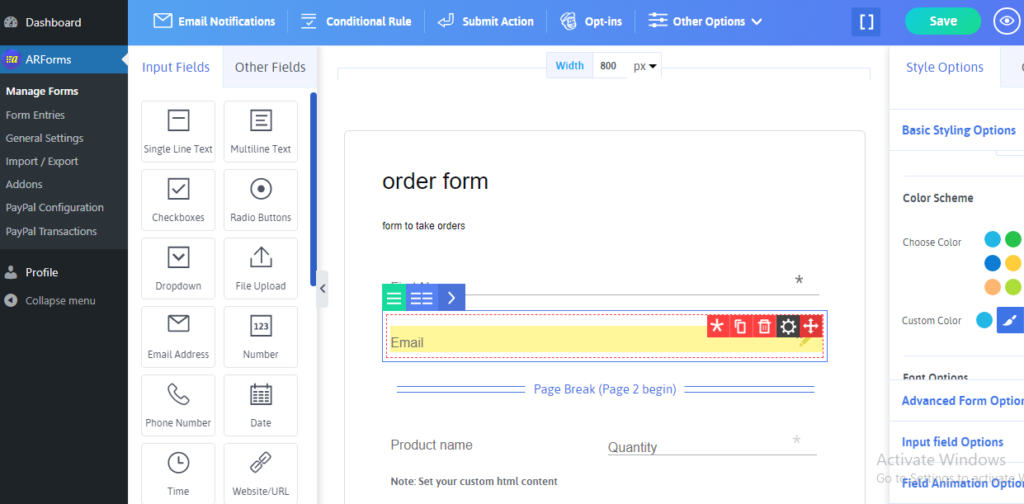
On the order form creator’s setup screen, type a name for your form and select a template. You may also wish to modify the items that you are able to order.
Along with your items, you can upload images so your customers can see what they’re getting.
By dragging fields from the left to the right, we have created a simple drag and drop form builder that lets you easily add additional fields to your order form. Once you’ve finished, click Save.
Step 2: Customizing Form Notifications
Your simple order form requires two settings to be configured. Let’s start with Notifications. When a form is submitted, notifications are a great way to send a notification via email.
Form notifications can be sent to yourself via email, which ARForms does automatically unless you disable them. The Send to Email Address field lets you add an email address for a member of your team to receive notifications.
Then click the Notifications tab under the Settings tab to begin.
You will now need to specify which email address will be notified when a new order is placed.
Set up the email settings to include the email address of the person who filled out your online order form.
The email address entered on the order form must be clicked so ARForms can send a notification.
If this email is going to someone other than yourself, make sure you include a personalized message.
With these fields in place, you can be sure that whoever receives the email notification knows exactly what it is and who sent it.
See Also: 15 Places to Add Opt-in Form for Higher Conversion Rate
Step 3: Personalize Your Form Confirmations
In the second setting, you will configure the form confirmations. When a customer submits an order form, a confirmation message appears to them.
The following confirmation types are available:
- Redirecting (Go to specific URL): Customers can be redirected to a different website using this option.
- Show Thank You Page: Customers will be taken to a thank-you page on your site with this confirmation type.
- Message after submission: A confirmation message is the default under ARForms. A simple message will appear when a customer submits an order form, informing them that their form was submitted.
You can customize the message users will see after submitting an order with ARForms by setting up a simple form confirmation.
Decide what type of confirmation you’d like to create. We’ll use a message for an example.
When you’re done, customize the confirmation message according to your preferences, and click Save.
If you collect orders online, you can also send an email confirmation when you complete the order form.
Step 4: Configure Your Payment Options
Your payment gateway provider will allow you to collect online payments from your customers once you have configured the payment settings for your order form.
Payments can be made through a number of integrations with common payment processors. For accepting payments, the plugin integrates with payment processors such as PayPal, PayPal Pro, PayFast, RazorPay, Stripe, etc. Adding more than one payment option to your order form is an excellent way to reduce abandoned orders.

You must first install and activate the correct payment addon in order to configure payment information settings on your order form.
Visit our Documentation to learn how to install and use the PayPal addon. Install and use the Stripe add-on using similar instructions here if you want to use Stripe.
When you’ve completed this step, click the Payments tab in the Form Editor.
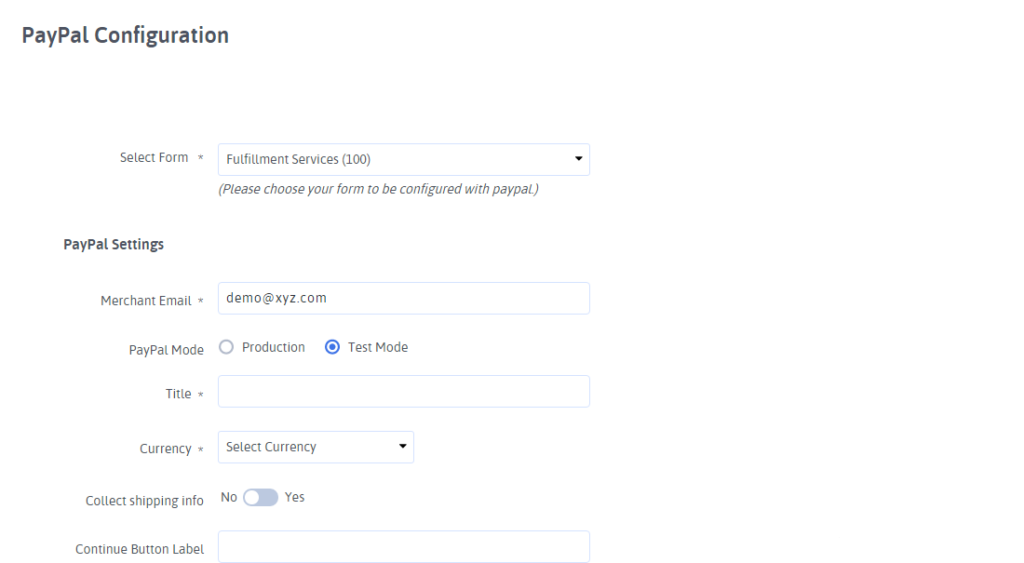
We will set up PayPal as our example payment processor.
When you click PayPal, you’ll need to enter your PayPal email address, select the Production mode, then choose Products and Services, and adjust other settings as necessary.
You can now save any changes to the payment settings once you’ve finished configuring them. You can now add a simple order form to your site.
Step 5: Insert Your Simple Order Form Onto Your Website
The ARForms feature allows you to place your forms on your blog posts, pages, and sidebars, among other places.
To begin, let’s examine the most commonly used post/page embed option.
The first step is to create a new post or page in WordPress. You’ll then need to click the Add Form icon within the first block.
You will see the ARForms widget inside the block. Select one of the forms you’ve already created to insert into your page. Click on the order form you created.
You will then see your form on your website, and you will be able to accept orders from your customers.
On your website, you are now able to view your published order form in real-time. The price of items changes automatically when you select them.
One Last Thought
And there you have it! You now know how to create a simple order form in WordPress that accepts online payments to accept orders from your users and grow your business. Thank you for the reading this article and request all to share it on social media platforms to show your love & support.

