

Hi there! If you are in search of an easy plugin to launch or promote your own site, Sticky Genesis Topbar can be the right choice for you. You may ask “why?” It’s very simple to install and run. This plugin adds an area before Genesis header and a meta box or section to the Genesis Theme Settings page.
By using this, you can add or modify the text, button text, button URL, and social media icons for Topbar. You can also remove the topbar by checking a checkbox in this section. You can use all of the features smoothly. Now you may ask “how to install?” Installing Sticky Genesis Topbar is very simple and easy.
And you will be happier to know that, it’s absolutely free. Wanna take a tour to enjoy the full amusement of this plugin? Great! Now follow me to install.
How to install Sticky Genesis Topbar
The installation process of this plugin can be done by following some simple and easy steps. But before installing this, you must have the Genesis framework installed with an active Genesis child theme.
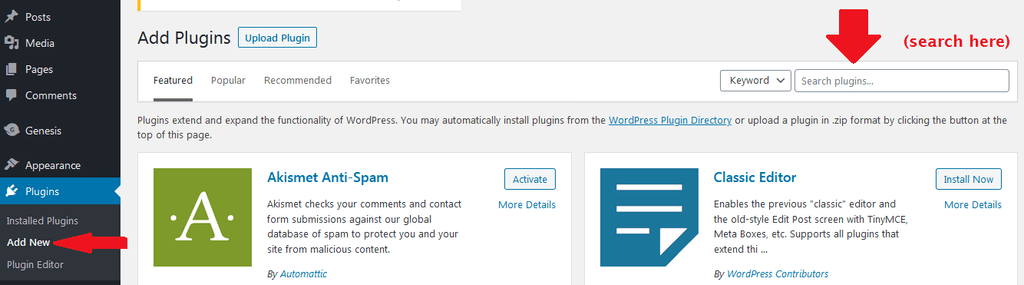
Step one: Upload the entire genesis-topbar or install directly by searching in Plugins
To install the sticky genesis topbar to your site, at first you need to upload the entire genesis-topbar folder to the /wp-content/plugins/ directory or install directly by searching in Plugins > Add New. Then you need to search it by clicking in the search box.
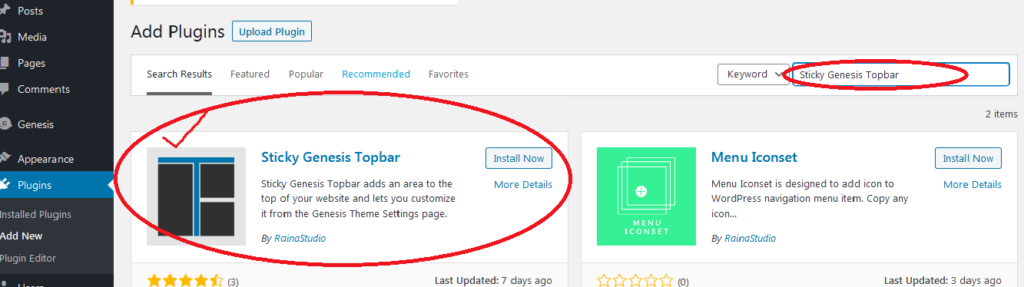
Step two: Type the name of your desired plugin and search
In the next step, you have to type Sticky Genesis Topbar in the search box. Then your desired plugin will be shown on your screen.

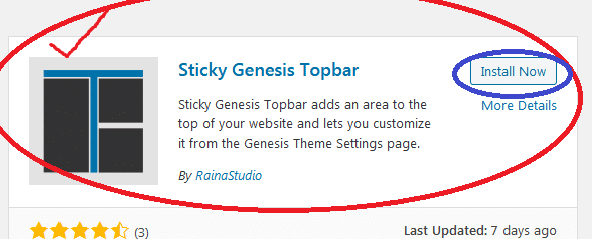
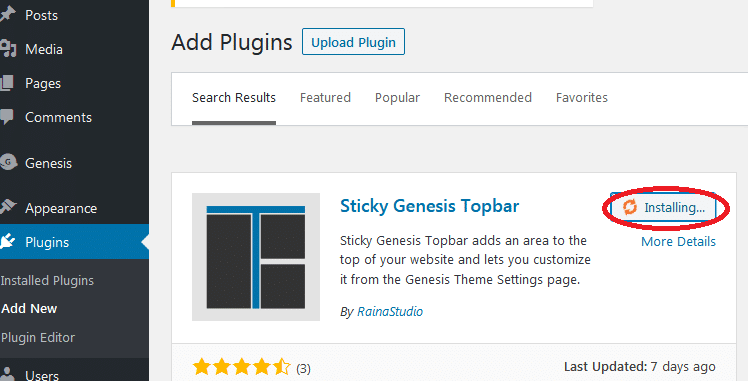
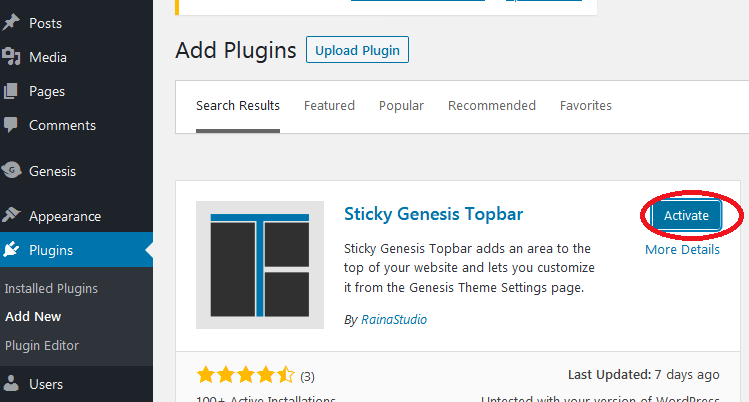
Step three: Click the install button
Now, you may see the install now button in the right corner. Click on it. Installing will be in progress.
Step four: Click on activate button
After installing the plugin, you may find an activate button in the right corner. Click to activate your plugin.
Activated ? Congratulations! You’ve just installed the Sticky Genesis Topbar. Now your plugin is ready to work.

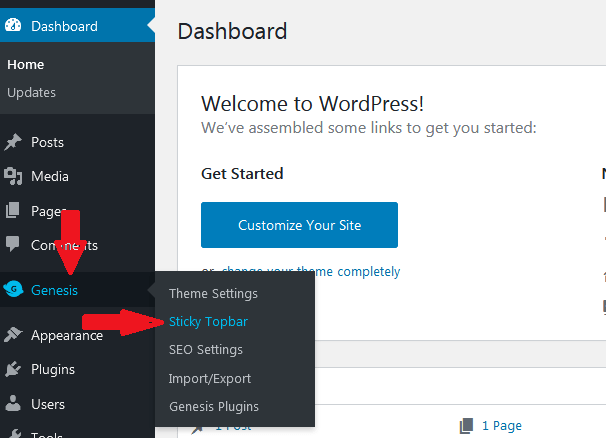
How to use
Your plugin is ready to work now. Go to the Genesis Theme Setting menu. You’ll see the submenu Sticky Topbar. You may add or modify content for your topbar from the meta fields.
After clicking the submenu, you will be shown the Topbar Settings.
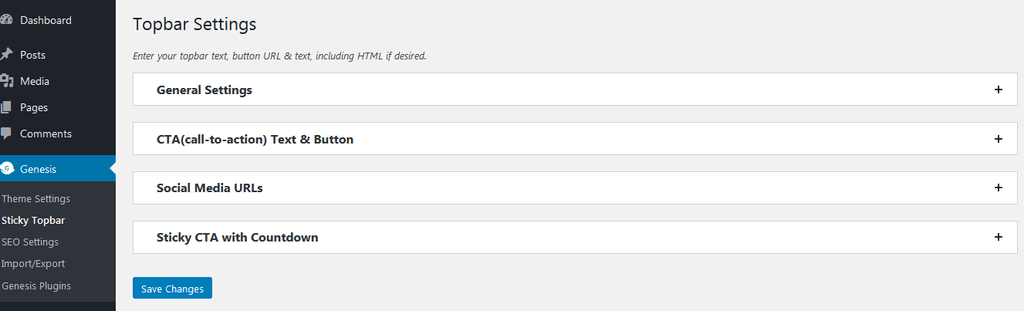
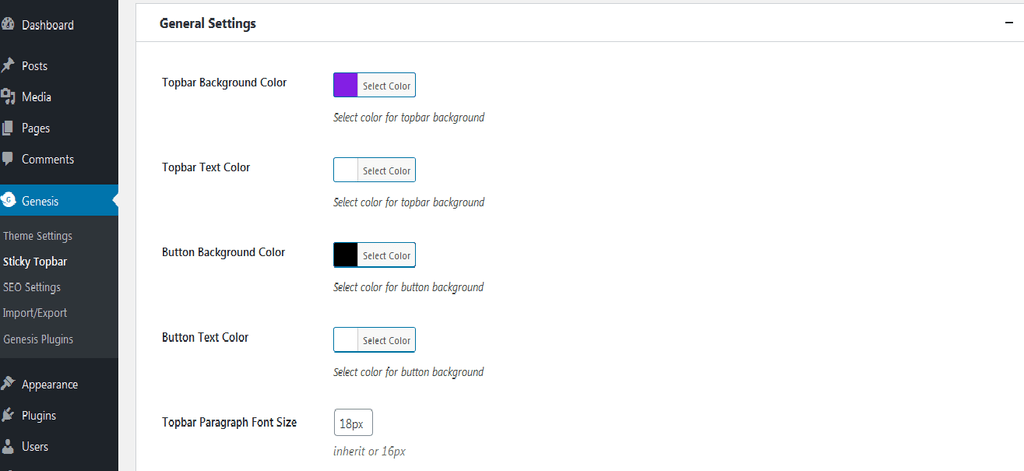
Now you can change the general settings by clicking on it. You may change the Topbar Background Color, Topbar Text Color, Button Background Color, Button Text Colour, Topbar Paragraph Font Size and so on.
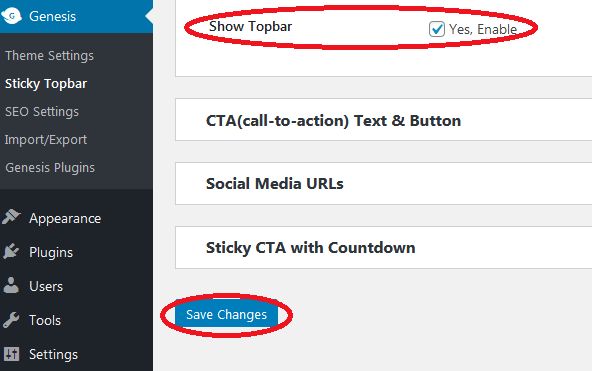
If you are done, don’t forget to enable Show Topbar and save.
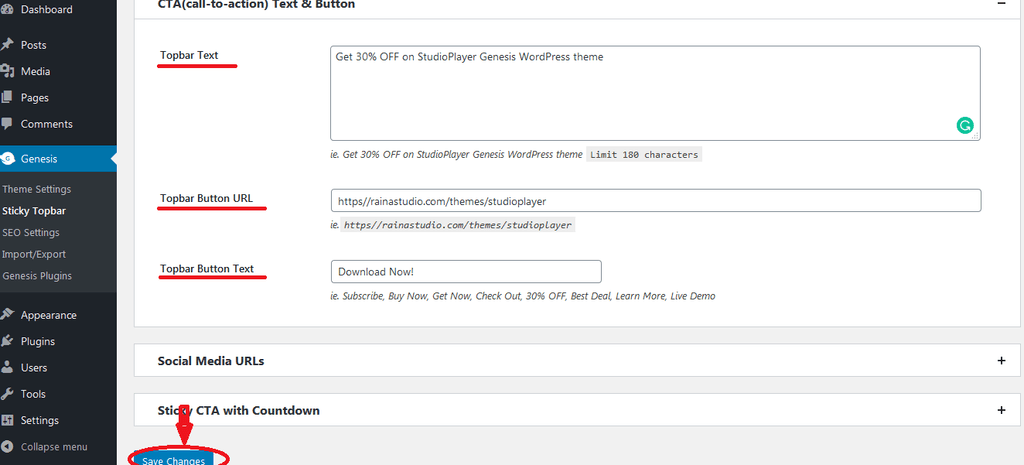
Then from the CTA (call to action) Text & Button, you can change Topbar Text, Topbar Button URL, Topbar Button Text. Don’t forget to save.
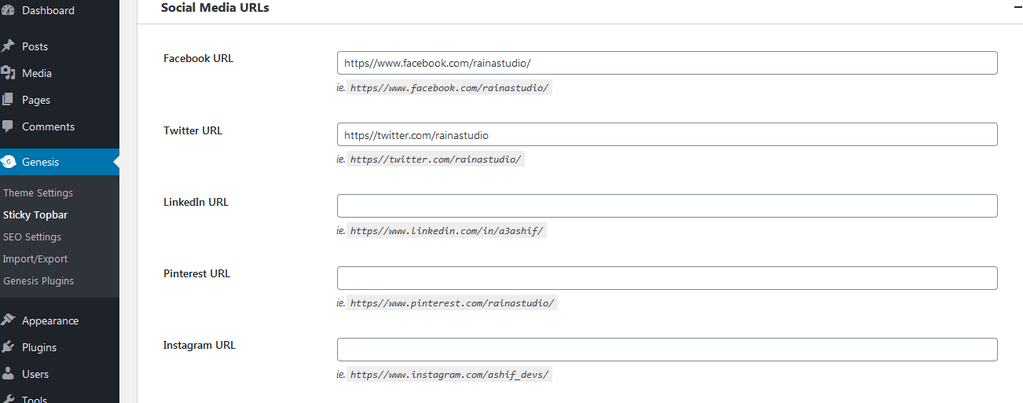
You can also add your social media URLs –
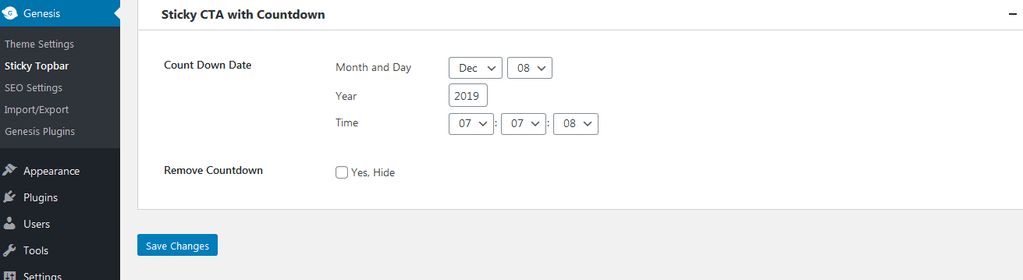
You can set time from Sticky CTA Countdown.
You can frequently make changes whenever it needs. It’s so simple and easy! Isn’t it?
You may now completely rely on Sticky Genesis Topbar for promotion. It’s compatible with any Genesis child theme, whether created by StudioPress or by a third party developer.
More you may need:
- Change Colors of Topbar Elements
- Add Text and Button to Topbar
- Add Social Media Icons to Genesis Topbar
- Add Countdown Timer to Genesis Topbar
- Integrate Subscribe Form to Genesis Topbar

