

Howdy reader! Welcome to another tutorial. In this tutorial we are going to learn to create awesome input range slider. So, open your favorite code editor and start writing.
Step 1: Create Awesome Input Range Slider
Here on this step we will write markup in HTML.
<div class="slider-blovk">
<div class="col block">
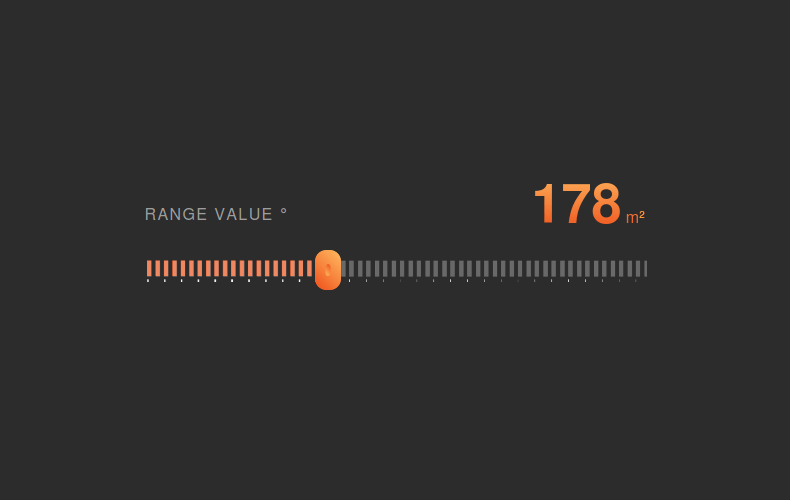
<div class="float-left nabidka-form-label">celková plocha °</div>
<div class="float-right nabidka-form-area"><b id="sliderval">120</b> m<sup>2</sup></div>
</div>
<div class="slidecontainer">
<input type="range" name="celkováplocha" min="1" max="500" value="120" class="slider" id="myRange">
<div class="slider-track"></div>
</div>
</div>
Markup Description: Under the main block called slider-blovk we have added two another child block for 1) showing the current range value and 2) for the range slider.
Step 2: Creating Awesome Input Range Slider
In this step we are going to add CSS.
.slider-blovk {
    width: 100%;
    position: relative;
    margin-bottom: 10vh;
}

.col.block {
    width: 100%;
    position: relative;
    display: flex;
    -moz-box-pack: justify;
    justify-content: space-between;
    align-items: flex-end;
    margin-bottom: 3vh;
    padding: 0 0;
}

.nabidka-form-label {
    text-transform: uppercase;
    color: #9d9c9c;
    font-size: 16px;
    display: block;
    font-weight: 400;
    position: relative;
    text-align: left;
    letter-spacing: 1.4px;
}

.nabidka-form-area {
    text-align: right;
    color: #f9a437;
    background: -webkit-linear-gradient(90deg, #f05a27, #feb05b);
    background-clip: border-box;
    -webkit-background-clip: text;
    -webkit-text-fill-color: transparent;
    display: block;
    line-height: 1;
}

.nabidka-form-area b {
    font-size: 54px;
    font-weight: 700;
}

.nabidka-form-area sup {
    color: #f9a437;
    font-size: 60%;
    -webkit-text-fill-color: initial;
}

.slidecontainer {
    width: 100%;
    position: relative;
}

.slider {
    -webkit-appearance: none;
    appearance: none;
    width: 100%;
    background-image: url(img/ic_mobile_slider_bg.png);
    background-size: contain;
    background-color: transparent;
    background-position: 0% 0%;
    background-size: auto 100%;
    height: 24px;
    outline: none;
    -webkit-transition: .2s;
    transition: opacity .2s;
    position: absolute;
    z-index: 101;
}

.slider::-webkit-slider-thumb {
    -webkit-appearance: none;
    appearance: none;
    cursor: grab;
    height: 40px;
    width: 26px;
    margin-left: -9px;
    margin-top: -9px;
    background-image: url(img/handle.png);
    background-size: contain;
    background-color: transparent;
    border: none;
    position: relative;
    z-index: 101;
}

.slider::-moz-range-thumb {
    cursor: grab;
    height: 40px;
    width: 26px;
    margin-left: -9px;
    margin-top: -9px;
    background-image: url(img/handle.png);
    background-size: contain;
    background-color: transparent;
    border: none;
    position: relative;
    z-index: 101;
}

.slider-track {
    background-image: url(img/ic_mobile_slider_bg_active.png);
    height: 24px;
    background-color: transparent;
    background-position: 0% 0%;
    background-size: auto 100%;
    border-radius: 0;
    left: 2px;
    right: auto;
    position: absolute;
    top: 2px;
    width: 24%;
    z-index: 100;
}
CSS Description: From the first line the CSS for the first block of HTML and following. We need to have 3 pictures in img folder in the same directory of project.
Step 3: Last Step of Creating an Awesome Input Range Slider
In this step, we write some jQuery. Note that you will need to add jQuery library before adding this script.
$('#myRange').on('input', function() {
    text = $('#myRange').val();
    $('#sliderval').html(text);
    fullwidth = (text / 500 * 100);
    $('.slider-track').width(fullwidth + '%');
});
Script Description: On change of input value the background image width value will be changed. As the range value will be changed.
Thank you so much for having interest on this post. Comment if you have any problem.
You will love the following tutorials:

- How to Add Nofollow Tag to a Certain Domain
- How to Add Visitor Counter to Website in PHP
- How to Combine a Background Image and CSS3 Gradient on the Same Element
- How to Popup Genesis eNews Extended Opt-in Form
- How to Add Custom Logo to Genesis Child Theme
- 11 Genesis Framework Hacks for Beginner
- How to Use HTML Form [PHP]
- Starting with WordPress Metafields
- How to Store XML Data to PHP Variable
- How to Make HTML Form Work and Send Mail


One thought on “How to Create Awesome Input Range Slider”
brilliant!
where can I find the 3 images you used?
Thanks!