

Adding topbar in Genesis Framework is not rocket science anymore. Very recently, I have created a plugin called Sticky Genesis Topbar for my personal project. As a member of many WordPress groups,
I found a question, “how to add topbar in Genesis Framework?”. There are many resources to add it to your Genesis child theme. I have tried to make it more simple and tricky.
This is one of the posts of RainaStudio Map 101 blog series. You can check our previous post if this series, how you can add an audio sound to your blog’s about page.
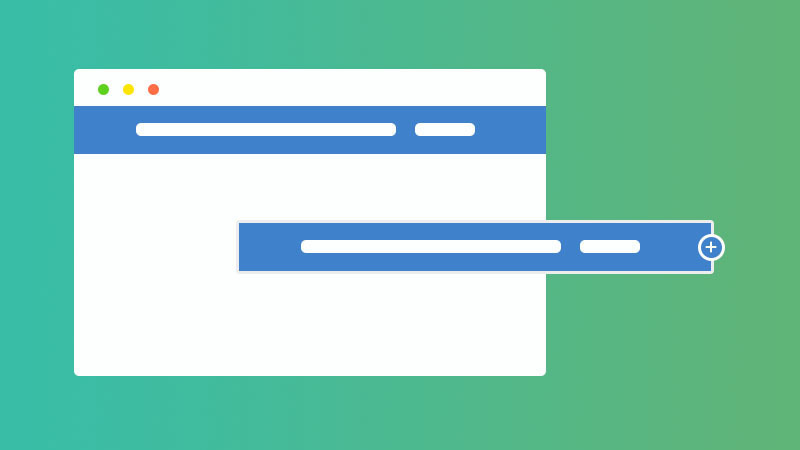
Genesis Tutorial: Add Topbar in Genesis Before Header
In this post, you’ll learn to install a WordPress plugin also. So, let’s move to the next part.
Following screenshots are easy to go through how you will add Sticky Genesis Topbar plugin on your WordPress website and customize or modify all the elements as needed.
Go to your website Dashboard > Plugins > Add New. Write “Sticky Genesis Topbar” in the search field located in right. Click on install and active buttons after appearing the plugin.

Okay, we have done the plugin installation part. Now, visit Dashboard > Genesis > Theme Settings page. On the very top, you’ll find a meta box like the screenshot below.
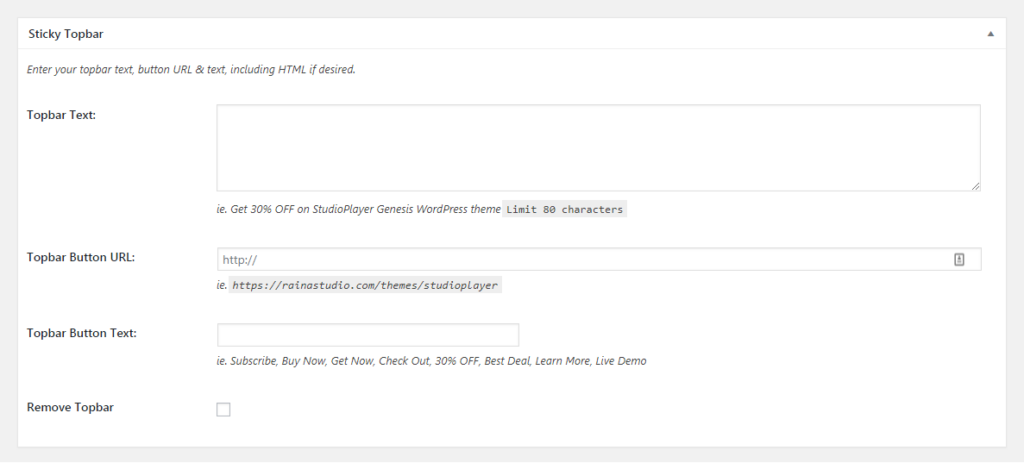

You’ll get four action fields here. If you don’t understand what are they about then following description of those fields is for you.
- Topbar Text: is the field where you can write a title, heading for the top bar. For example, I want to promote Sticky Genesis Topbar WordPress plugin. So, I write in this field, “Check out latest Sticky Genesis Topbar plugin”.
- Topbar Button URL: uses for URL/link. Here you can add any link you want. In my case, I am using this one https://wordpress.org/plugins/topbar-for-genesis/
- Topbar Button Text: is the field uses for CTA text. This text will wrap Topbar Button URL. I add “Download Now!”
- Remove Topbar: is a checkbox. By default, the top bar always shows on top of your website. Checking this filed you can remove or hide top bar.
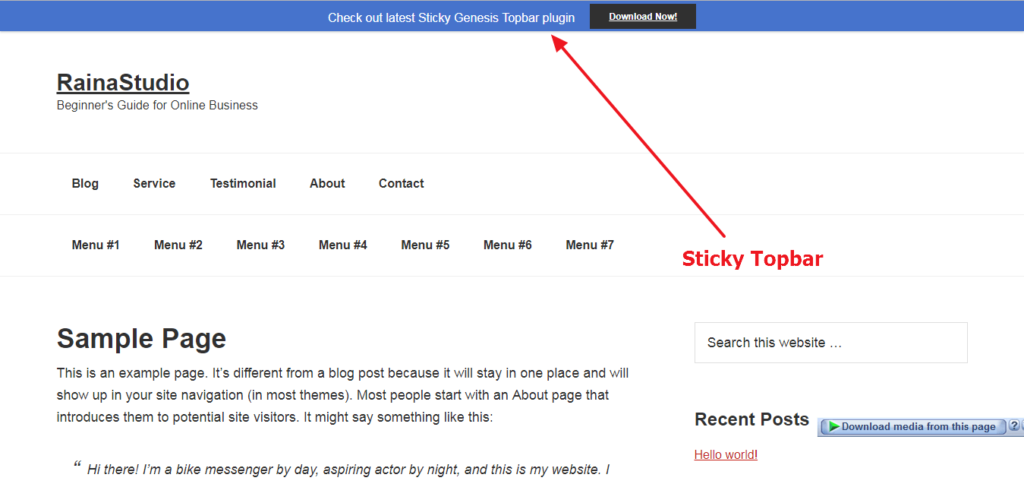
Don’t forget to click “Save Changes” button below on the settings page to update the modification. This is the outcome we achieve.
Conclusion
I make sure to avoid any kind of hard-coding in this tutorial. Some CSS would be required if you want to change font-size, color and for any kind of layout changes.
Comment below for feedback or help. Human really looking for feedback, here I am a human also. 🙂
You will love the following articles:
- How to Install WordPress Plugin
- How to Add an Audio Sound to Blog’s About Page (RainaStudio Map 101)
- How to Easily Add Slider On Home Page in WordPress
- How to Use Advanced Custom Fields on WordPress
- How to Create an Automatic WordPress Backup for Free
- How to Add MailChimp Subscribe Form to WordPress
- How to Disable Comments on WordPress
- How to Regenerate Custom Thumbnail Image Size
- How to Compress and Optimize Image on WordPress
- How to Add Caching Engine to WordPress Website
- How to Enhance Your WordPress Visual Editor
- How to Add Sitemaps to Google Webmaster
- How to Limit WordPress Login Attempts
- How to Secure Your WordPress Website
- How to Create Sitemaps for WordPress Website
- How to Add Google Analytics to WordPress Website
- How to Build an eCommerce Website Using WooCommerce
- How to Add GUTENBERG Visual Editor to WordPress
- How to do WordPress SEO technically (OnPage Guide)
- How to Add a Contact Form to WordPress
- How to STOP Spam Submission on Your Blog
- W3 Total Cache vs WP Super Cache – Which Should You Choose

