

When it comes to a WordPress website and the fact is about the loading speed of the site. Then, it’s very indeed to take action to reduce the loading time as far as possible. Because Page Speed is a major ranking factor on Search engines like Google.
Considering this point, the first thing you can do adding a Caching Engine to your WordPress Website to improves your site performance.
So, in this article, I’m going to show you one of the easiest ways add Caching Engine to WordPress website. But, I think it could be helpful to discuss a little about cache and the importance of cleaning it.
What is Caching and Why You Need to Add Caching Engine to Your WordPress Site?
Caching is a system that stores a static version of your website which allows WordPress to skip running the heavier PHP scripts and improves your website performance.
However, there are a lot of different type of caching solution you can use on your WordPress site.
The true purpose of caching is to speed up your website and improve the overall user experience. Although, sometimes this causes you do not see the changes you make right away which can be frustrating.
But it’s nothing to be worried about. You will just need to clear caches to see your changes. That’s very simple.
So, let’s add Caching Engine to your WordPress Website
However, there are many ways available for caching but here, we’re focusing on the most popular way – WP Super Cache plugin to enable caching on WordPress site.
This plugin is a powerful plugin and comes with many advanced options to improve your site performance.

WP Super Cache Installation
Simply go to the plugin section of your WP Dashboard and click ‘Add New’ which will open the page for plugin installation. Now, search for the plugin in the search bar, it’ll come out.
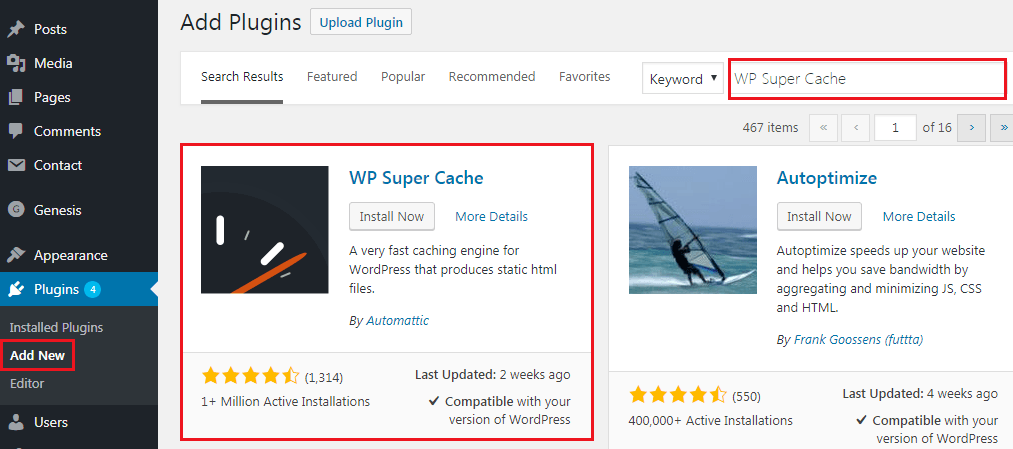 Then, click the ‘Install’ button, it takes a few moment to be installed. After that, click the activate button to make it ready for work.
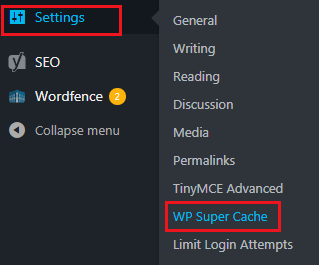 Once, you activate it, you’ll find a new menu option named ‘WP Super Cache’ under your WP ‘Settings’ section. So, click on it to go to the setting page of WP Super Cache.
Setting Up WP Super Cache – Easy Way
You can see there some several tabs, on the first tab you are now.
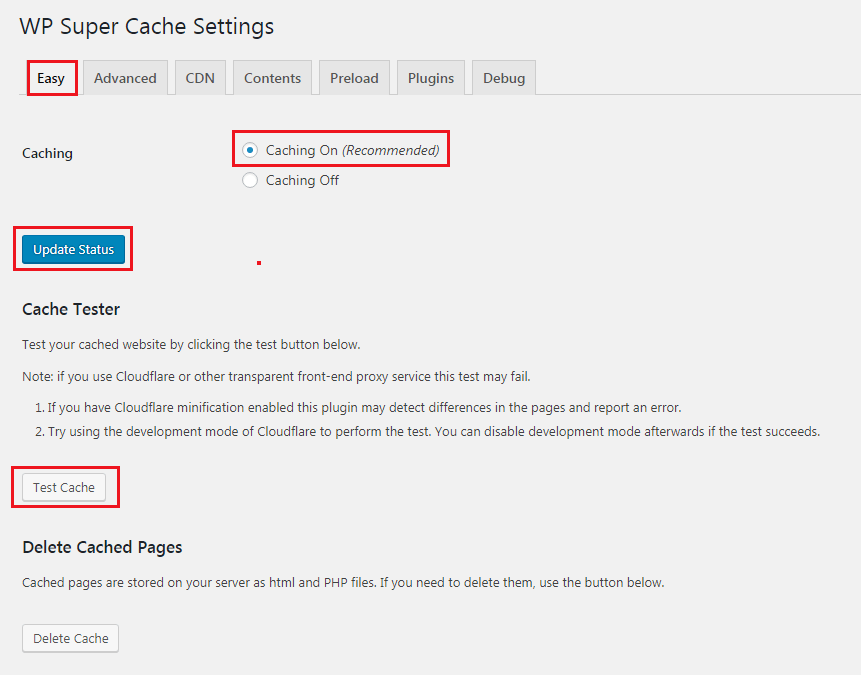 So, first turn on caching option and hit ‘Update Status’. Once, caching is on then click on the test cache button to check if it is working.
Now, WP Super Cache will fetch your WordPress Website twice and will compare the time stamps of both pages. And, if the time stamps match with each other, then it’s working on your site now.
WP Super Cache is a very powerful plugin for WordPress Website with a bunch of useful setting options. But, here I’ll show you the setups that are recommended. So, let’s move on.
WP Super Cache – Advanced Setup
The next tab is for some advanced settings. Here, you can see the Cache Delivery Method is ‘Simple’ by default and also recommended. So, keep it as it has.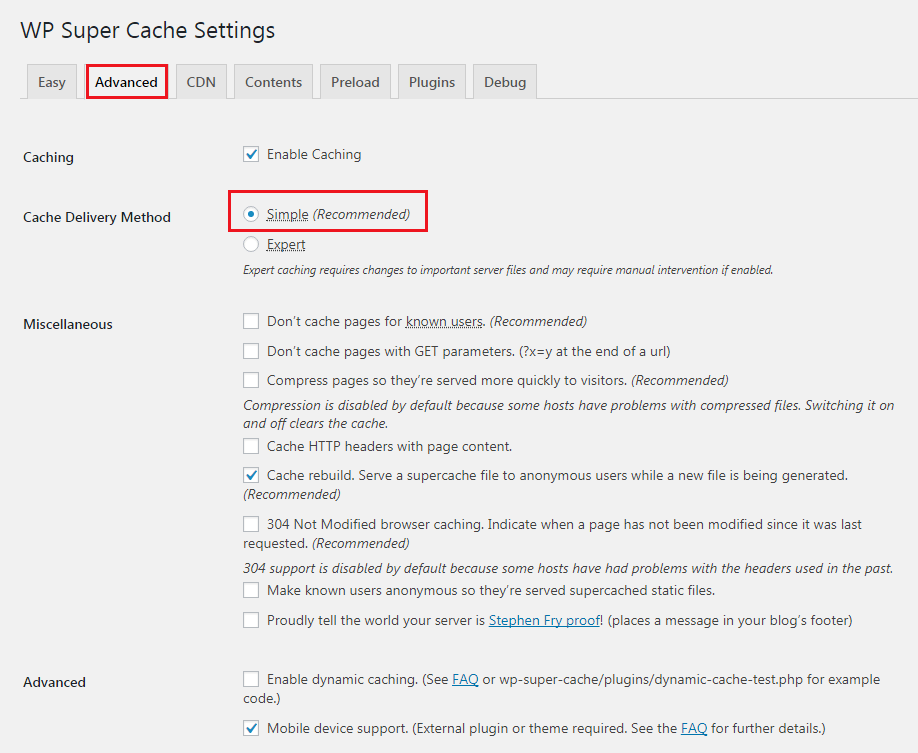
Next, you can see Miscellaneous, where you can some options that you can enable or disable. Such as, ‘Don’t cache pages for known users’ (Recommended), you should enable this option.
Because a known user has already the cache files in his browser. So, simply enable this.
You can also see the option for page compression, which is also recommended because page compression helps pages to load more quickly.
In the Advanced section, you’ll see the option for ‘Mobile Devices Support’ which is already enabled. So, keep it on and scroll to the next. Here, you can see the default cache location is wp-content/cache.
However, you can change the location if you want but there is no problem with default.
 The last section under Advanced setting is ‘Expiry Time & Garbage Location’, where the timer is already set by default for checking for state cached files. You can also see scheduler for doing this checking.
WP Super Cache – CDN Setup
After getting done with advanced settings, it’s the rough end of your WordPress Caching Engine setup. But, if you’ve CDN for your WordPress Website, then there are more for you.
You should know that most of the websites serve different types a lot of static files with each page request like JavaScripts, images, stylesheets, etc. and these files can be served by using a CDN (Content Delivery Network). MaxCDN is one of the best CDN providers.
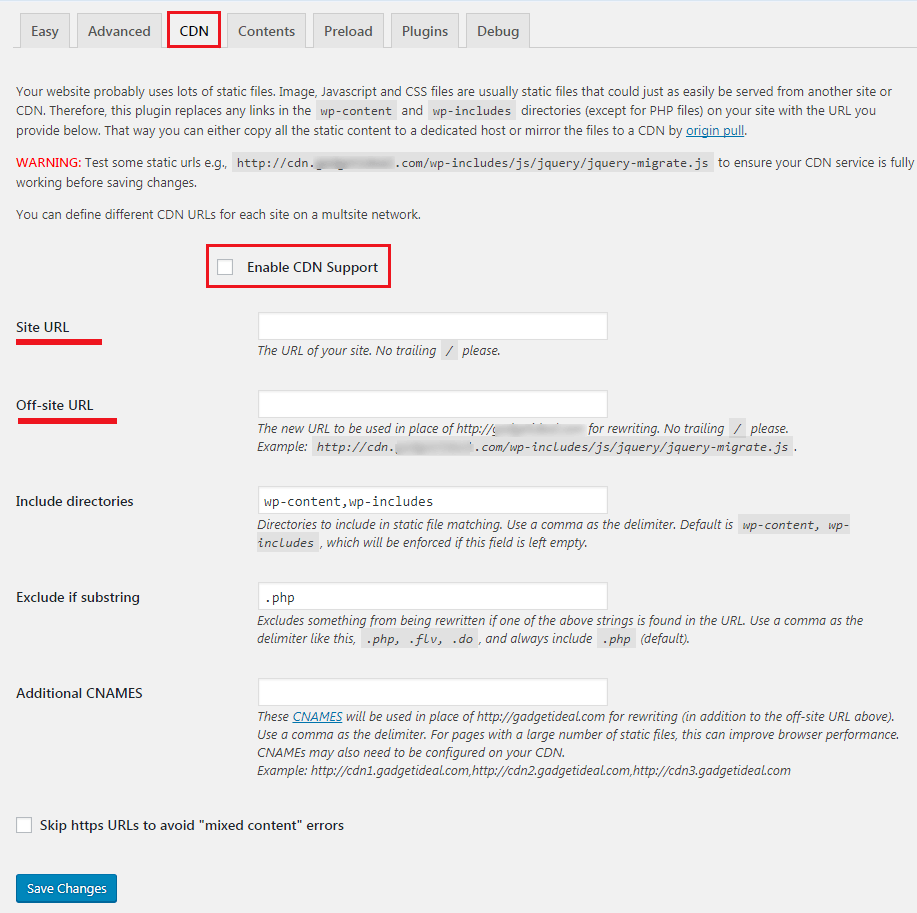 So, first enable the ‘CDN Support Option’, then put your site URL and Off-site URL (which will be the URL of your pull zone). For example, https://cdn.yoursite.com. You can also set an Additional CNAMEs you have created for your pull-zone. For example, https://cdn1.yoursite.com,
After that, simply check the box that said: ” Skip https URLs to avoid ‘mixed content’ errors”. So, now it’s ready for also ready to serve static content from your CDN.
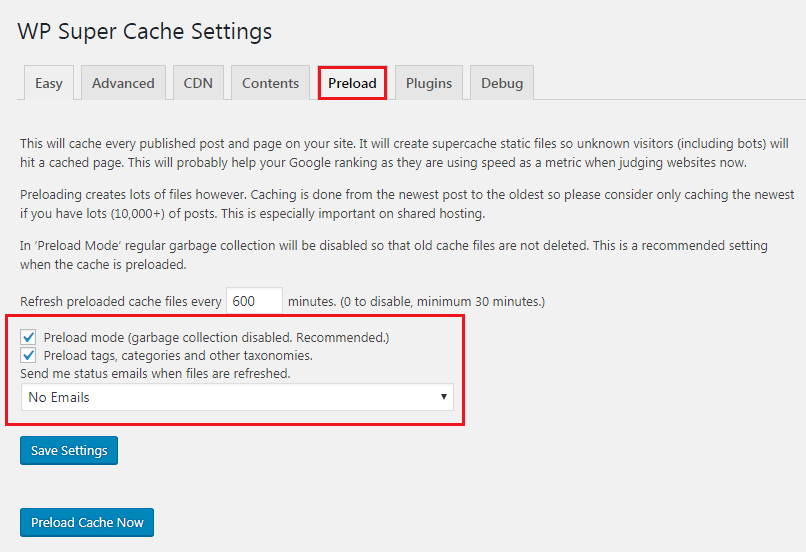
Preload Caching Set Up
Next, go to the ‘Preload’ tab. This preload mode in WP Super Cache allows you to create super cache static files for all of your posts and pages and serve a static website.
 However, this tab is not so important, but sometimes it is. Here below are some reasons –
- If you need to conserve server resources,
- Or, if you serve an old site that is not being updated anymore,
- To improve site speed by serving static content only.
However, there could be many more reasons and situations where you might need to completely disable PHP processes. If it will happen to you, don’t need to be worried about that.
WordPress will work normally and you will still be able to manage your content with WordPress.
Here, the refresh preload cache files options need to set to zero by default. Whether minimum required time is at least 30 minutes. As well as, need to check the preload modes.
Remember, Pre-loading your entire WordPress Website takes some time and consumes a lot of resources on your server. So, you should leave it to 0 if you don’t want your static files to expire ever unless you manually refresh the cache.
That’s it, the Caching Engine integration to your WordPress Website is complete.
You will love the following Articles:
- How to Add TopBar in Genesis Framework (RainaStudio Map 101)
- How to Add an Audio Sound to Blog’s About Page (RainaStudio Map 101)
- How to Easily Add Slider On Home Page in WordPress
- How to Use Advanced Custom Fields on WordPress
- How to Create an Automatic WordPress Backup for Free
- How to Add MailChimp Subscribe Form to WordPress
- How to Disable Comments on WordPress
- How to Regenerate Custom Thumbnail Image Size
- How to Compress and Optimize Image on WordPress
- How to Install WordPress Plugin
- How to Enhance Your WordPress Visual Editor
- How to Add Sitemaps to Google Webmaster
- How to Limit WordPress Login Attempts
- How to Secure Your WordPress Website
- How to Create Sitemaps for WordPress Website
- How to Add Google Analytics to WordPress Website
- How to Build an eCommerce Website Using WooCommerce
- How to Add GUTENBERG Visual Editor to WordPress
- How to do WordPress SEO technically (OnPage Guide)
- How to Add a Contact Form to WordPress
- How to STOP Spam Submission on Your Blog
- W3 Total Cache vs WP Super Cache – Which Should You Choose
- How to Research Competitors Using Semrush Keyword Research Tool
- How to Research Keyword Using Long Tail Pro (Step By Step Guide)
- Ahrefs vs SEMRush vs Long Tail Pro: Best Keyword Research Tool in 2020
- How to Add Nofollow Tag to a Certain Domain
- Thrive Themes vs Genesis Theme Framework: Comprehensive Review
- How to Choose Best Managed WordPress Hosting
- W3 Total Cache vs WP Super Cache – Which Should You Choose
- 15 Reasons You Should Consider Managed WordPress Hosting
- How to Compress and Optimize Image on WordPress
- How to Add GUTENBERG Visual Editor to WordPress
- How to Jetpack Your WordPress Website
Wrap Up
I think you have found this guide helpful and successfully added WP Super Cache to your WordPress site. If you got any problem through the steps, simply let us know. We’ll try our best to help you.
As well as, if you already know any other way adding Caching Engine to WordPress, share your experience with us. We’ll be happy to hear you.


2 thoughts on “How to Add Caching Engine to WordPress Website”
Thank you for such a detailed article!
I exactly need to conserve server resources of my site and was looking for a help.
You are welcome. We are glad you found this article helpful. 🙂