

Custom fields are essential for many developers. Because they allow you to add customized information to post and pages and build tailored solutions for content creation on different types of websites.
Such as, custom fields can be used to include a dedicated menu in the WordPress editor that allows users to add ratings to book reviews. Or, setting an expiration date for the blog posts that you can easily implement with their help.
This feature is as complex as powerful, that’s because many non-developers shy away from it and improvise other solutions instead.
But thankfully, the plugin Advanced Custom Fields makes custom fields available to everyday WordPress users and in this article, I’ll be showing you the way to use it step by step. So, you can get an overview of WordPress custom fields and their capabilities, also in detail how to use the Advanced Custom Fields plugin to get the best out of them to your WordPress site.
Sound’s good? So, let’s get going, have a long way to walk.
What Are Custom Fields?
Basically, custom fields are a form of metadata that can be used to extend posts and pages. As well as, they are very similar to stuff like publishing date, author, category, tag, and other data that are common for many WordPress content types.
Actually, custom fields are the single most advanced & powerful feature for extending WordPress posts and pages, which allow you to include additional information of any kind to your content. It gets more exciting when you look at concrete examples of custom fields in action.
- A scoring system for a book post type
- Start and end times for events
- Prices for products or color variations and sizes
- taxonomies (categories, tags, or custom taxonomies)
- Additional meta boxes in the WordPress editor like the content analysis tool in Yoast SEO.
These are some of the tasks that you can do very easily using custom fields in WordPress.
Advantages of Using Custom Fields on WordPress
However, you can add a lot of this information to your content in other ways. Like, book scoring, for example, could be directly added to the post. So, what do you need custom fields for?

The true advantage of using custom fields to add recurring data is that they make it easy to change things sitewide.
As an example, if you decided to move the book scores to another location inside your posts, you can just do that for all reviews by changing one template.
On the other hand, if you saved the information inside the posts, then you would have to edit every single one to implement the same change on your entire site.
I think it’s clear now and apart from that, using custom fields often makes for a much better user experience. They allow you to add meta fields to the WordPress editor and other places from where the filled-in information is automatically added to your finished content in the right place instantly.
This makes things much more comfortable and helps you to create a customized admin interface that does exactly what you want to create your content easily.
Now it seems all good, so let’s go forward.
How to Add Custom Fields to WordPress?
However, in this tutorial, I’ll show you how to use Advanced Custom Fields, but should be said that you don’t necessarily need the plugin to take advantage of this WordPress feature.
Because the ability to add custom fields is built into WordPress by default (besides the possibility is to code it manually). But, Advanced Custom Fields makes the process much easier to use on your WordPress site.
Perhaps, you are not aware of it but there is actually a custom field meta box available in the WordPress editor. Which is hidden by default and, you need to use the screen options at the top of your WordPress editor screen to see it.
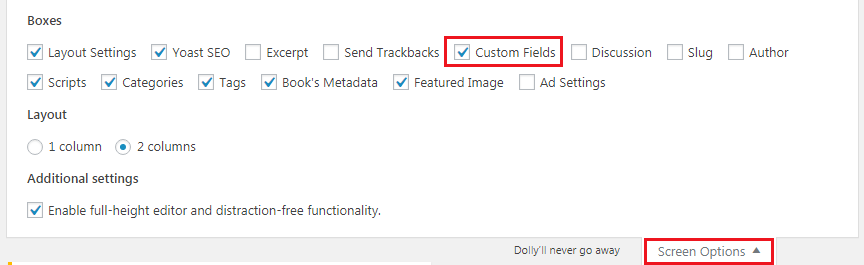
Once, you check the custom fields option, the box appears at the bottom of the editor screen.
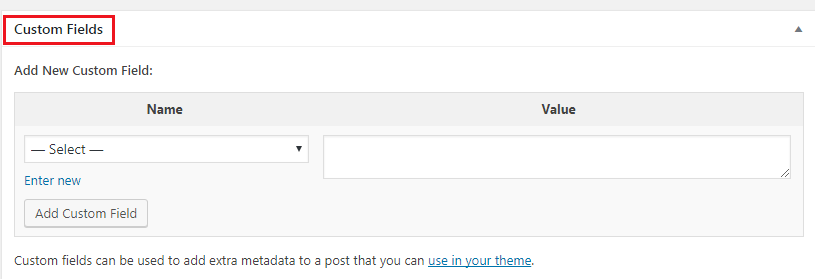
You can easily add any custom field to your post, all you need to do is give it a name and a value. That’s it.
For example, you can let people know which book they are reading while writing your post. Simply adding a custom field called Currently Reading To: plus the book that’ open at the moment.
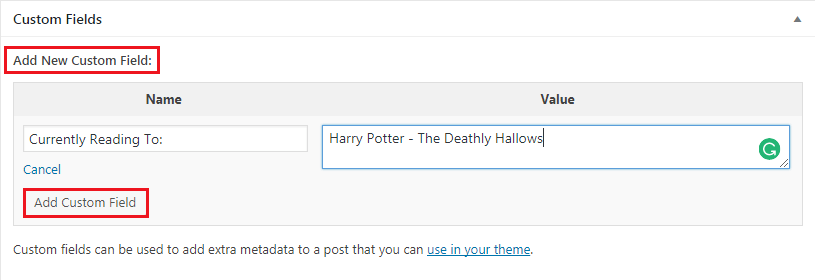 Once you add this data, it will be saved in the database and can be output on your site.
The field (here: Currently Reading To:) will also be reusable in other posts in the future and can be picked easily from a drop-down menu.
The only thing left is adding some code to whichever template you want this field to show up in. I’ll be showing you this topic in more detail below.
Now, the question may appear in your mind that if this all can be done by WordPress by default or by hand, then why the need for the plugin Advanced Custom Fields.
Here, the answers come below.
Why Should You Use Advanced Custom Fields on Your WordPress Site?
With a full five-star rating in the WordPress Plugin directory and more than a million active installs, this means ‘Advanced Custom Fields’ has to have something going for it, isn’t it?
Yes, it does. This plugin basically provides an advanced and easy to use user interface for adding custom fields to WordPress.
Whether the main advantage is that it has over 20 different presets for custom fields built in. That’s why it’s easier and faster to create the required fields as you need.
The Presets Include (in free version):
- Text — Single-line text field with optional HTML support and character limit
- Text Area — Same as Text but with multiple lines
- Number — Number field that can have optional min/max values
- Email — Custom field for email input including validation
- Password — Password input with text masking
- WYSIWYG Editor — WordPress editor input with options for media insertion and editor buttons
- Image — Upload an image or select one from the media library. Returns an object, URL or ID.
- File — Same as image but for files in general
- Select — Drop-down menu with support for multiple selections
- Checkbox — Checkbox field for single or multiple items
- Radio Button — Pick a single item via radio button
- True / False — Basic true or false selector
- Page Link — Returns the URL of any post or page. Can be limited to specific post types.
- Post Object — Returns a WordPress object of any post or page, post type or taxonomy
- Relationship — Same as post object but with an advanced interface and reordering via drag and drop
- Taxonomy — Returns an object or ID for one or more taxonomies. Can be limited to tags, categories or custom taxonomy terms.
- User — Select one or more users. Option to limit choice by user role.
- Google Map — Set a center, zoom level, and width
- Date Picker — Select a calendar date and return a formatted date string
- Color Picker — Select a hexadecimal color
- Message — Leave a message
- Tab — Combine fields into a tabbed interface
These are the built-in handy presets, but still, ACF also lets you define rules to determine where they will show up in your WordPress admin.
By this way, you can only show custom fields in certain post categories. However, there are a number of ACF extensions available that help you to use it to use in more functional ways. Some of the extensions are free like:
- Advanced Custom Fields: Nav Menu Field — allow you to select from the menus you create in the WordPress Admin backend to use on your website’s frontend.
- ACF: Sidebar Selector — Allows the selection of a registered WordPress sidebar, even for null values if needed.
Others are premium solutions:
- Repeater Field — Allows you to create a set of subfields which can be repeated again and again whilst editing content!
- Gallery Field — Provides a simple and intuitive interface for managing a collection of images, where Multiple images can even be added, edited and sorted with ease!
- Options Page — Create a custom options page for the WordPress dashboard, good for collecting site-wide data.
- Flexible Content — With a blank canvas it lets you add an unlimited number of layouts with full control over the order.
Afer quick looking, we can see that Advanced Custom Fields makes extending your content with custom meta data as easy as filling out a form. Where you’ve complete control over how it is used in the WordPress admin area. Isn’t it wonderful?
Yes, it is! So, if the above has made you at least a little curious, surely you are in luck. Now, let’s see how to install and use the Advanced Custom Fields plugin to implement WordPress custom fields on your WordPress site.
How to Use Advanced Custom Fields?
Creating custom fields with this plugin is really like a piece of cake, however, some users think it complex. But, spending few times you can understand it and, then you can feel the true test of it. So, let’s spend some …
Installing Advanced Custom Fields Plugin
For using ACF (Advanced Custom Fields) on your WordPress site, you need to have installed it at first. You can install it like any other plugins.
So, simply go to Plugin » Add New. Then, search for the plugin into the search bar and, when it’ll come out simply install and activate.
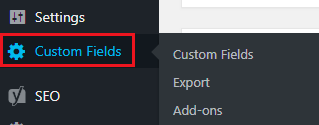 Once, the activation is complete, you can see the new Custom Fields option in your WordPress Admin area.
Creating A New Field Group Using Custom Fields
To make it easier to understand the process, I’ve come up with a real use case of real use. Here, I’ll create a group of custom fields for a post type called popular books that will be used for book reviews.
So, for the shake I want to add the following data throwing custom fields:
- Release year of the book
- Author of the book
- Rating of the book (out of five)
Wow! It’s started!
Now, I need to create a Field Group – a group of custom fields that topically belong together. Because all the information I want to add to my book reviews logically correlate and can therefore all go in one group.
Creating field groups is the main function of Advanced Custom Fields. However, a group can also only contain one.
Let’s create one, click Custom Fields from your WordPress admin area. You’ll be taken to the page of the added field groups.
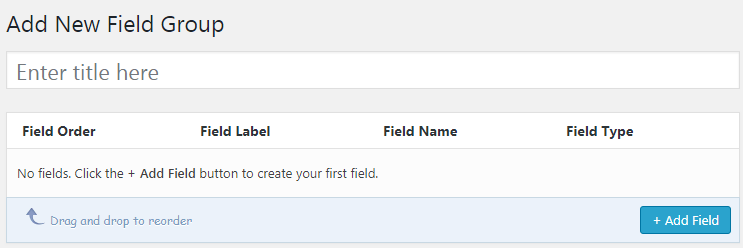 Now, find the Add New button at the top and click it and, it will bring you to the screen (like the image below).
 It looks yet a little overwhelming at first sight, but as soon as you have gone through the process once, it’ll get easy to understand everything on there.
For now, simply enter a name for your field group at the top. Here, I’m going with Book’s Metadata. Then, we can move on to adding fields to the group.
Adding and Configuring The Fields
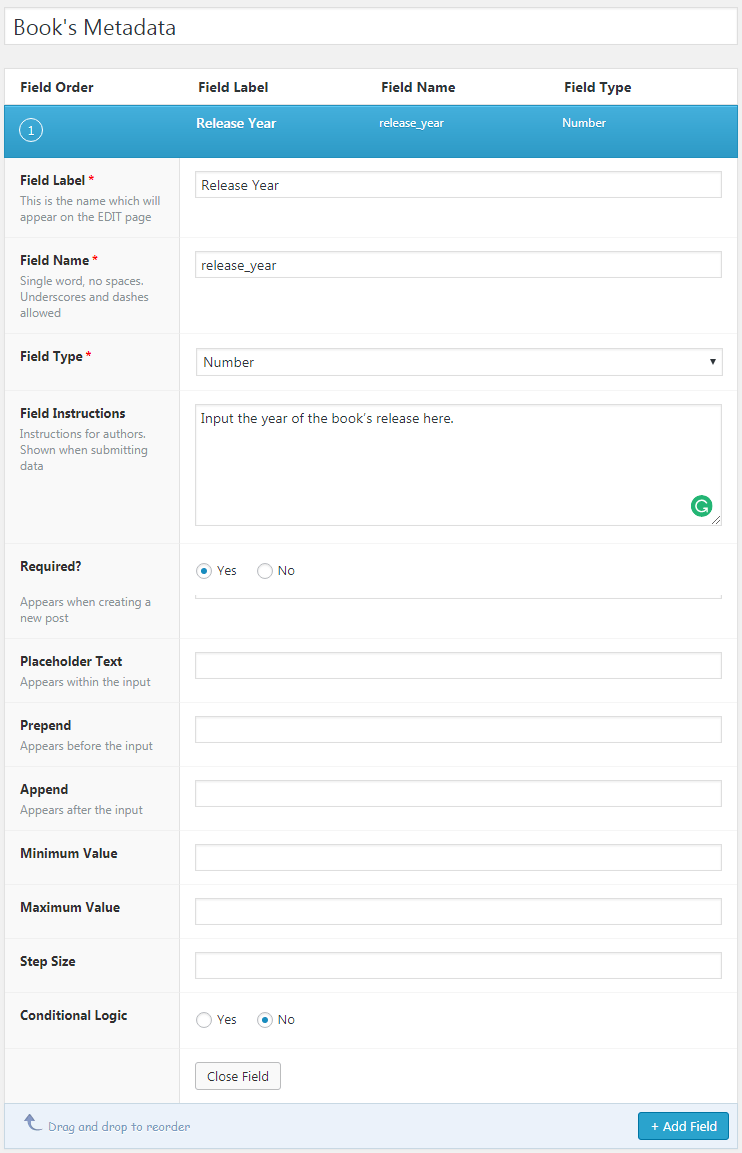
Now, to start adding custom fields to your group, click the big blue Add Field button. It’ll open the form (like the image below).
 Kindly take a look, here’s what each of the fields in the form means and is used for:
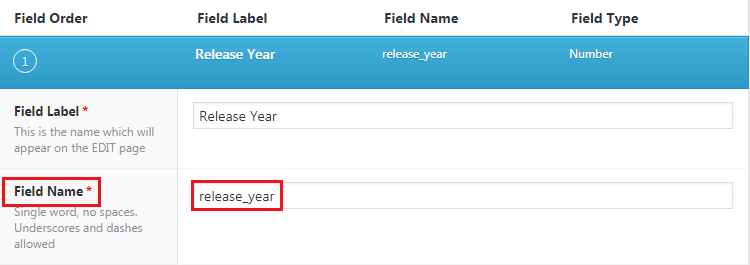
- Field Label — The name that appears inside the advanced custom fields menu
- Field Name — The name used in templates and code (automatically will be populated with the label). Remember no spaces allowed between words, only hyphens, and underscores.
- Field Instructions — For now, leave instructions for using the field later
- Required — Determine whether or not this field is mandatory to fill in. For yes, authors won’t be able to save posts or pages associated with the custom field unless contains something.
- Default Value — This will automatically populate the field when creating a post
- Placeholder Text — Appears within input fields on the editor screen
- Prepend & Append — Defines what appears before and after the input text
- Formatting — Check whether or not HTML input into a text field will be rendered on screen
- Character Limit — Optionally put a limit on how many characters can be typed in
- Conditional Logic — Rules for when fields are visible
- Minimum & Maximum Value — Minimum and maximum number allowed inside a field
- Step Size — Defines the step by which to reduce or increase a number when clicking on the arrows
- Close Field — To close the currently viewed field to configure others (field group, remember?)
Always be aware of that not all of these options may show up. Like, minimum and maximum value, as well as step size, are only available for fields that contain numbers.
Although there are also additional options available for other field types, we don’t need to go into them right now.
Here, my own setup ends up like this:
- Field Label: Release Year
- Field Name: release_year
- Field Type: Number
- Field Instructions: Input the year of the book’s release here.
- Required: Yes
As you can see, I make this field required because I definitely want authors to fill this in.
- Field Label: Author
- Field Name: author
- Field Type: Text
- Field Instructions: Use the full name (first and last) without any commas, e.g. “Stephenie Meyer, J.K. Rowling”.
- Required: Yes
- Formatting: No Formatting
As you can see, I give clear instructions on how to use this field. The “no formatting” setting is to keep anyone from adding HTML here that would mess with my layout.
- Field Label: Book Rating
- Field Name: book_rating
- Field Type: Number
- Field Instructions: Rating of the quality of the book on a scale of one to five.
- Required: Yes
- Minimum Value: 1
- Maximum Value: 5
- Step Size: 1
Once you are done with the last field by closing that, you can see the see the entire group. Here, you can also change the order of the items via drag and drop.
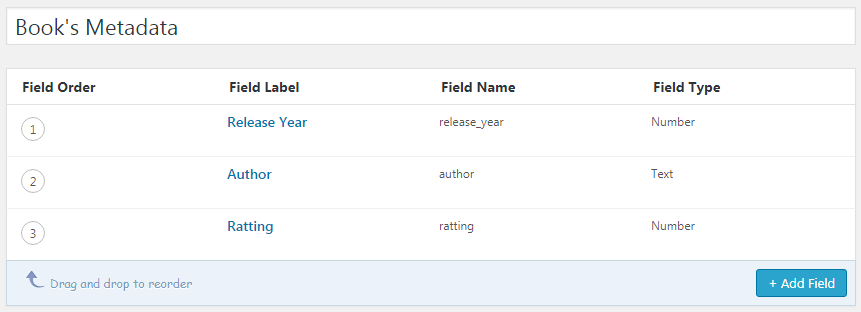 Are you bored, please hang on? Just a few steps left here to do.
Configuring Field Location And Options
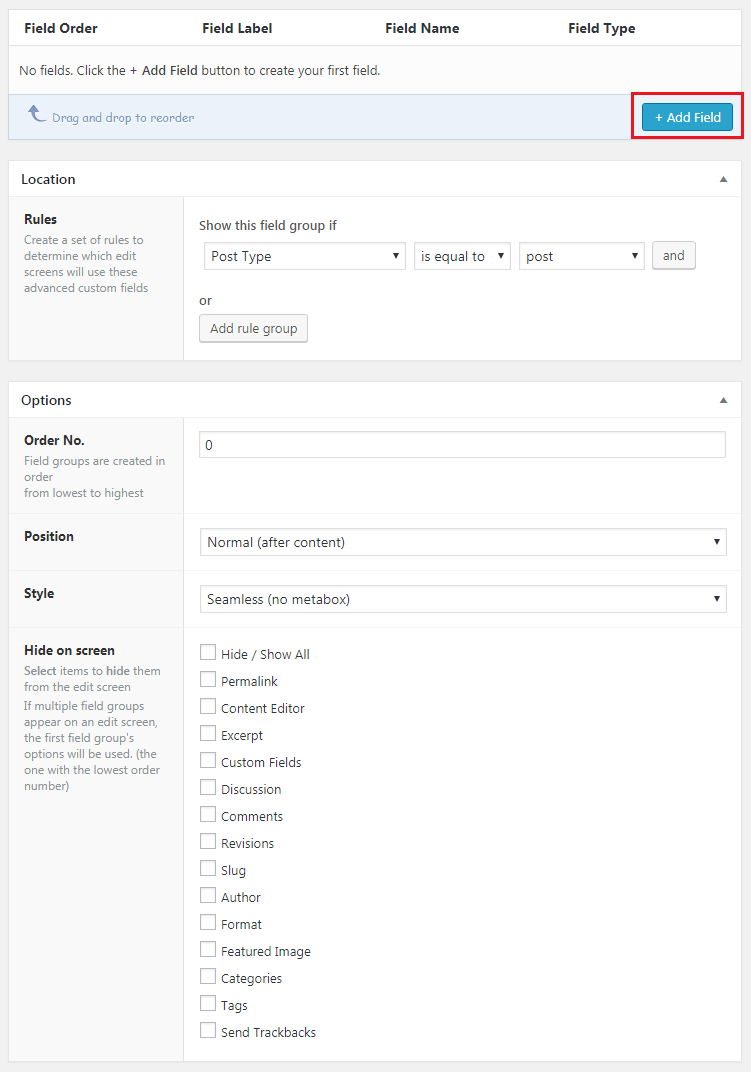
Now, here we need to configure where and how the newly created fields group will show up through the Location and Options panel.
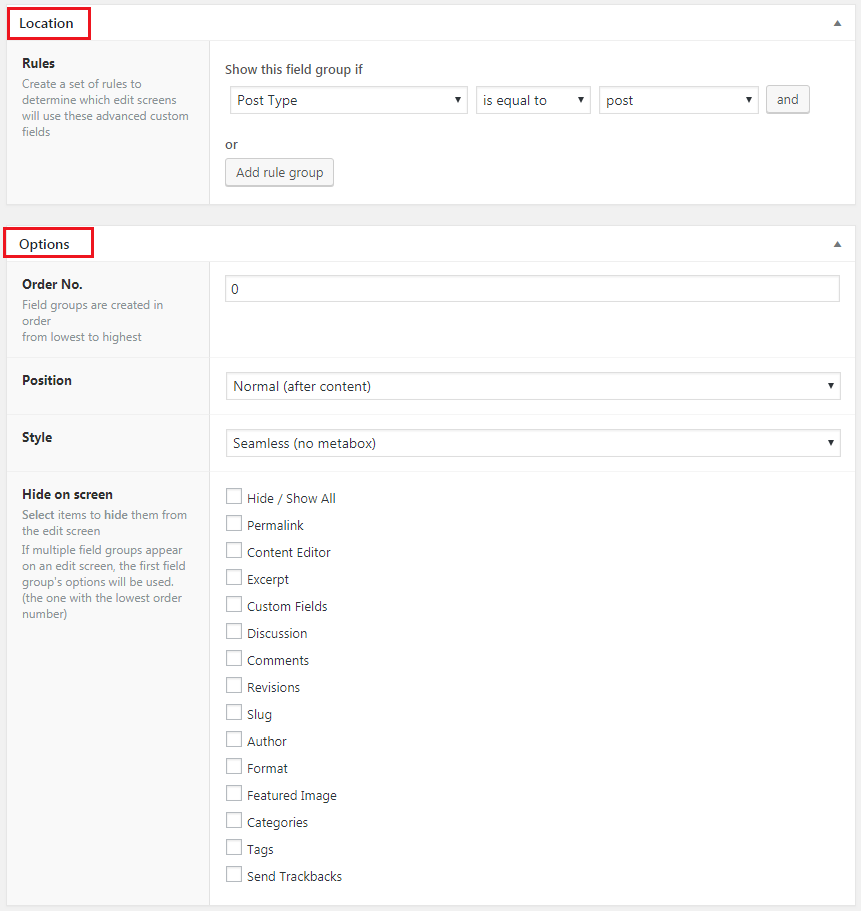 Under the Location, you can add rules to determine under which circumstances the fields will be displayed.
You can include and exclude depending on these terms:
- post type
- user type
- exact post
- post category
- post format
- post status
- post taxonomy
- exact page
- page type
- page parent
- page template
- attachment
- taxonomy term
- user
Me, here I want to limit my new field group to my book post type, so here it goes: Post type > is equal to > books. (Leave it as post if you haven’t yet created any of your custom post types)
After that, on the Options panel, here’s what each setting means:
- Order No — The order this field group will take if there are several on the same screen
- Position
- Normal — Below content editor
- High — Below title
- Side — On the side of the editor
- Style
- Seamless — Without a WordPress metabox
- Standard — Placed inside a metabox
- Hide on-screen — Here, checking the boxes allow you to hide other panels you are not going to need like, tags, categories, comments and etc.
So, pick whatever is right for your case. I’m going with:
- Position: Side
- Style: Standard
And, leaving the rest as is for now. Now, it’s time to publish our new custom fields. So, hit the Publish button.
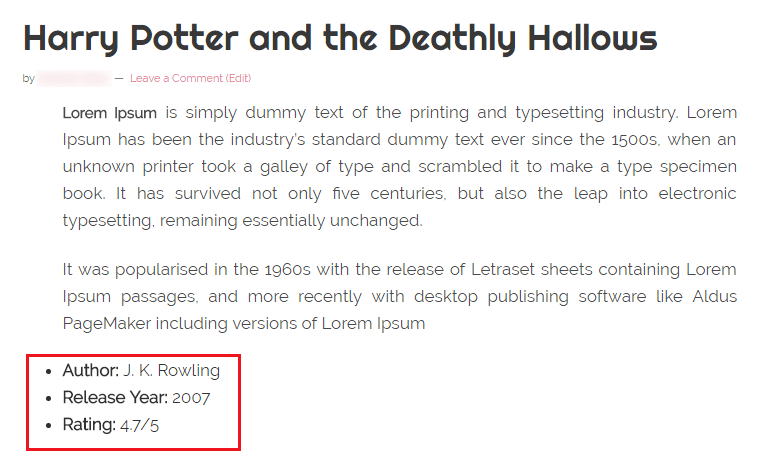
Now, you can head on over to your editing screen to see if the new meta fields show up. Here for me, they do.
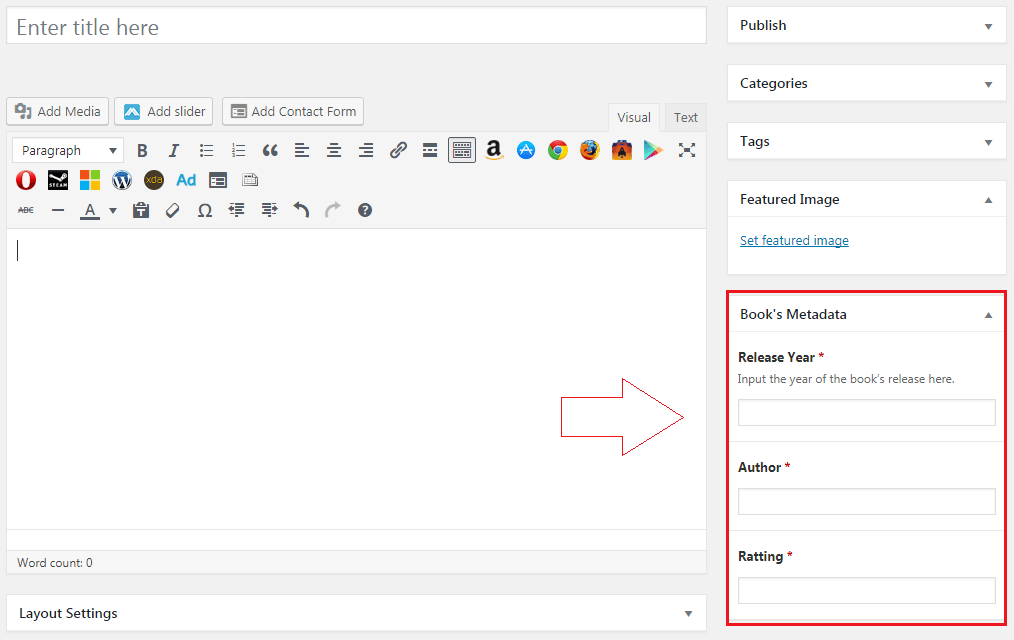 Oh Yea, that’s it, working. Now, it’s time to make your custom fields show up on your page. In order to do that, let’s add a bit of test data and publish your post — now we need to edit some theme files.
How to Display Custom Fields in Your WordPress Theme
So, in order to display the new custom fields on your site, you need to call them in a template file. In most cases, the first thing is that need to copy the template for single posts (usually it’s single.php)
If you’re not sure, check the WordPress template hierarchy if you are not sure which is the right one for you.
From the hierarchy, you can know that in order to make a custom template for a single post type, it needs to rename the file to single-postname.php.
So, simply copy the single post template file and save it as single-popularbook.php in your child theme folder.
Now, we can call our new post meta data to display, which can be done via get_post_meta(). But while we’re using ACF (Advanced Custom Fields plugin) then it’s recommended to use ACF’s own functions.
Here, I’m using the_field() which allows me to display custom fields for the current post.
<?php the_field('field_name'); ?>
So, it’s going like this, for author field:
<?php the_field('release_year'); ?>
 And, after wrapping the functions in its own ‘div’ and adding some markup, my code comes out like this:
<div class="popularbook-meta">
<ul>
<li><strong>Author:</strong> <?php the_field('author'); ?></li>
<li><strong>Release Year:</strong> <?php the_field('release_year'); ?></li>
<li><strong>Book Rating:</strong> <?php the_field('rating'); ?>/5</li>
</ul>
</div>
I only need to input it into my newly created post template where I want it to show up. So, that’s all.
Of course, you also here on this point with me. Now, just add a little styling to the stylesheet for that ‘div’ and say just “WOW”.
Walk Long Way with Advanced Custom Fields
Perhaps, you already got a broad look at how to create and insert custom fields in this tutorial and. The truth is yes Advanced Custom Fields can take you to go further.
The only way to learn how to create more complex implementations is to read Advanced Custom Fields’ stellar documentation for:
Then, you can use custom fields in various ways. But, you’re looking for more functionality with Advanced Custom Fields, you can consider the Pro version.
Wrap Up
As you can see that Advanced Custom Fields makes it easy to extend your WordPress content in a ton of different ways. While you can understand how to create and display custom fields on your site, that moment surely you almost there to dive into more advanced tweaks.
I hope you enjoyed learning about Advanced Custom Fields throwing this tutorial, and look forward to seeing what you come up with.
You will love the following Articles:
- How to Add TopBar in Genesis Framework (RainaStudio Map 101)
- How to Add an Audio Sound to Blog’s About Page (RainaStudio Map 101)
- How to Easily Add Slider On Home Page in WordPress
- How to Install WordPress Plugin
- How to Create an Automatic WordPress Backup for Free
- How to Add MailChimp Subscribe Form to WordPress
- How to Disable Comments on WordPress
- How to Regenerate Custom Thumbnail Image Size
- How to Compress and Optimize Image on WordPress
- How to Add Caching Engine to WordPress Website
- How to Enhance Your WordPress Visual Editor
- How to Add Sitemaps to Google Webmaster
- How to Limit WordPress Login Attempts
- How to Secure Your WordPress Website
- How to Create Sitemaps for WordPress Website
- How to Add Google Analytics to WordPress Website
- How to Build an eCommerce Website Using WooCommerce
- How to Add GUTENBERG Visual Editor to WordPress
- How to do WordPress SEO technically (OnPage Guide)
- How to Add a Contact Form to WordPress
- How to STOP Spam Submission on Your Blog
- W3 Total Cache vs WP Super Cache – Which Should You Choose

