

Perhaps, your WordPress site is getting good. Now, my question is – have you ever wanted to change the theme on your site? If it’s Yes, then you might be worried about your image sizes not fitting properly with the new theme.
So, why it happens and how to fix this problem if you face again? Yes, I got the easiest solution for you. Let’s go for that!
Why and When You Need to Regenerate Custom Thumbnail Image Size?
By default, WordPress themes have defined various custom image dimensions for thumbnails and featured images.
Which means, when you upload an image or photo to your media library, WordPress will automatically generate several thumbnails from the original image that are registered into your WordPress theme.
These thumbnails can be used in WordPress as featured images and thumbnails across various locations on your website (like archives, widgets, sliders, etc…).
However, the thumbnails will work that you’ll upload after activating the new theme to your WordPress site. But, the previously uploaded image thumbnails will not work properly.
That’s why you need to regenerate custom image thumbnail for previous images. You can also know how to compress and optimize images on WordPress site.
So, if you’re having a problem with showing image thumbnails on your WordPress site, then fix that right through this short tutorial.
Regenerating Custom Thumbnail Image Size on WordPress Site
However, there are a bunch of plugin options available to regenerate custom image thumbnail. But, here we’re focusing on the easiest method – using the plugin ‘Regenerate Thumbnails’.

You can also check 5 best online image compressor sites.
Installing Regenerate Thumbnail Plugin
Simply, go the Plugin section of your WP dashboard and hover it. Then, click ‘Add New’, and it’ll open the window for plugin installation.
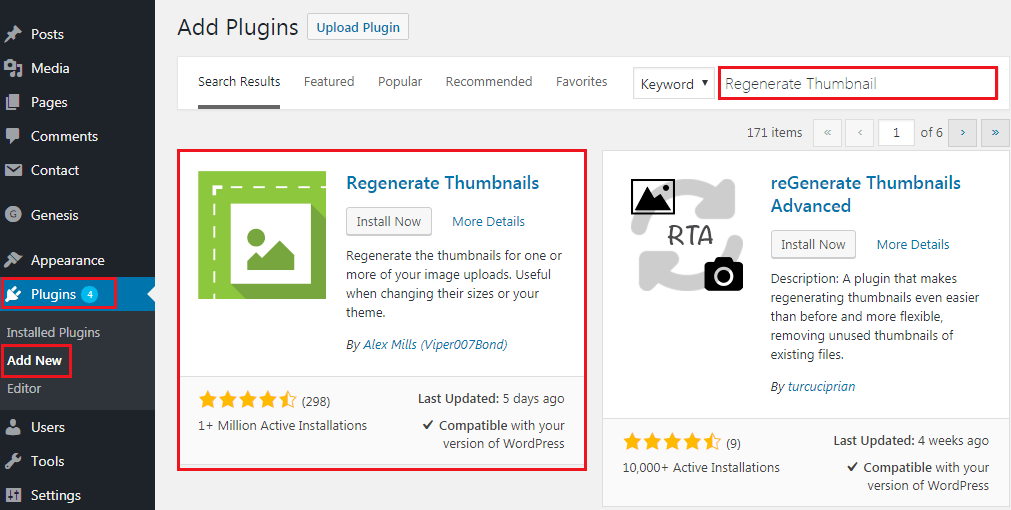 Now, do a search for the plugin in the search box. The first result should be our desired plugin, so click the ‘Install’ button. It’ll take a few moment to being install. Then, click the ‘Activate’ button to make it for work.
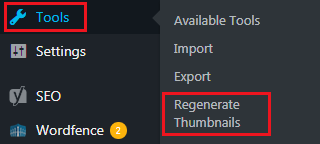 Once, the plugin is activated, go to the ‘Tools’ section of your WP dashboard and hover it. You’ll find the ‘Regenerate Thumbnail’ option there. So, click on it and you’ll be landed on the page of Regenerate Thumbnail main page (like the image below).
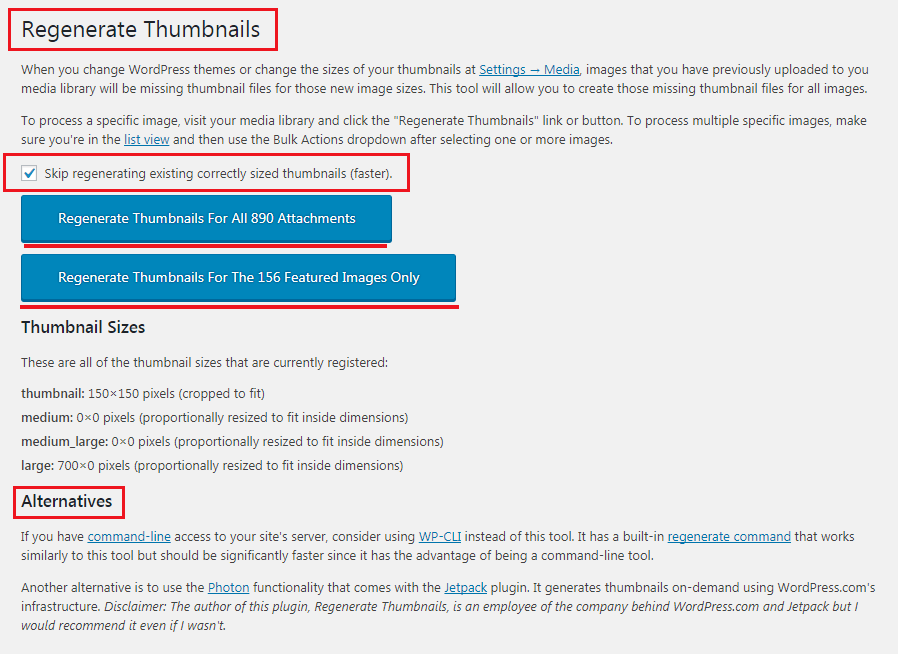
Here, you can see first a briefing about regenerating thumbnail, you can understand that easily. However, I’m making it clear here.
So, here you can see two options, regenerating all the attachment images that you’ve already on your site and regenerating only the featured images. If you’ve problem only with featured images, then simply do it for only featured images.
But, if it’s with all the images, then you can do it for all. You can also see the currently registered thumbnail sizes right after those options (Review them to make sure the sizes is correct before regenerating)
So, when you pick any options to regenerate thumbnails this will start to generate the thumbnails in according to the current theme setting or to the WordPress Settings ⇒ Media. It may take a while, depending on the number of images you’re regenerating.
Regenerating Thumbnail Manually from Media Library
There is another option which is totally under your control! Which means, you can regenerate custom image thumbnails manually for the images you want.
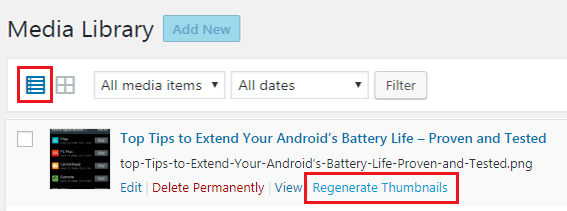
For this, simply go to your Website’s Media ⇒ Library, where all the uploaded images are shown. Now, switch the list view, then you can see the ‘Regenerate Thumbnail’ option under every image.
It’s good to know that regenerating images sizes does not affect your original upload and it creates additional copies of images in the newly defined sizes. Even, it also does not delete previously created image sizes that you have.
If you are sure that you haven’t used those sizes anywhere on your website, you can delete the sizes.
Important Note & Alternatives
As you can see there is also another section at the bottom ‘Alternatives’, where it says: you can regenerate thumbnail on our site using WP-CLI with command-line access (which seems complex to a newbie, but if you want you can do that).
Note: This plugin won’t work if you have the “PHOTON’ feature enabled in Jetpack plugin on your Website. Because the Photon feature is able to generate thumbnails on-demand using WordPress.com infrastructure.
However, these alternatives could be helpful but this plugin is highly recommended especially for regenerating WordPress custom image thumbnails (by the author of this plugin, the same man behind WordPress.com and Jetpack)
Wrap Up
So, that’s it, the simplest and easiest way to regenerate custom image thumbnail to your WordPress site. Hope, this article will be helpful to fix image thumbnail problem after integrating new theme into your site.
Anyway, if you got any problem with this guide, let us know. We’ll do our best to fix that, or if you’ve already fixed this kind of problem by different ways, share your experience with us by a comment.
You will love the following Articles:
- How to Add TopBar in Genesis Framework (RainaStudio Map 101)
- How to Add an Audio Sound to Blog’s About Page (RainaStudio Map 101)
- How to Easily Add Slider On Home Page in WordPress
- How to Use Advanced Custom Fields on WordPress
- How to Create an Automatic WordPress Backup for Free
- How to Add MailChimp Subscribe Form to WordPress
- How to Disable Comments on WordPress
- How to Install WordPress Plugin
- How to Compress and Optimize Image on WordPress
- How to Add Caching Engine to WordPress Website
- How to Enhance Your WordPress Visual Editor
- How to Add Sitemaps to Google Webmaster
- How to Limit WordPress Login Attempts
- How to Secure Your WordPress Website
- How to Create Sitemaps for WordPress Website
- How to Add Google Analytics to WordPress Website
- How to Build an eCommerce Website Using WooCommerce
- How to Add GUTENBERG Visual Editor to WordPress
- How to do WordPress SEO technically (OnPage Guide)
- How to Add a Contact Form to WordPress
- How to STOP Spam Submission on Your Blog
- W3 Total Cache vs WP Super Cache – Which Should You Choose

