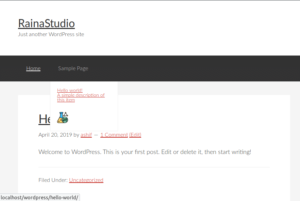
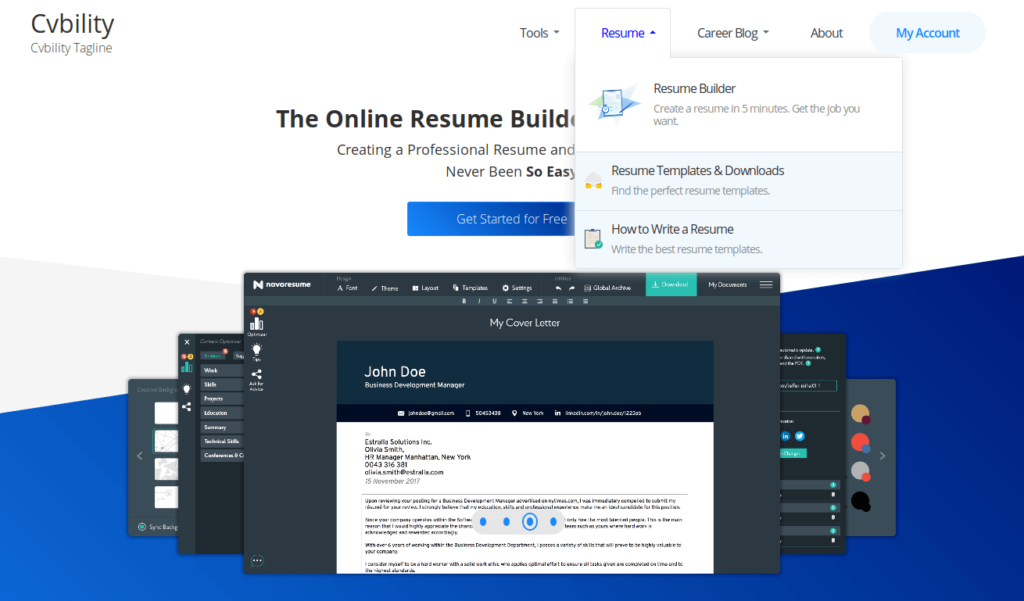
In this post, you are going to learn to develop a mega menu in WordPress. The image above is the example of the mega-menu we are going to build.
If you google for mega menu WordPress, you’ll get tons of plugins for this solution. But we tried something custom & different, which results from a summation of choices.
WordPress Mega Menu Developing Plan and Tools

We used the following theme and plugins during the development:
Step 1
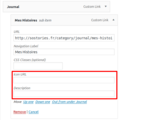
At first download, the Men’s Item Custom Fields plugin from GitHub and extract the file. Now we need to install the plugin on our site. Here is how you can install a WordPress plugin.
Step 2
On this step, copy the menu-item-custom-fields-example.php and rename it to custom-menu-fields.php and open it with your favorite code editor. Scroll down, you’ll see:
self::$fields = array(
    'field-01' => __( 'Custom Field #1', 'menu-item-custom-fields-example' ),
    'field-02' => __( 'Custom Field #2', 'menu-item-custom-fields-example' ),
);
[thrive_text_block color=”note” headline=””]As per our needs we just change ‘Custom Field #1’ to ‘Icon URL’ and comment ‘Custom Field #2’ and then save the file.[/thrive_text_block]
self::$fields = array(
    'field-01' => __( 'Icon URL', 'menu-item-custom-fields-example' ),
    // 'field-02' => __( 'Custom Field #2', 'menu-item-custom-fields-example' ),
);
Step 3
Now create a new directory named inc in your theme and upload the file(custom-menu-fields.php) to that directory. Open your theme’s functions.php file and add the following snippet.
//* Custom Menu Item Fields
include( get_stylesheet_directory() . '/inc/custom-menu-fields.php' );

Step 4
If you test, you’ll see any given value will be saved in those fields. Now time to execute the data on the front. Open functions.php and add the following snippet.
// Show Menu Items Description
function prefix_nav_description( $item_output, $item, $depth, $args ) {

    $icon_url = get_post_meta( $item->ID, 'menu-item-field-01', true );
    if ( !empty( $item->description ) ) {

        $item_output = str_replace( $args->link_after . '</a>', '<p class="menu-item-description">' . $item->description . '</p>' . $args->link_after . '</a>', $item_output );

    }
    if ( !empty( $icon_url ) ){

        $item_output = str_replace( $args->link_after . '</a>', '<div class="icon-img-wrap"><img src="' . $icon_url . '"></div>' . $args->link_after . '</a>', $item_output );

    }
    return $item_output;
}
add_filter( 'walker_nav_menu_start_el', 'prefix_nav_description', 10, 4 );

Step 5
Add the following CSS to style.css file of your theme to style and fix some alignments of the mega menu.
/* Mega Menu */
.genesis-nav-menu .menu-item:hover {
    position: relative !important;
}
.genesis-nav-menu .menu-item a {
    padding: 1.5rem 3.3rem !important;
}
.genesis-nav-menu .sub-menu a {
    padding-left: 4rem !important;
}
.menu-item-has-children > a > span:before {
    position: absolute;
    z-index: 3;
    top: 50%;
    right: 1.8rem;
    display: block;
    width: 0;
    height: 0;
    margin-top: -.2rem;
    border-color: #676b78 transparent transparent;
    border-style: solid;
    border-width: .4rem .4rem 0;
    content: "";
    transition: -webkit-transform .25s cubic-bezier(.45,.05,.55,.95) 0ms;
    transition: transform .25s cubic-bezier(.45,.05,.55,.95) 0ms;
    transition: transform .25s cubic-bezier(.45,.05,.55,.95) 0ms,-webkit-transform .25s cubic-bezier(.45,.05,.55,.95) 0ms;
}
.genesis-nav-menu .menu-item-has-children a:hover span:before,
.genesis-nav-menu .sfHover > a span:before {
    border-top-color: #00f !important;
    -webkit-transform: rotate(180deg) !important;
    transform: rotate(180deg) !important;
}
.menu-item-has-children {
    position: relative;
}
.nav-primary .genesis-nav-menu a .menu-item-description {
    white-space: normal;
    font-size: 1.4rem;
    font-weight: 400;
    transition: color .25s cubic-bezier(.45,.05,.55,.95) 0ms;
    color: #888;
    margin-bottom: 0px;
    margin-top: 5px;
}
.menu-item.first .icon-img-wrap {
    position: absolute;
    display: block;
    top: 10px;
    left: 0;
    width: 100px;
    height: 100px;
}
.icon-img-wrap {
    position: absolute;
    display: block;
    top: 13px;
    left: 0;
    width: 45px;
    height: 45px;
}
.icon-img-wrap img {
    padding: 10px;
}
Conclusion
Looking forward to your comment and let us know how far you have abled to achieve of developing WordPress mega menu.
You will love The following tutorials:
- How to Install and Configure Really Simple SSL WordPress Plugin
- How to Add Simple Social Icons Widget Plugin in WordPress
- How to Add Custom JavaScript to WordPress
- How to Add Facebook Customer Chat to Your WordPress Website
- How to Show Related Posts in WordPress
- How To Change Text Color In WordPress Post
- Custom Post Types to Genesis WordPress Theme Framework (RainaStudio Map 101)
- Template Page Attributes for Custom Post Type [WP Support]
- Add Custom CSS to WordPress 5.0 Admin for Post Editor
- Custom Front Page Template Design for Blog Website in Genesis (RainaStudio Map 101)
- Add Custom Heading Style Formats to WP Visual Editor Without Plugin (RainaStudio Map 101)
- Custom Related Posts After Entry Footer in Genesis (RainaStudio Map 101)
- Custom Social Share Buttons with Counter in Genesis (RainaStudio Map 101)


