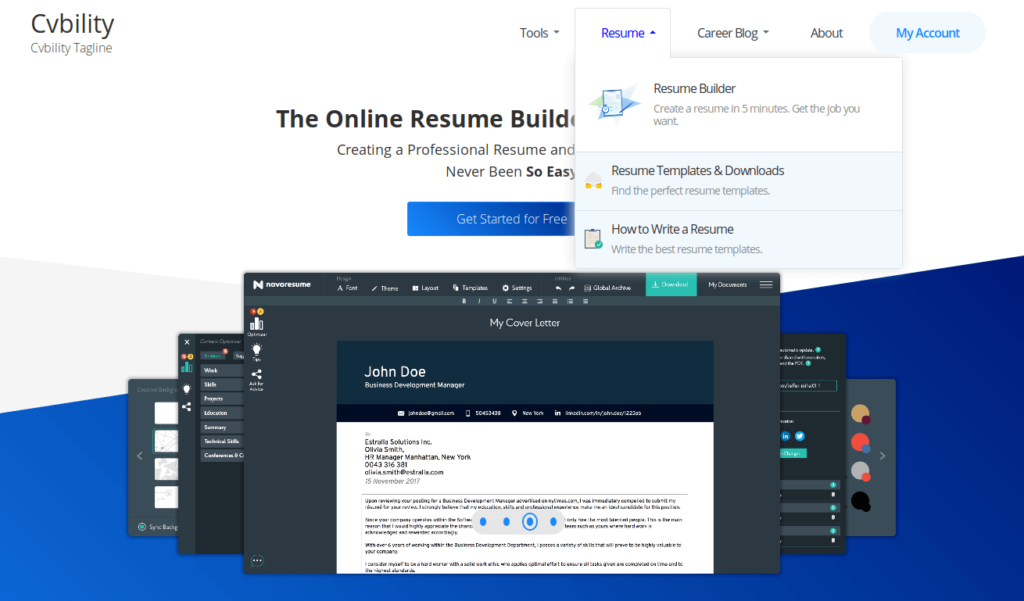


In this post, you are going to learn to develop a mega menu in WordPress. The image above is the example of the mega-menu we are going to build.
If you google for mega menu WordPress, you’ll get tons of plugins for this solution. But we tried something custom & different, which results from a summation of choices.
WordPress Mega Menu Developing Plan and Tools
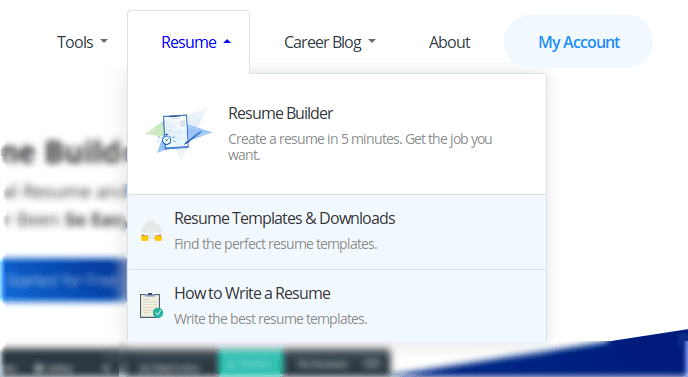 If you notice items of the menu, you’ll see three elements for each item. For example, the first item under Resume menu has an icon image, description, and the item name.
We used the following theme and plugins during the development:
Step 1
At first download, the Men’s Item Custom Fields plugin from GitHub and extract the file. Now we need to install the plugin on our site. Here is how you can install a WordPress plugin.
Step 2
On this step, copy the menu-item-custom-fields-example.php and rename it to custom-menu-fields.php and open it with your favorite code editor. Scroll down, you’ll see:
self::$fields = array(
    'field-01' => __( 'Custom Field #1', 'menu-item-custom-fields-example' ),
    'field-02' => __( 'Custom Field #2', 'menu-item-custom-fields-example' ),
);
[thrive_text_block color=”note” headline=””]As per our needs we just change ‘Custom Field #1’ to ‘Icon URL’ and comment ‘Custom Field #2’ and then save the file.[/thrive_text_block]
self::$fields = array(
    'field-01' => __( 'Icon URL', 'menu-item-custom-fields-example' ),
    // 'field-02' => __( 'Custom Field #2', 'menu-item-custom-fields-example' ),
);
Step 3
Now create a new directory named inc in your theme and upload the file(custom-menu-fields.php) to that directory. Open your theme’s functions.php file and add the following snippet.
//* Custom Menu Item Fields
include( get_stylesheet_directory() . '/inc/custom-menu-fields.php' );
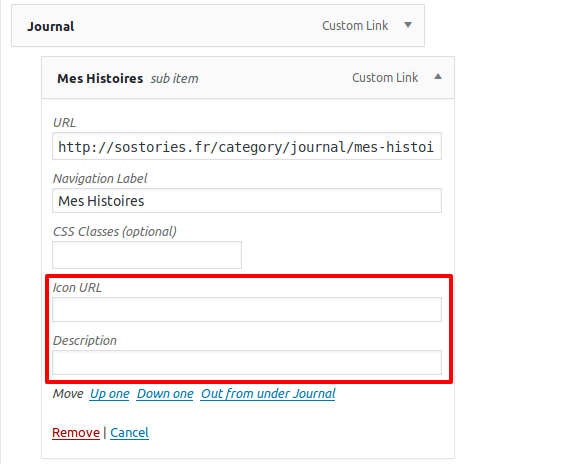 Now, go to Appearance >> Menu >> Screen Options. Tick on Description & Icon URL. We got two new custom fields for menu items for two elements.

Step 4
If you test, you’ll see any given value will be saved in those fields. Now time to execute the data on the front. Open functions.php and add the following snippet.
// Show Menu Items Description
function prefix_nav_description( $item_output, $item, $depth, $args ) {

    $icon_url = get_post_meta( $item->ID, 'menu-item-field-01', true );
    if ( !empty( $item->description ) ) {

        $item_output = str_replace( $args->link_after . '</a>', '<p class="menu-item-description">' . $item->description . '</p>' . $args->link_after . '</a>', $item_output );

    }
    if ( !empty( $icon_url ) ){

        $item_output = str_replace( $args->link_after . '</a>', '<div class="icon-img-wrap"><img src="' . $icon_url . '"></div>' . $args->link_after . '</a>', $item_output );

    }
    return $item_output;
}
add_filter( 'walker_nav_menu_start_el', 'prefix_nav_description', 10, 4 );
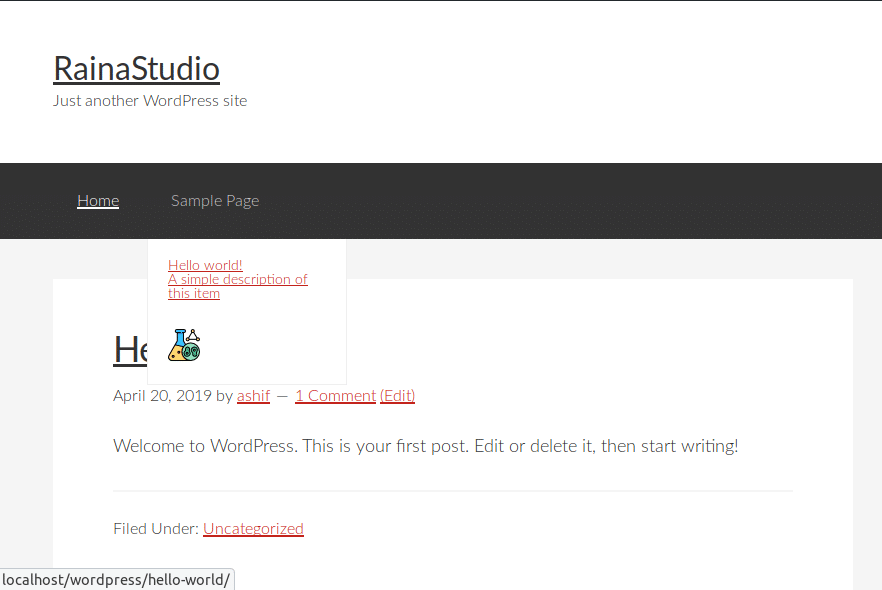 It is how it is showing now after adding a description and icon URL to menu items on the frontend.
Step 5
Add the following CSS to style.css file of your theme to style and fix some alignments of the mega menu.
/* Mega Menu */
.genesis-nav-menu .menu-item:hover {
    position: relative !important;
}
.genesis-nav-menu .menu-item a {
    padding: 1.5rem 3.3rem !important;
}
.genesis-nav-menu .sub-menu a {
    padding-left: 4rem !important;
}
.menu-item-has-children > a > span:before {
    position: absolute;
    z-index: 3;
    top: 50%;
    right: 1.8rem;
    display: block;
    width: 0;
    height: 0;
    margin-top: -.2rem;
    border-color: #676b78 transparent transparent;
    border-style: solid;
    border-width: .4rem .4rem 0;
    content: "";
    transition: -webkit-transform .25s cubic-bezier(.45,.05,.55,.95) 0ms;
    transition: transform .25s cubic-bezier(.45,.05,.55,.95) 0ms;
    transition: transform .25s cubic-bezier(.45,.05,.55,.95) 0ms,-webkit-transform .25s cubic-bezier(.45,.05,.55,.95) 0ms;
}
.genesis-nav-menu .menu-item-has-children a:hover span:before,
.genesis-nav-menu .sfHover > a span:before {
    border-top-color: #00f !important;
    -webkit-transform: rotate(180deg) !important;
    transform: rotate(180deg) !important;
}
.menu-item-has-children {
    position: relative;
}
.nav-primary .genesis-nav-menu a .menu-item-description {
    white-space: normal;
    font-size: 1.4rem;
    font-weight: 400;
    transition: color .25s cubic-bezier(.45,.05,.55,.95) 0ms;
    color: #888;
    margin-bottom: 0px;
    margin-top: 5px;
}
.menu-item.first .icon-img-wrap {
    position: absolute;
    display: block;
    top: 10px;
    left: 0;
    width: 100px;
    height: 100px;
}
.icon-img-wrap {
    position: absolute;
    display: block;
    top: 13px;
    left: 0;
    width: 45px;
    height: 45px;
}
.icon-img-wrap img {
    padding: 10px;
}
Conclusion
Looking forward to your comment and let us know how far you have abled to achieve of developing WordPress mega menu.
You will love The following tutorials:
- How to Install and Configure Really Simple SSL WordPress Plugin
- How to Add Simple Social Icons Widget Plugin in WordPress
- How to Add Custom JavaScript to WordPress
- How to Add Facebook Customer Chat to Your WordPress Website
- How to Show Related Posts in WordPress
- How To Change Text Color In WordPress Post
- Custom Post Types to Genesis WordPress Theme Framework (RainaStudio Map 101)
- Template Page Attributes for Custom Post Type [WP Support]
- Add Custom CSS to WordPress 5.0 Admin for Post Editor
- Custom Front Page Template Design for Blog Website in Genesis (RainaStudio Map 101)
- Add Custom Heading Style Formats to WP Visual Editor Without Plugin (RainaStudio Map 101)
- Custom Related Posts After Entry Footer in Genesis (RainaStudio Map 101)
- Custom Social Share Buttons with Counter in Genesis (RainaStudio Map 101)

