Perhaps, you have a WordPress website and you’re getting skilled day by day with the different types of customization of WordPress.
Such as the most familiar part of WordPress you use every time while you’re creating a content is the built-in Visual Editor ( WYSIWYG editor). As you see, it already comes with some basic formatting and style options.
But, if it happens like that you need some custom styles of your own to add some useful buttons, content blocks, taglines, etc. Then, you’ve different options available to easily do that.
That’s why this article, and here I’m going to show you one of the easiest ways to enhance your WordPress Visual Editor. So, stick your eyes here and get enhanced!
Do You Really Need to Enhance Your Built-in WordPress Visual Editor?
I’m asking this because the importance of enhancing your WordPress Visual Editor depends on your demand!
In the default WordPress editor, you can always switch from visual to the text editor and add custom HTML and CSS as you want.
But, if you regularly use some custom styles, then it would be best I think to add them to the visual editor so that you can easily reuse them when you need.
Apparently, this will save you time spent on switching back and forth between text and visual editor. As well as, it also allows you to consistently use the same styles throughout your website.
And, most importantly, it’ll be easy to tweak or update styles without having to edit posts on your website.
I think you really need this, so let’s dive into it!
Enhancement of Your WordPress Visual Editor
It’s the plugin TinyMCE Advanced that’s all you need to enhance your default WordPress Visual Editor to the extent possible.
It’s actually not a single plugin with just a few specific features, it’s very powerful and contains 15 different plugins for TinyMCE that are automatically enabled or disabled depending on the buttons you have chosen for your WordPress Visual Editor.
By default, this plugin contains some commonly used options like as keeping the paragraph tags in the Text editor, creating a table, importing the CSS classes from the theme’s editor-style.css, and more.
You can also know more from TinyMCE WordPress Codex like Advanced Editing Buttons, TinyMCE Custom Buttons, etc.
So, let’s install the plugin on your WordPress Website and set up required settings.
TinyMCE Advanced Editor Installation and Set Up
To get the plugin installed on your WordPress site, first, go to the Plugin section of your WP Dashboard and click ‘Add New’.
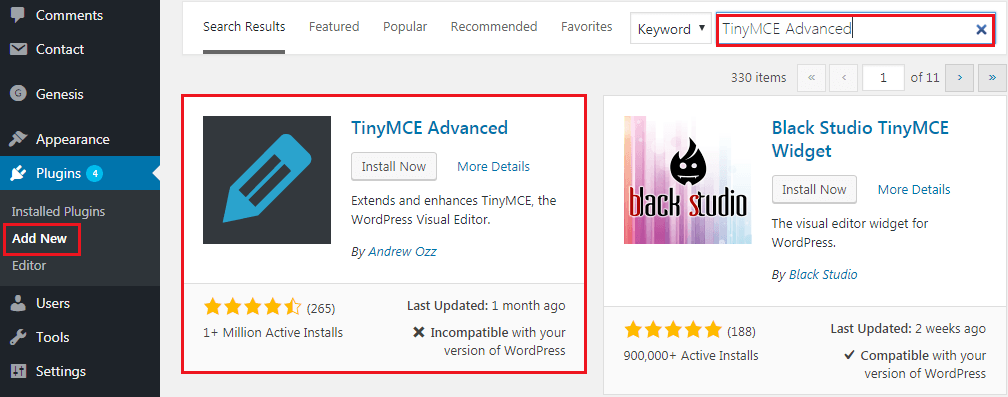
So, do it and it’ll come out. Now, click the ‘Install’ button, it’ll take a moment to be installed. Then, click the ‘Activate’ button.
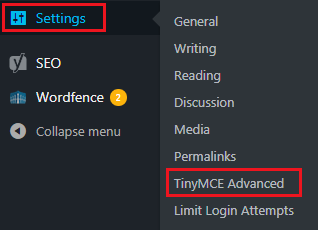
Editing Menu Customisation
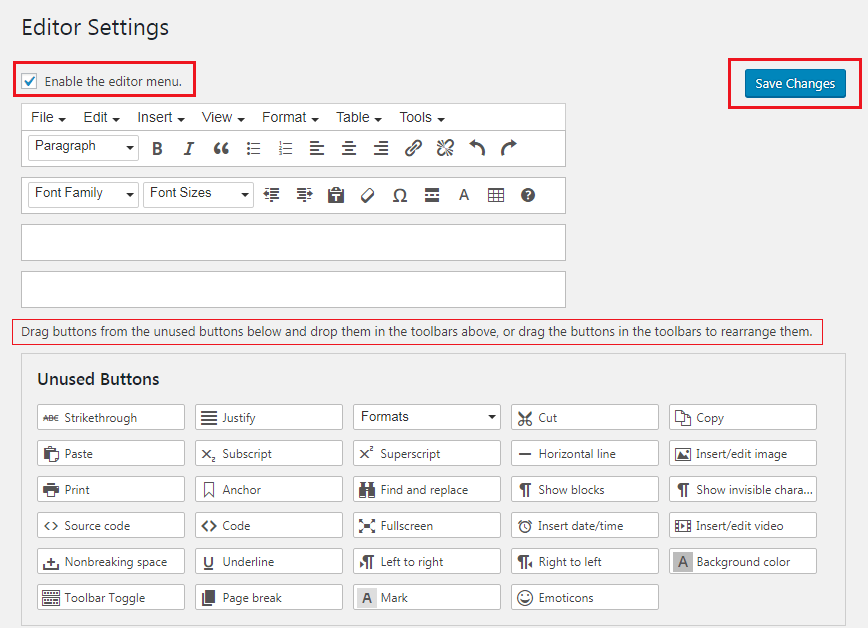
By the same way, you can remove any button from the editor menu by dragging and dropping to the unused buttons section. It’s so easy!
Useful Options
You can also see there some additional options, such as List Style Options, Context menu, Alternative Link Dialog and Font Sizes.
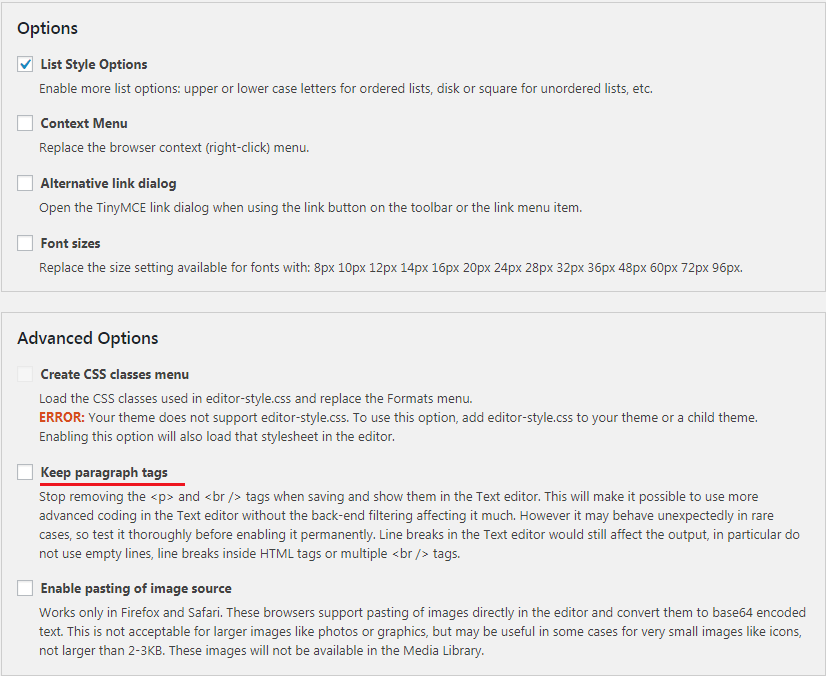
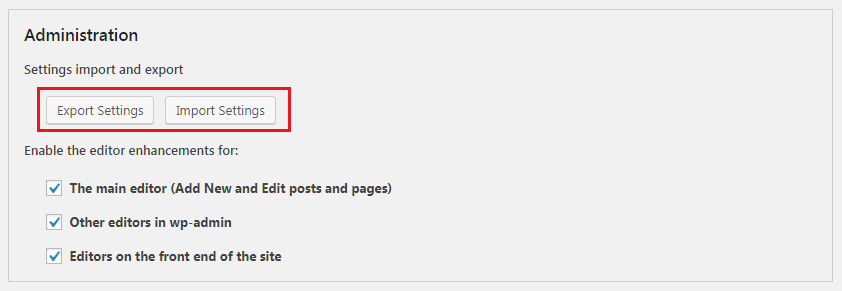
You can also select the location where you want to add this enhancements menu.
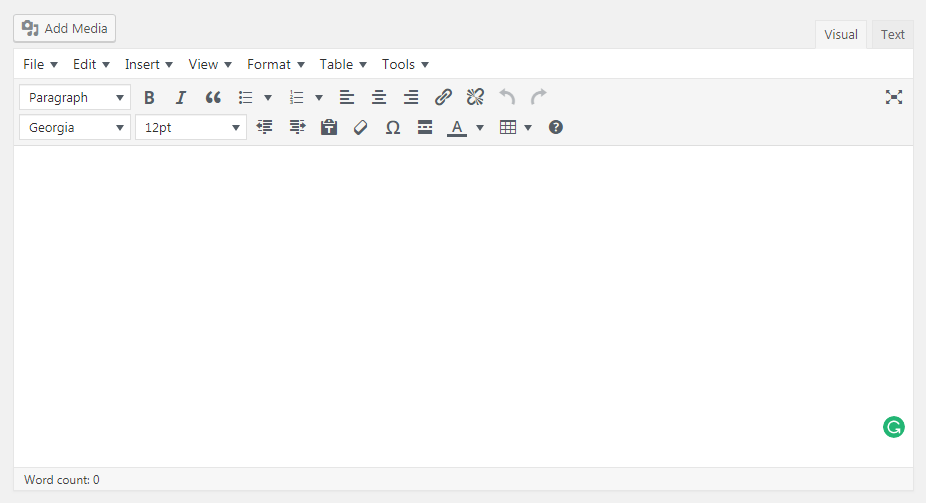
So, these are the basic of TinyMCE Advanced to enhance your WordPress Visual Editor. So, do it by your way and boost your editing.
You will love the following articles:
- How to Add TopBar in Genesis Framework (RainaStudio Map 101)
- How to Add an Audio Sound to Blog’s About Page (RainaStudio Map 101)
- How to Easily Add Slider On Home Page in WordPress
- How to Use Advanced Custom Fields on WordPress
- How to Create an Automatic WordPress Backup for Free
- How to Add MailChimp Subscribe Form to WordPress
- How to Disable Comments on WordPress
- How to Regenerate Custom Thumbnail Image Size
- How to Compress and Optimize Image on WordPress
- How to Add Caching Engine to WordPress Website
- How to Install WordPress Plugin
- How to Add Sitemaps to Google Webmaster
- How to Limit WordPress Login Attempts
- How to Secure Your WordPress Website
- How to Create Sitemaps for WordPress Website
- How to Add Google Analytics to WordPress Website
- How to Build an eCommerce Website Using WooCommerce
- How to Add GUTENBERG Visual Editor to WordPress
- How to do WordPress SEO technically (OnPage Guide)
- How to Add a Contact Form to WordPress
- How to STOP Spam Submission on Your Blog
- W3 Total Cache vs WP Super Cache – Which Should You Choose
Wrap Up
Hope, you’ve already replaced your default WordPress editor with TinyMCE Advanced editor. You may sure about one thing that this advanced editor will completely change your experience about WordPress Visual Editing.
Anyway, if you found this article helpful, share it with your friends and subscribe for getting notified about any update instantly. You also most welcome to share your potential thought with us about WordPress Editor enhancement.



3 thoughts on “How to Enhance Your WordPress Visual Editor”
Great article!
Thank you, Jo. I am glad you enjoyed the article.
Awesome post. Saved my day
whether this plugin enables “justify ” option in Gutenberg blocks?